Overview
Creating clear, professional visitor documents is now faster and more flexible with Visitly's Document Editor. Build rich, formatted documents, personalize them with visitor and organization details, and see exactly how they'll appear before you save.Accessing the Document Editor
- Go to Locations.
- Select the location you want to add or edit a document for, and select Edit.
- Go to the Documents tab.
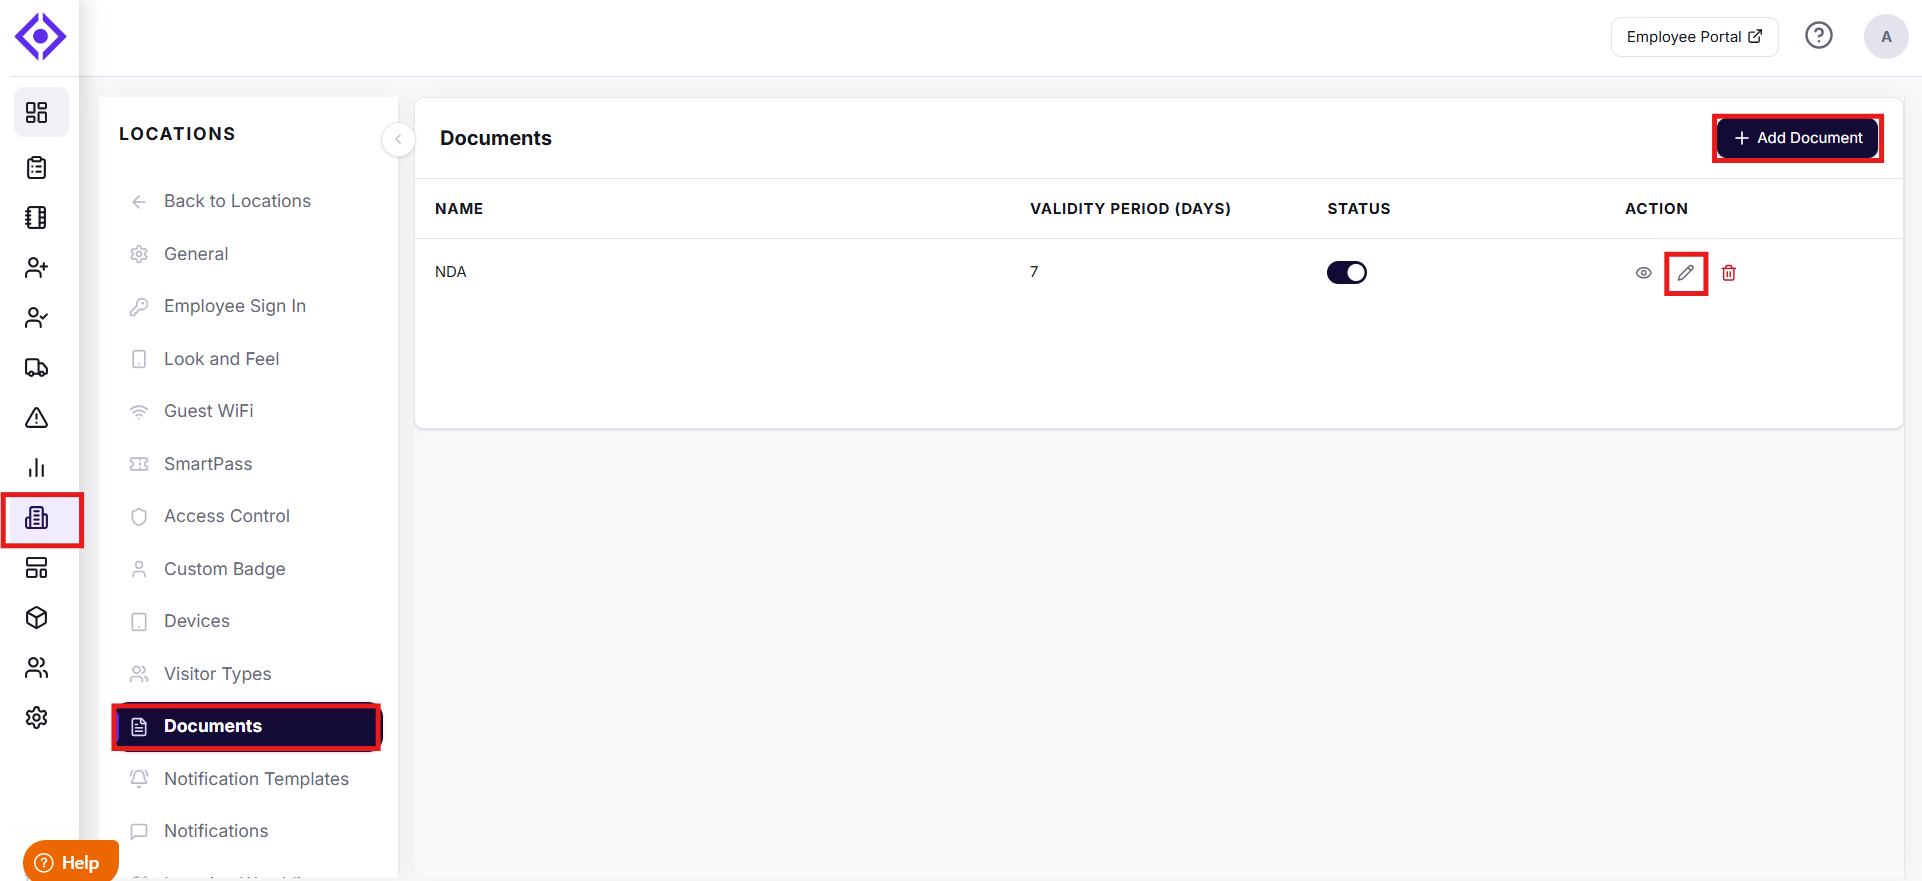
- Select Add Document to create a new one, or select Edit on an existing document.
The same editor is used for both — the only difference is that editing an existing document opens the editor with your saved content already in place.
General Details
At the top of the editor, set up the basics for your document:
- Document Name — A clear, recognizable name for the document (required).
- Status — Set the document to Active or Inactive.
- Signed Document Validity Period (Days) — How long a visitor's signature stays valid before they need to sign again. Leave this at 0 if you want the signature to never expire.
- Allow Visitors to Decline — Choose whether visitors have the option to decline signing this document.
Building Your Document Content
The Document Content area gives you a full rich-text editor to design your document exactly the way you want — headings, bold and italic text, bullet and numbered lists, alignment, font color, tables, links, and images are all supported.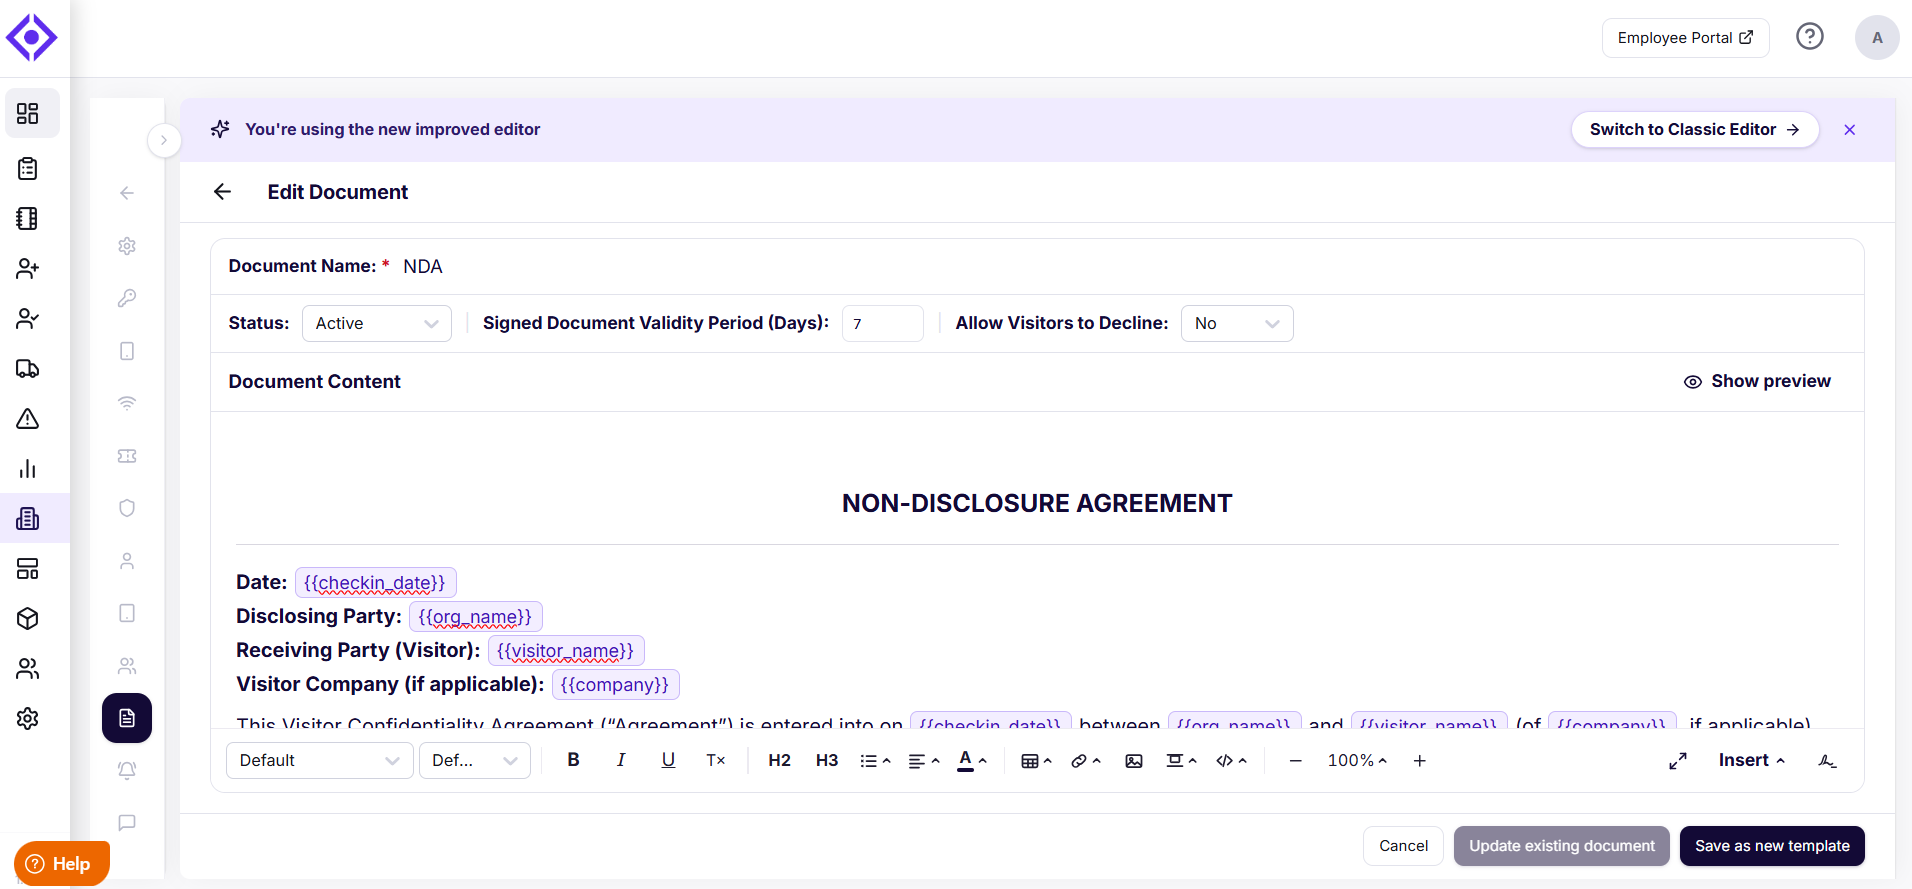
Inserting Shortcodes
Shortcodes let you personalize your document with details that are automatically filled in for each visitor — no manual editing required. To add one:
- Select Insert to open Insert Shortcodes, then search or browse by type — Visitor, Organization, Host, Visit, Employee, Documents, or Custom fields — and select Insert.
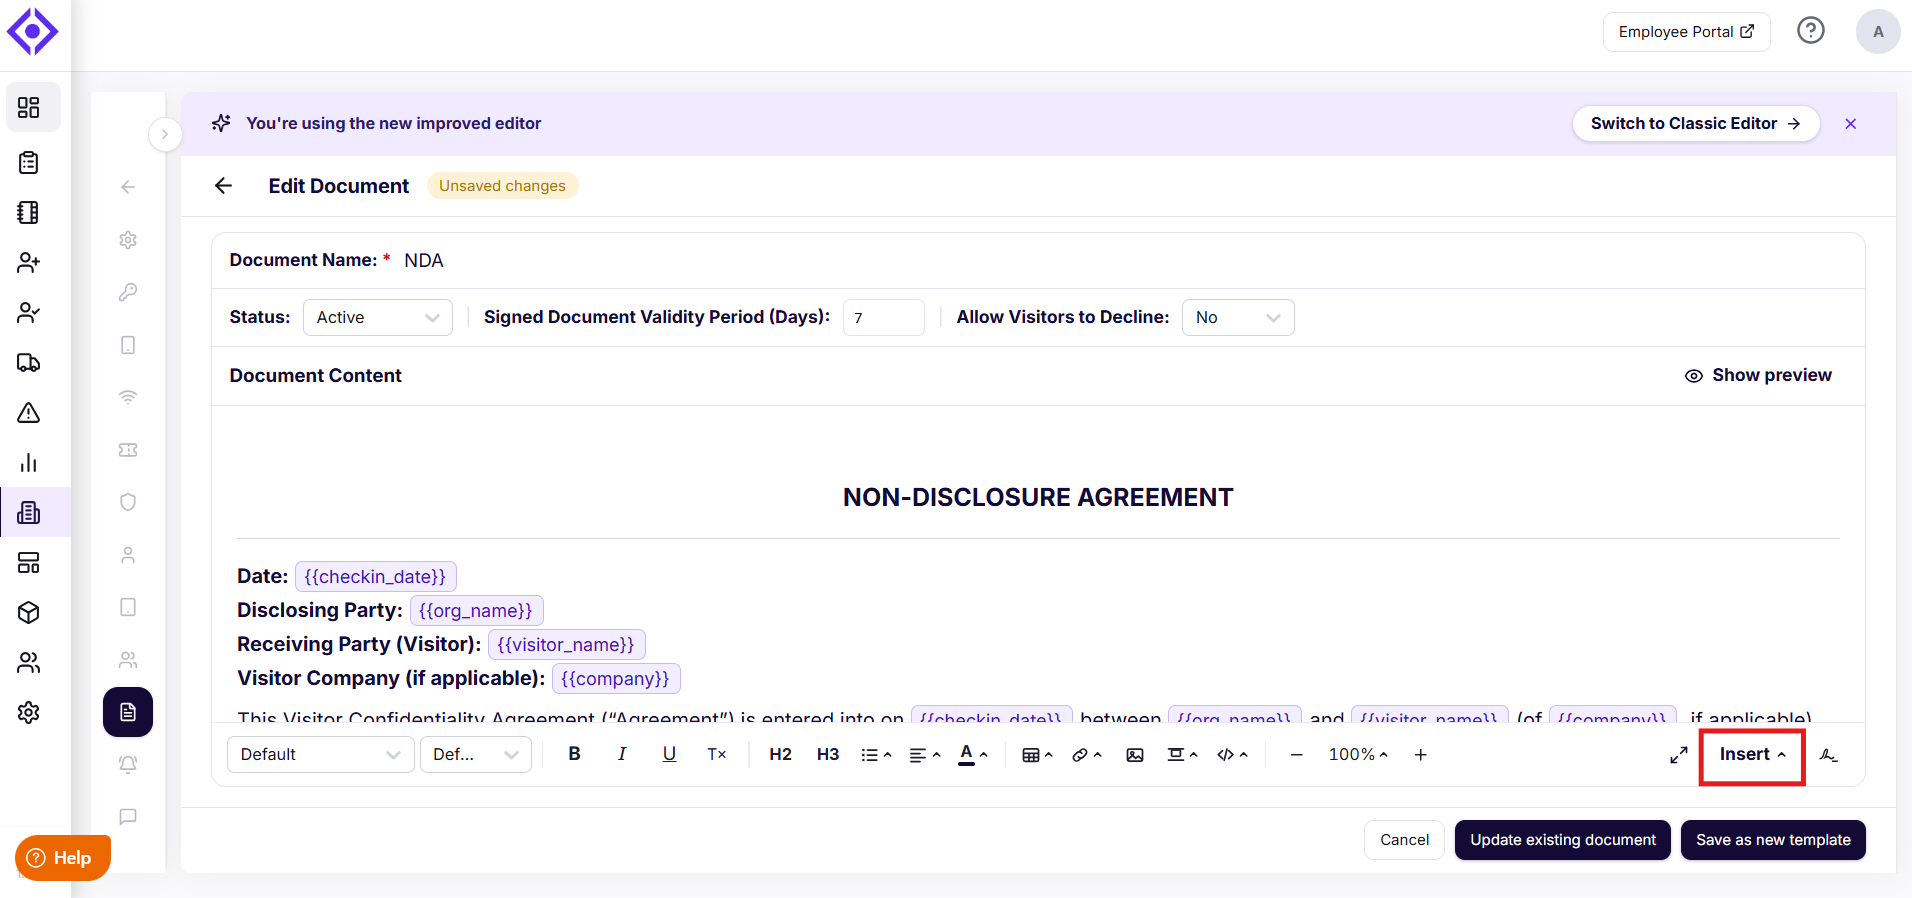
- Or, type {{ directly in the document body to search shortcodes inline, then select your desired shortcode.
For example, adding the Visitor name and Visitor's company shortcodes turns "hello {{visitor_name}} {{company}}" into a personalized greeting for every visitor who signs the document.
Adding a Signature Line
Select the Signature icon beside the Insert button to add a Signature and Date line to your document, giving visitors a clear place to sign and date their acknowledgment.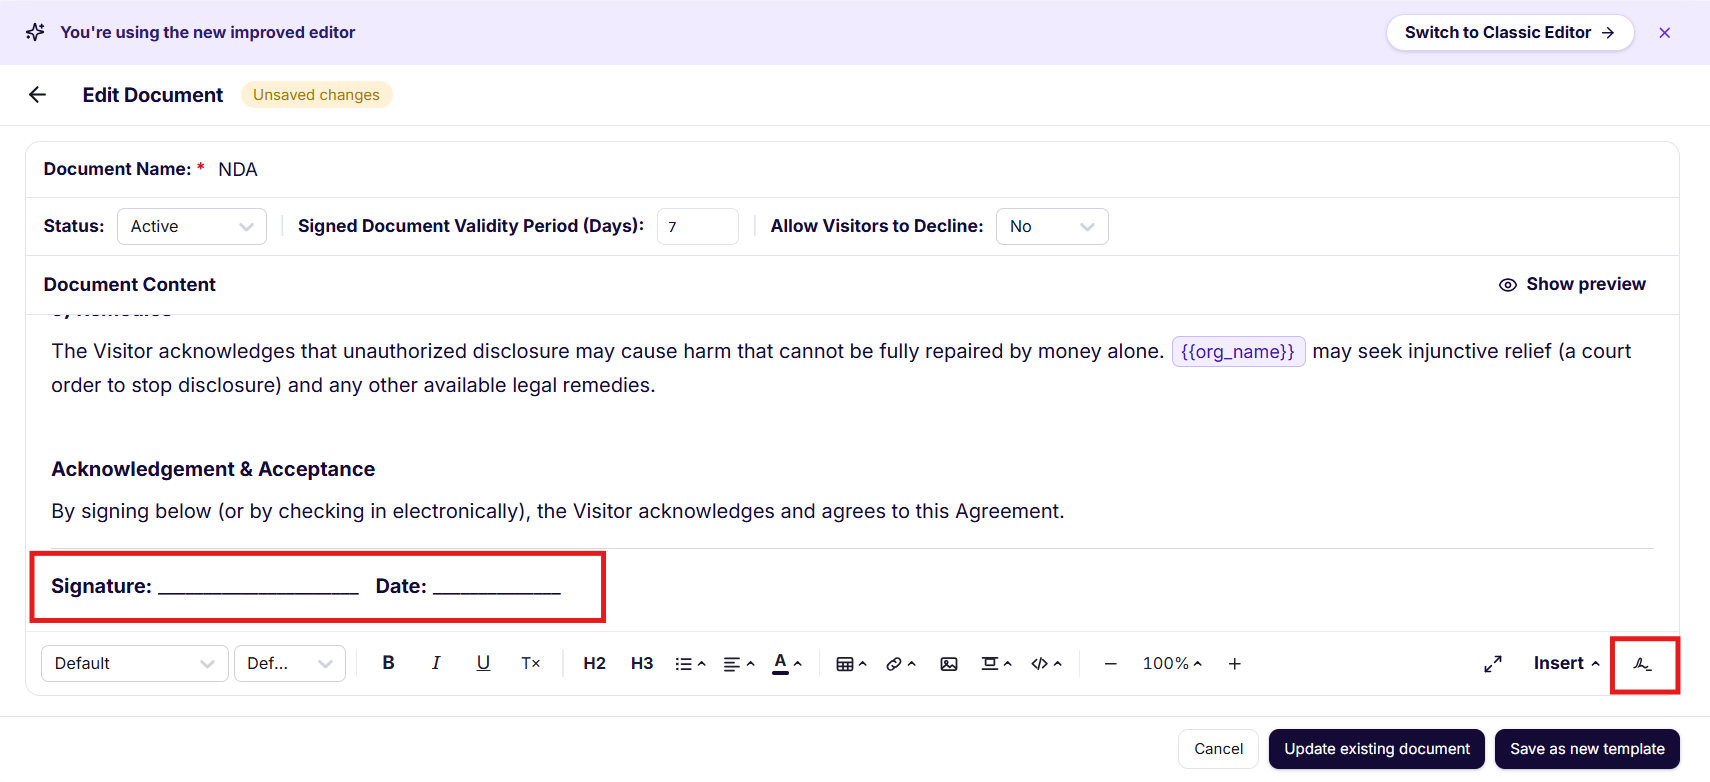
Previewing Your Document
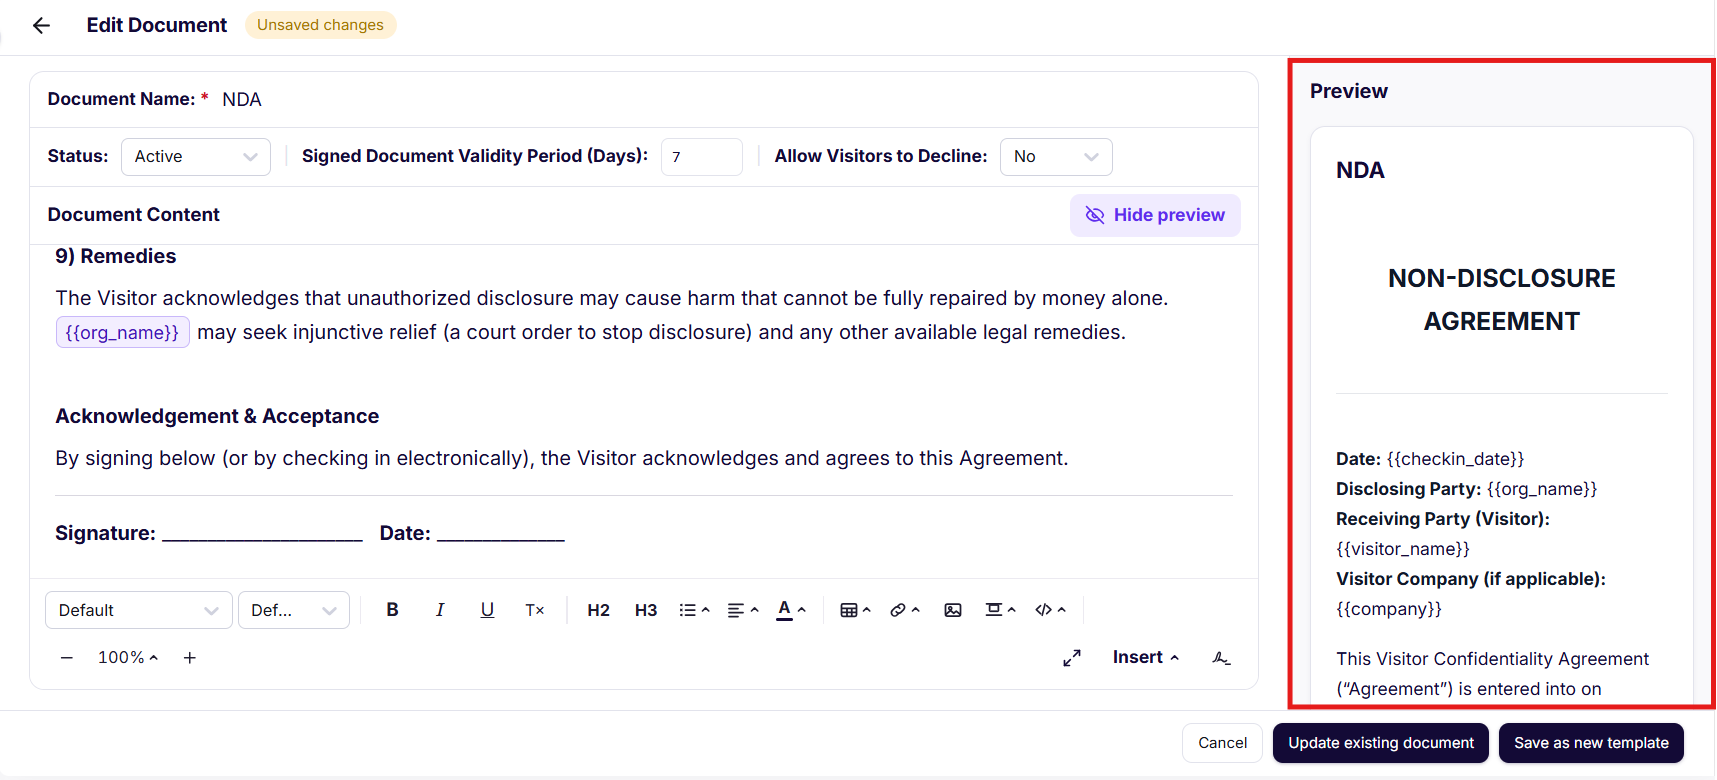
Select Show preview at any time to see exactly how your document will render — with all shortcodes displayed before you save.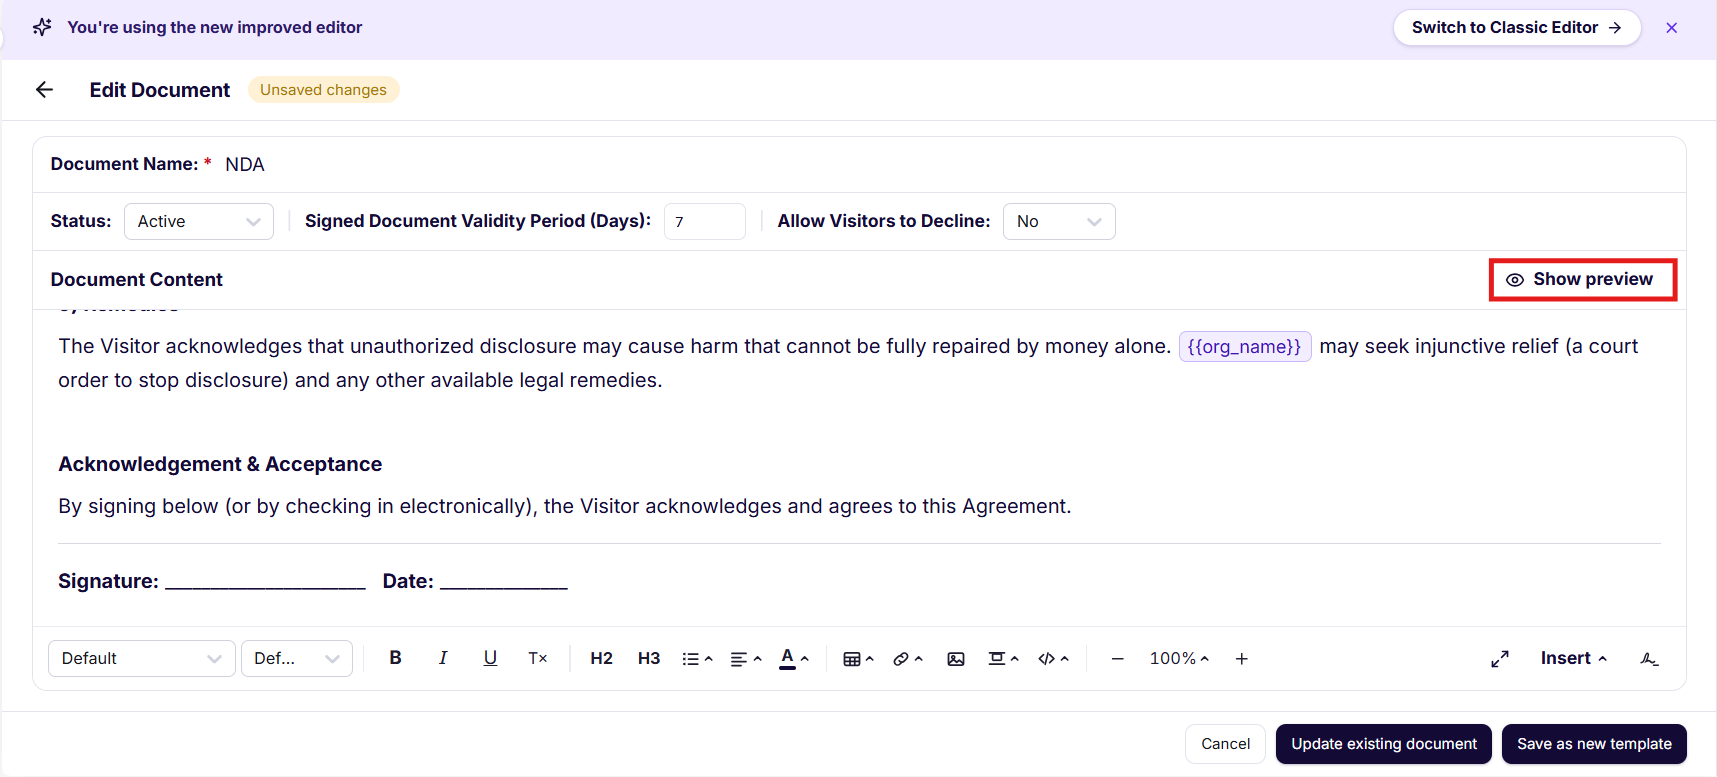
Saving Your Document
Once you're happy with your document, select Save document to save it. You can always come back and edit it later — your saved content will already be in place when you reopen it.
Troubleshooting
Shortcodes aren't being replaced with visitor details.
Confirm the shortcode was inserted using the Insert Shortcodes panel or the inline {{ search, rather than typed out manually. A shortcode that doesn't match the exact format won't be recognized.
A shortcode is showing up blank in the preview.
Check that the underlying field actually has a value for that visit — for example, a Host or Custom field shortcode will render blank if that field wasn't filled in for the visitor or visit.
Visitors aren't being asked to sign the document.
Confirm the document's Status is set to Active, and that a Signature line has been added to the document content.
Returning visitors are being asked to sign again unexpectedly.
Check the Signed Document Validity Period. If it's set to a number of days, the visitor's signature expires after that period and they'll be prompted to sign again. Set it to 0 if you want signatures to never expire.
Visitors don't see the option to decline.
Confirm Allow Visitors to Decline is toggled on for this document. If it's off, visitors must sign to proceed.
Formatting looks different after saving.
Use Show preview before saving to confirm exactly how the document will render, including shortcodes. This catches formatting issues before visitors see them.
Was this article helpful?
That’s Great!
Thank you for your feedback
Sorry! We couldn't be helpful
Thank you for your feedback
Feedback sent
We appreciate your effort and will try to fix the article