Create reusable invite templates and use them to pre-register visitors in seconds.
Overview
Visit Templates let you save commonly used invite configurations so you don't have to fill them in every time you invite a visitor.
Once a template is created, any user who can invite visitors can use it through Quick Invite to pre-register a visitor in just a few taps. Select a template, enter the visitor's name and email, and send the invite. Everything else is already filled in.
Who Can Do What
Create, edit, and delete templates: Global Admins
Use templates via Quick Invite: All users who have permission to invite visitors — including Admins, Front Desk, and Hosts.
Creating a Visit Template
Visit Templates are managed from the Admin Portal. Follow these steps to create a new template:
Step 1: Navigate to Visit Templates
Log in to app.visitly.io and open the Admin Portal. In the left sidebar, click Visit Templates. You'll see a list of any existing templates, along with their assigned location and visitor type.
Step 2: Click "+ Create Template"
Click the + Create Template button in the top-right corner. This opens the template editor.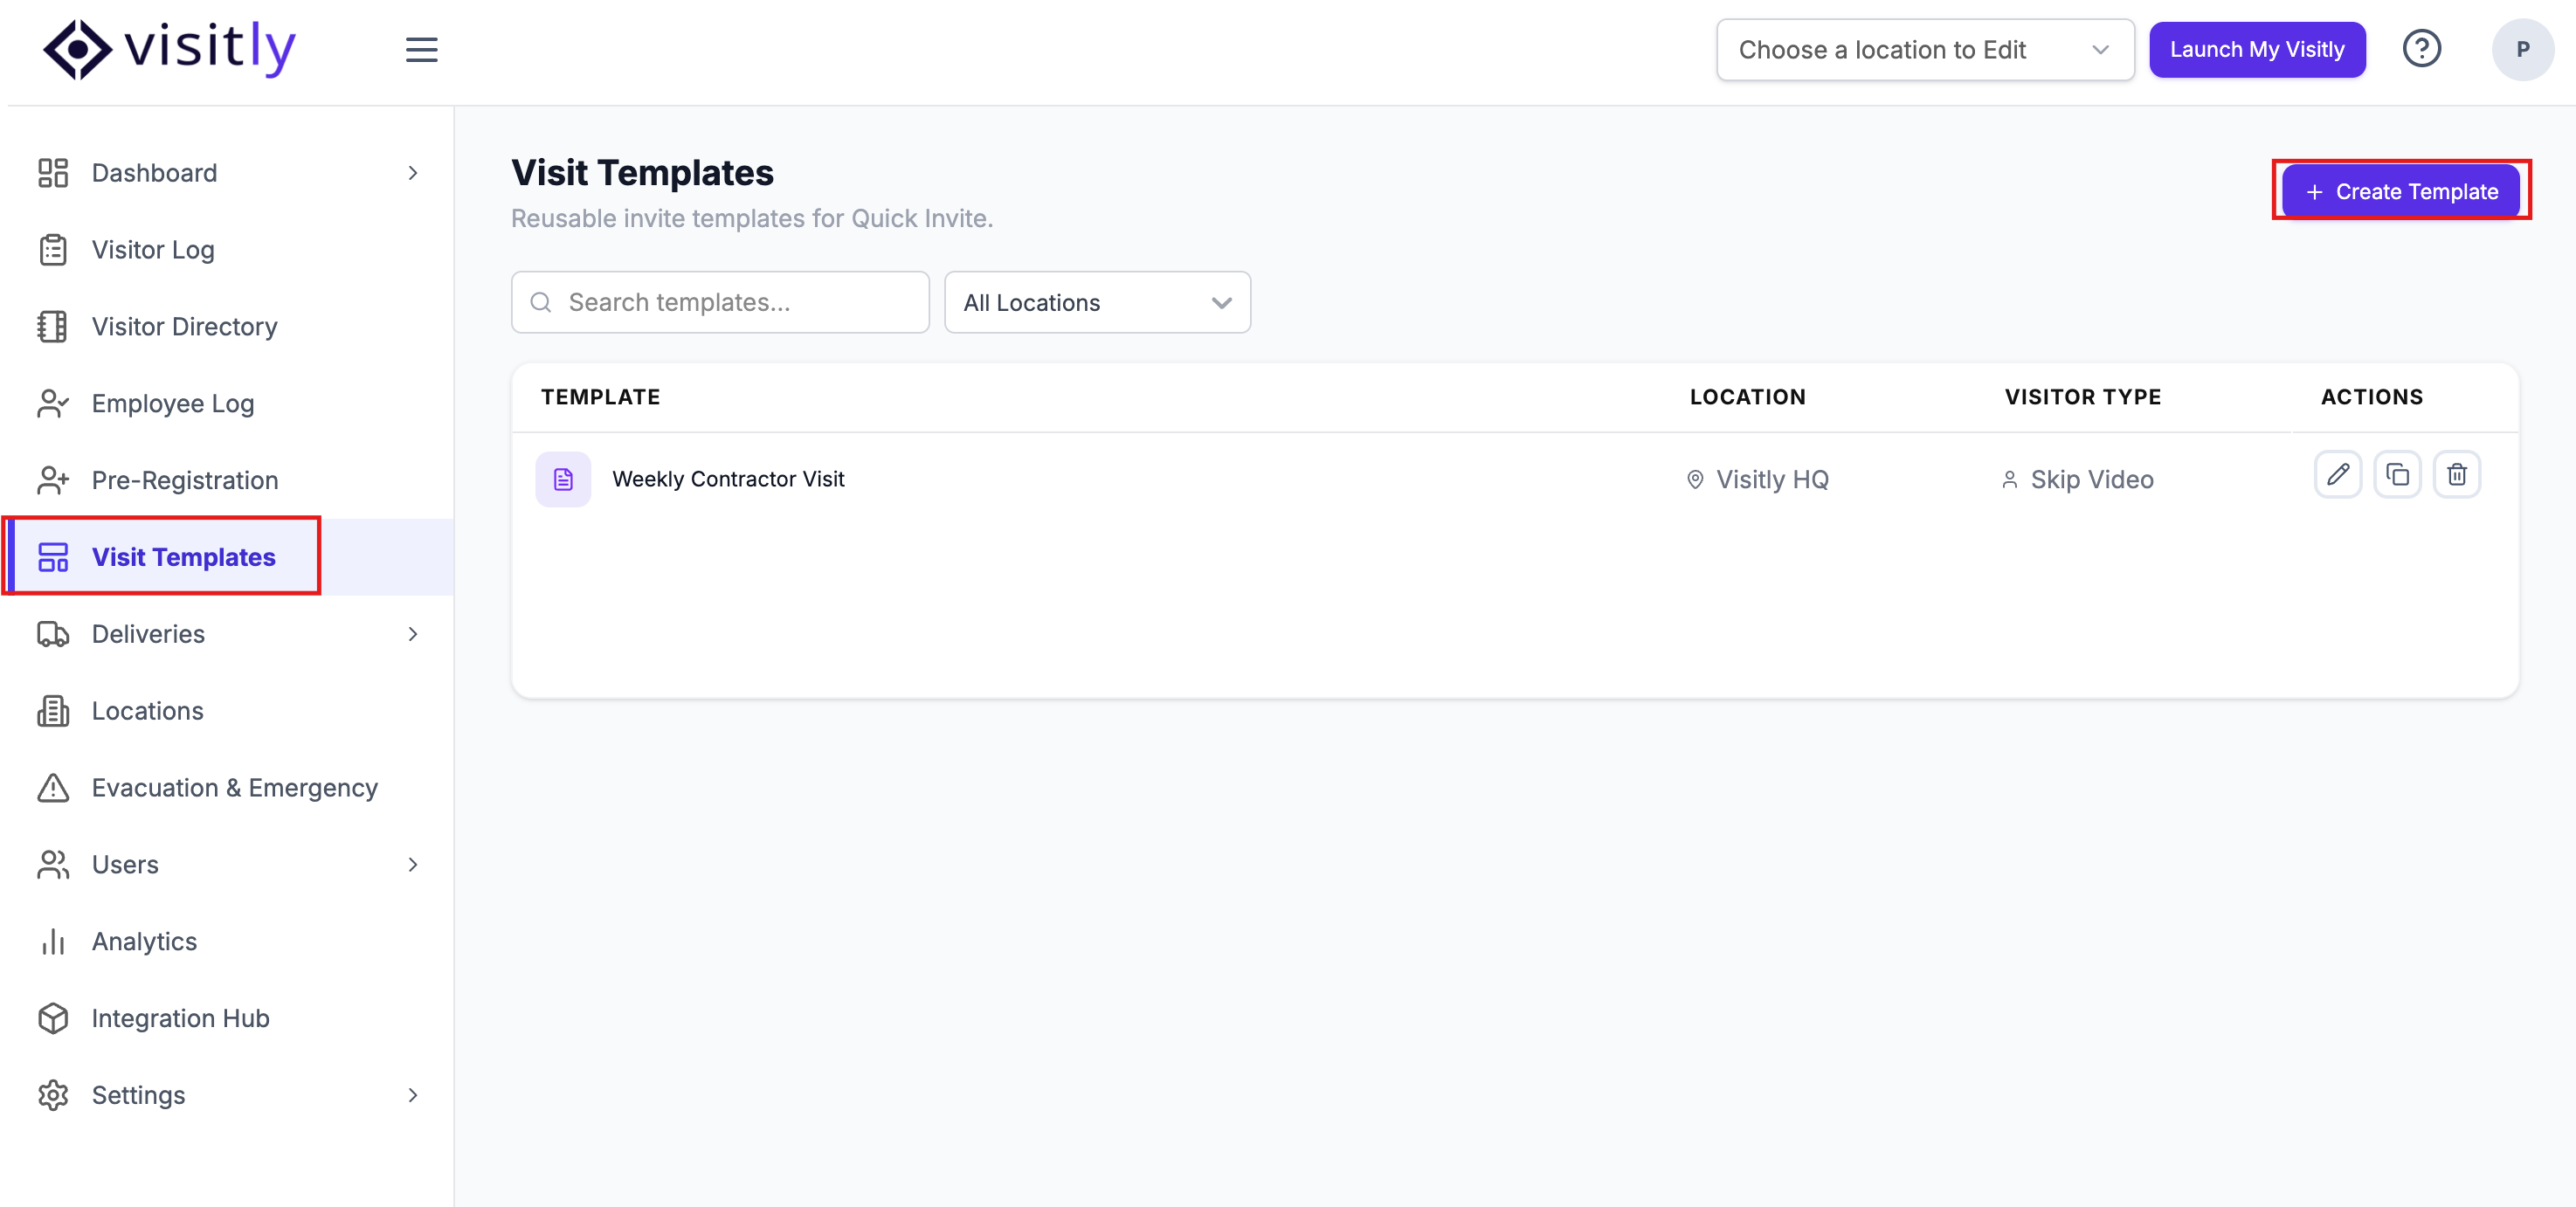
Step 3: Enter Template Details
Give your template a name — this is required and will be visible to anyone using Quick Invite. For example, "Weekly Contractor Visit" or "Summer Event." You can also add an optional description to note when this template should be used.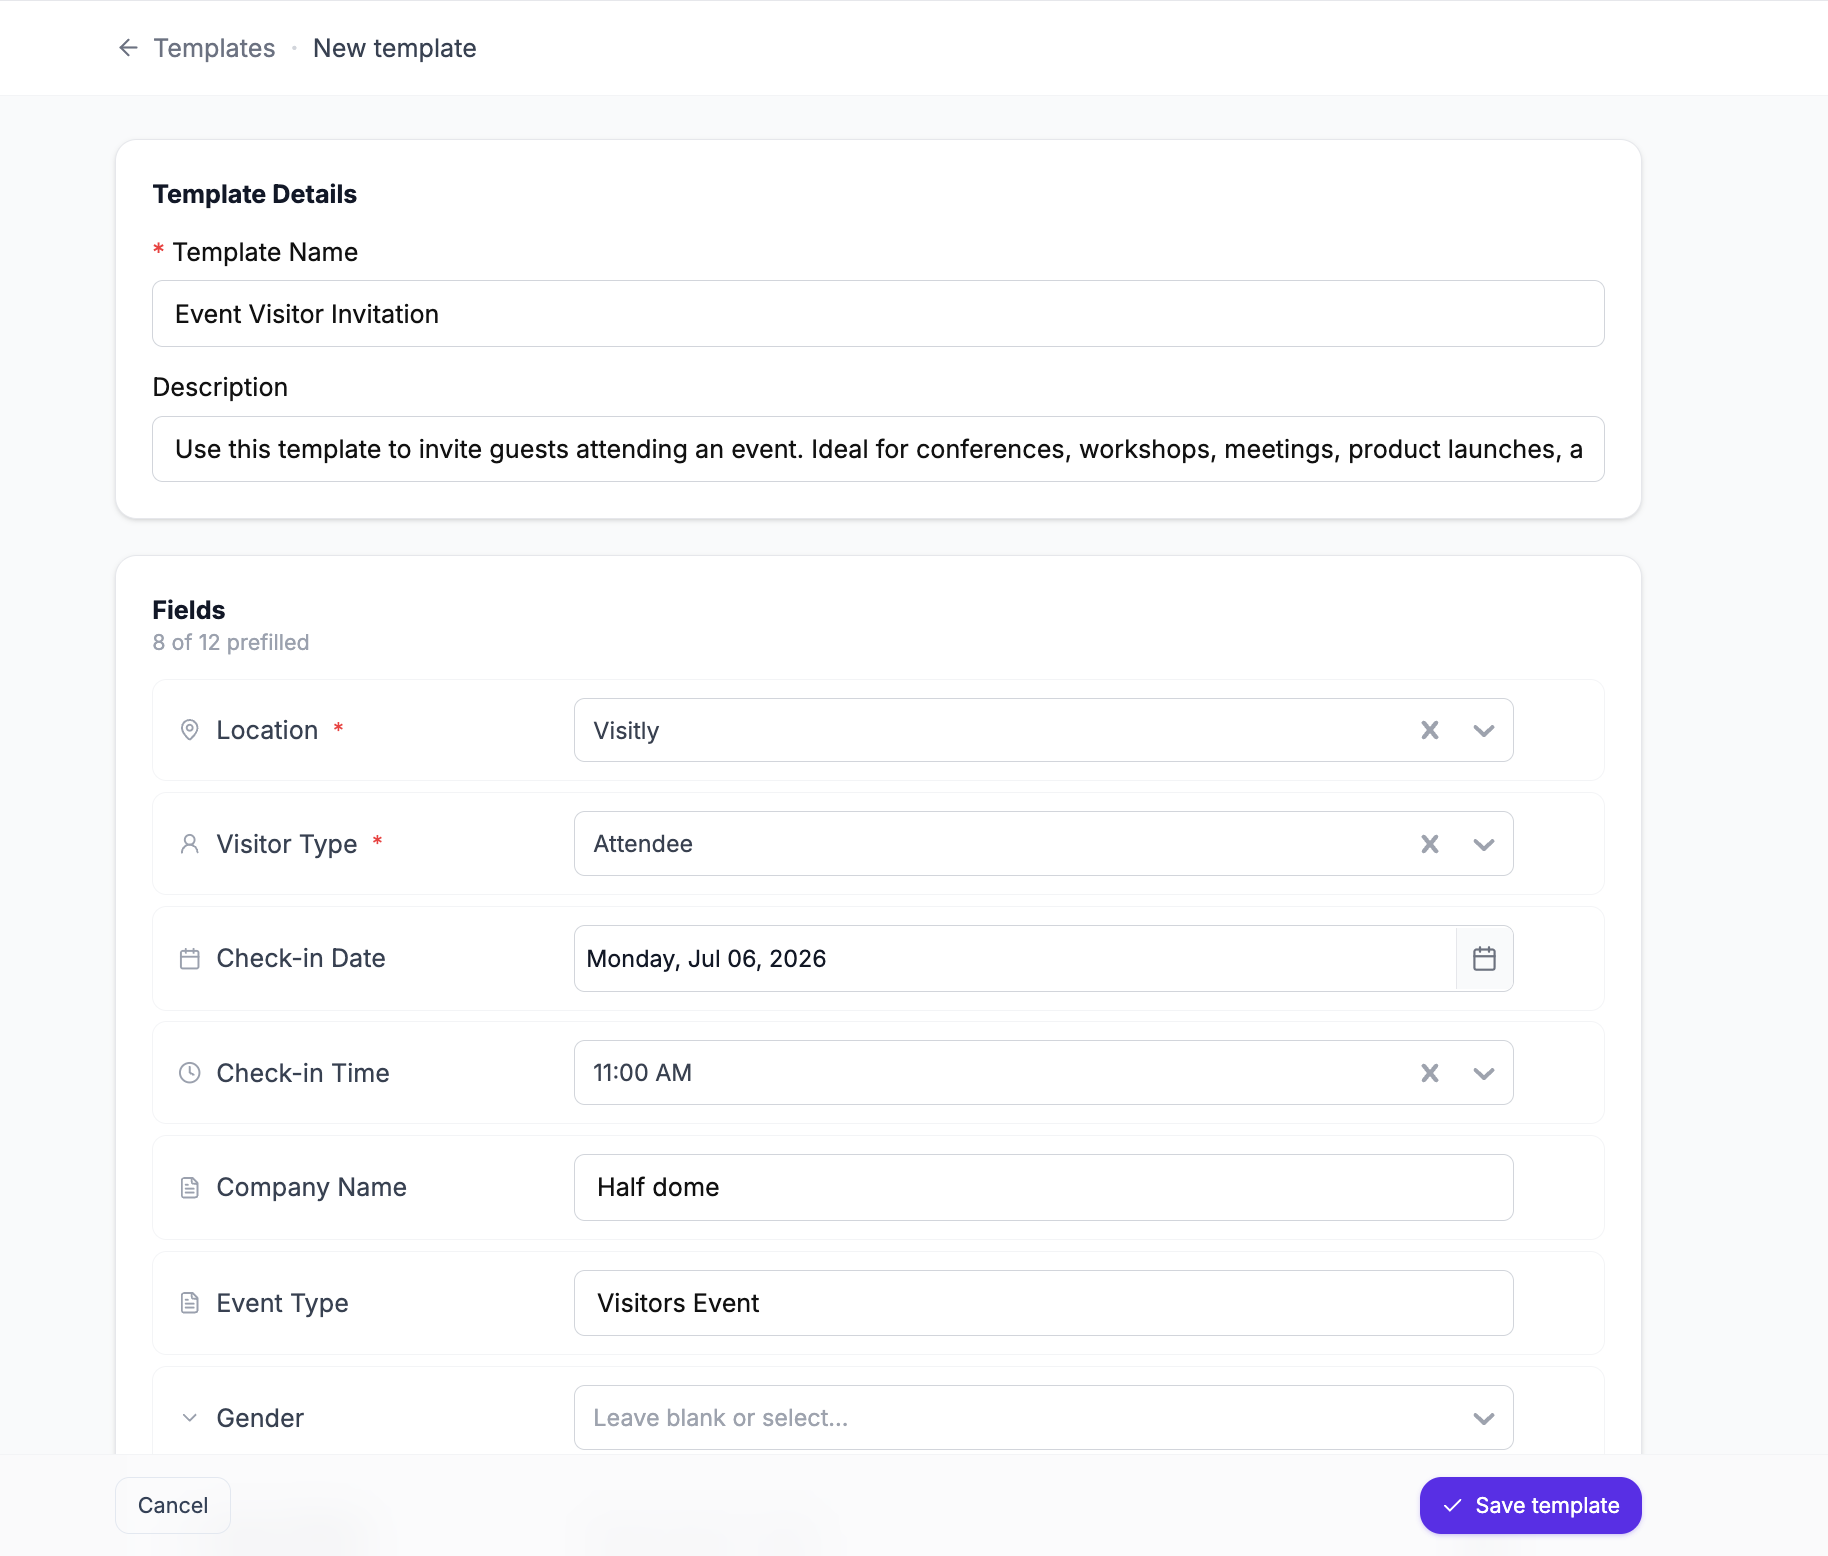
Step 4: Select Location and Visitor Type
Choose the Location and Visitor Type for this template. Both fields are required. The Visitor Type dropdown becomes available after you select a location. Once a visitor type is selected, any custom fields configured for that visitor type will appear below.
Step 5: Pre-fill Fields (Optional)
After the visitor type is selected, you'll see all available fields for that visit — such as Check-in Date, Check-in Time, and any custom fields. Fill in as many or as few as you'd like. Any field you leave blank will either default (e.g., Check-in Date defaults to today) or remain empty for the user to complete at invite time.
Step 6: Save the Template
Click Save Template. Your template now appears in the Visit Templates list and is immediately available for Quick Invite.
Note: You can edit or delete a template at any time from the Visit Templates list using the edit and delete icons in the Actions column.
Using Quick Invite
Quick Invite is the fastest way to pre-register a visitor. It uses your saved templates to pre-fill most of the invite, so you only need to enter the visitor's details.
How to Access Quick Invite
For Admins and Front Desk: From the Admin Portal, click Launch My Visitly in the top navigation. This opens the My Visitly dashboard. Click Invite Visitor and select Quick Invite from the dropdown.
For Hosts: Log in to My Visitly (the web app) directly. Click Invite Visitor and select Quick Invite.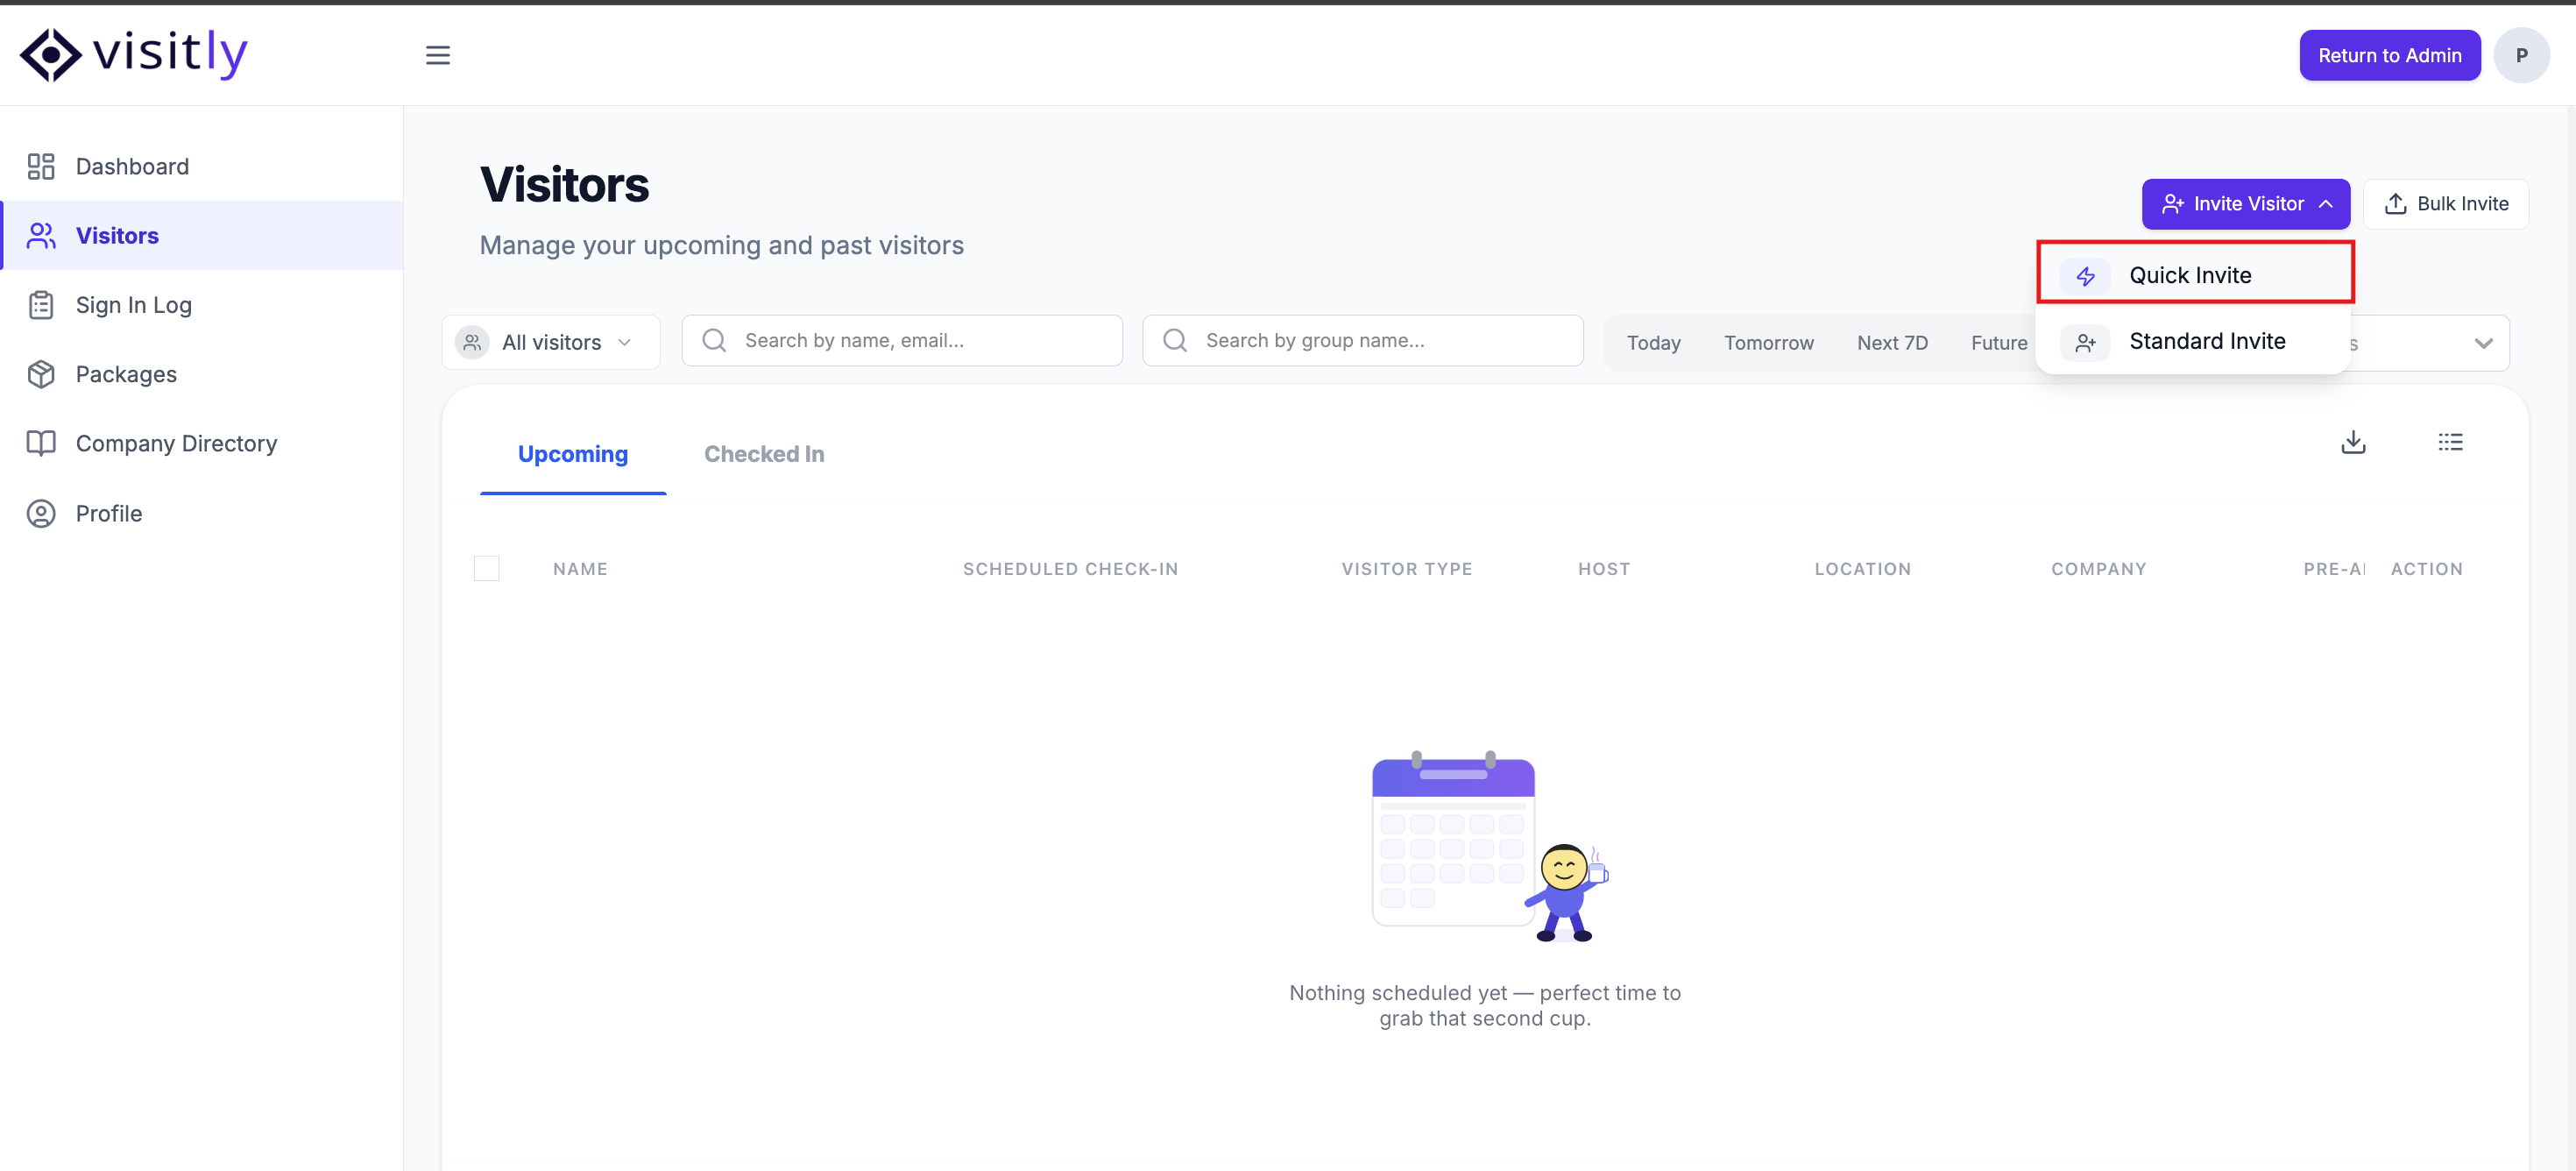
Sending a Quick Invite
Step 1: Choose a Template
A modal appears showing all available templates. Each template displays its name, location, and visitor type. Use the search bar to find a specific template, or browse the list and click the one you want.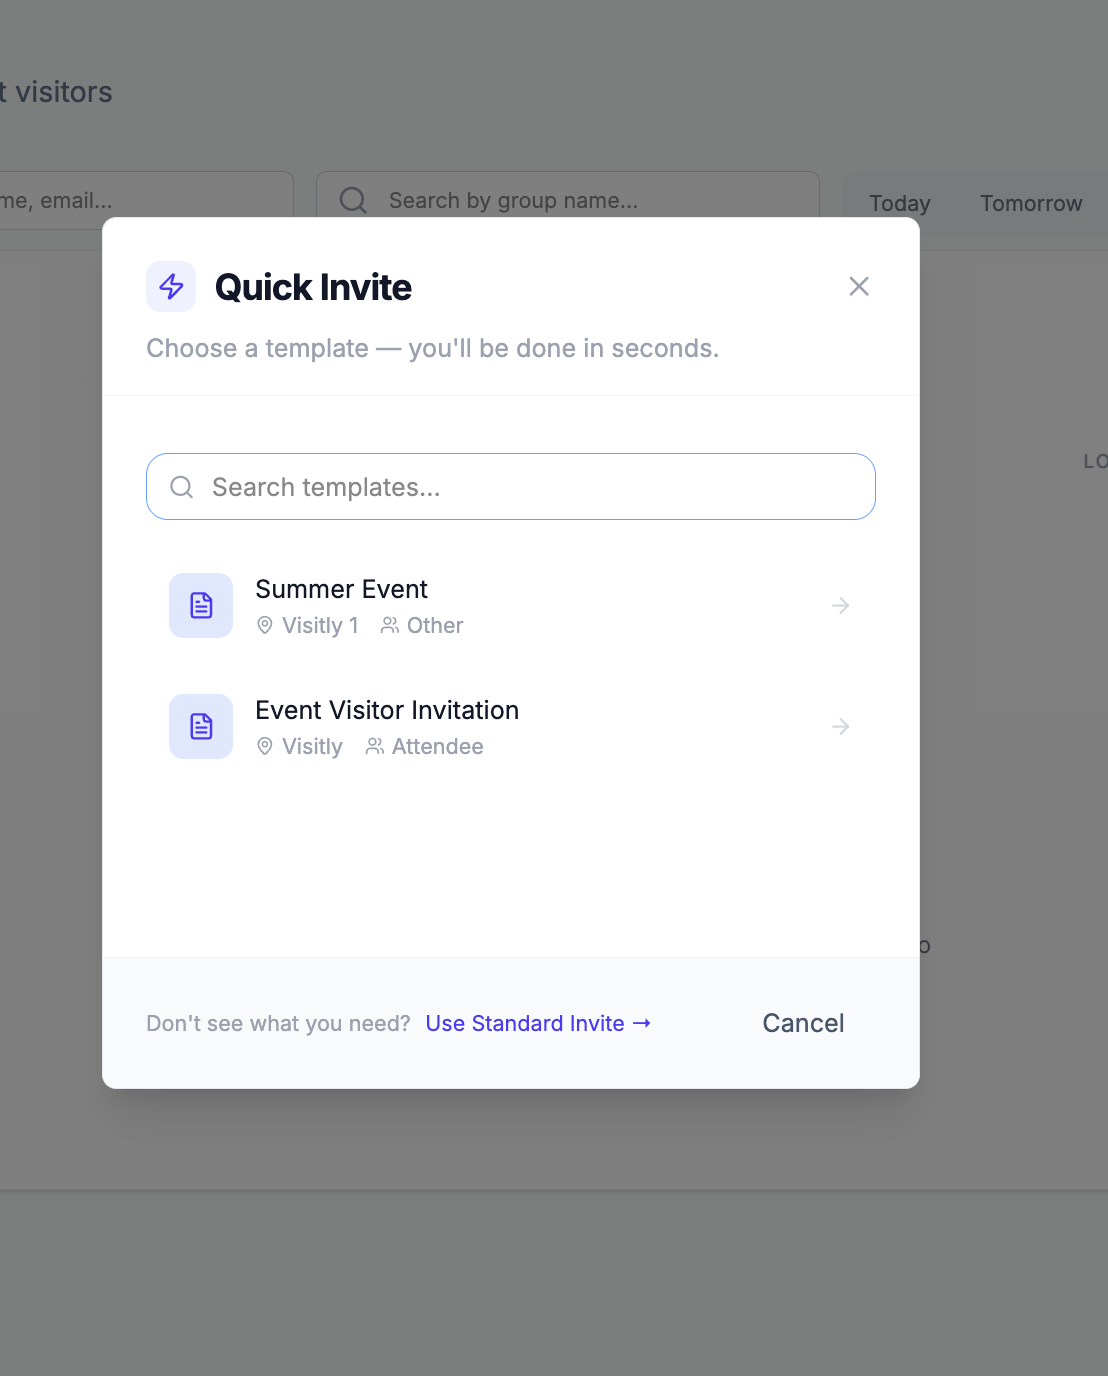
Step 2: Enter Visitor Details
The Quick Invite form opens with the template's pre-filled values already applied — location, visitor type, check-in date, time, and any other fields the template defined. Only the required fields are shown by default: Full Name and Email. The Host field is automatically set to the logged-in user.
Note: To see all fields including Company Name, Phone Number, and any custom fields, click Optional Fields below the required fields. Fields that were pre-filled in the template will already have values; you can override them if needed.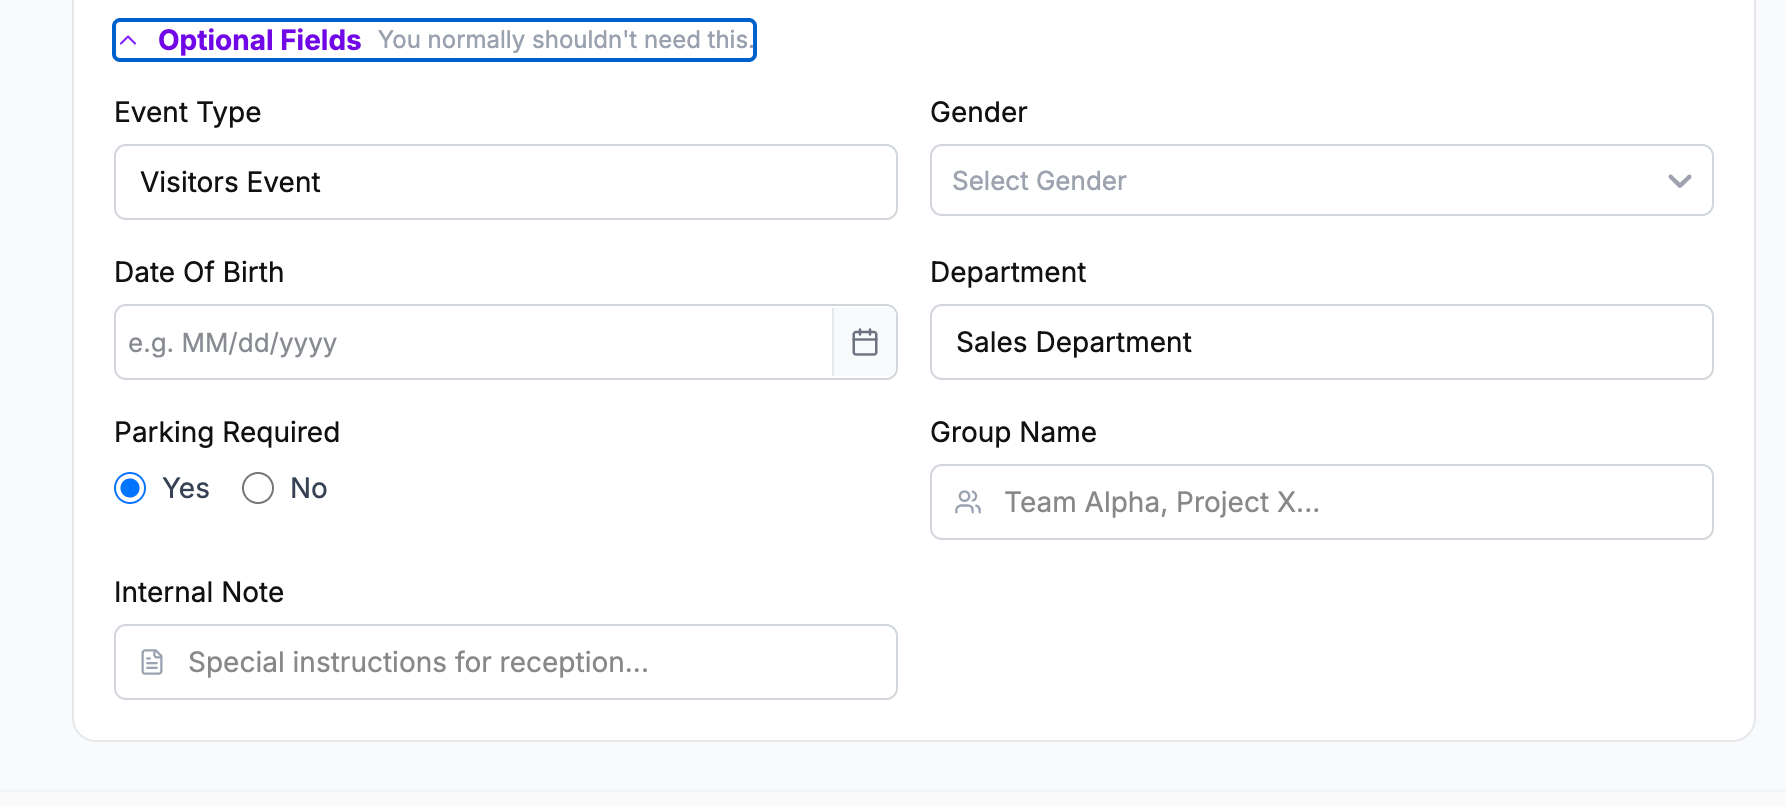
Step 3: Configure Notification Preferences
At the bottom of the form, you'll see toggles for Notify Host, Notify Visitor, and Allow Pre-arrival. These are enabled by default. Toggle any of them off if you don't want to send notifications or allow pre-arrival registration for this particular invite.
Step 4: Send the Invite
Click Send Invite to pre-register the visitor. The invite is created and notifications are sent based on your toggle settings.
Additional Features
Create & Add Another
If you need to invite multiple visitors using the same template, click Create & Add Another instead of Send Invite. This sends the current invite and immediately reopens the Quick Invite form with the same template applied — ready for the next visitor's details.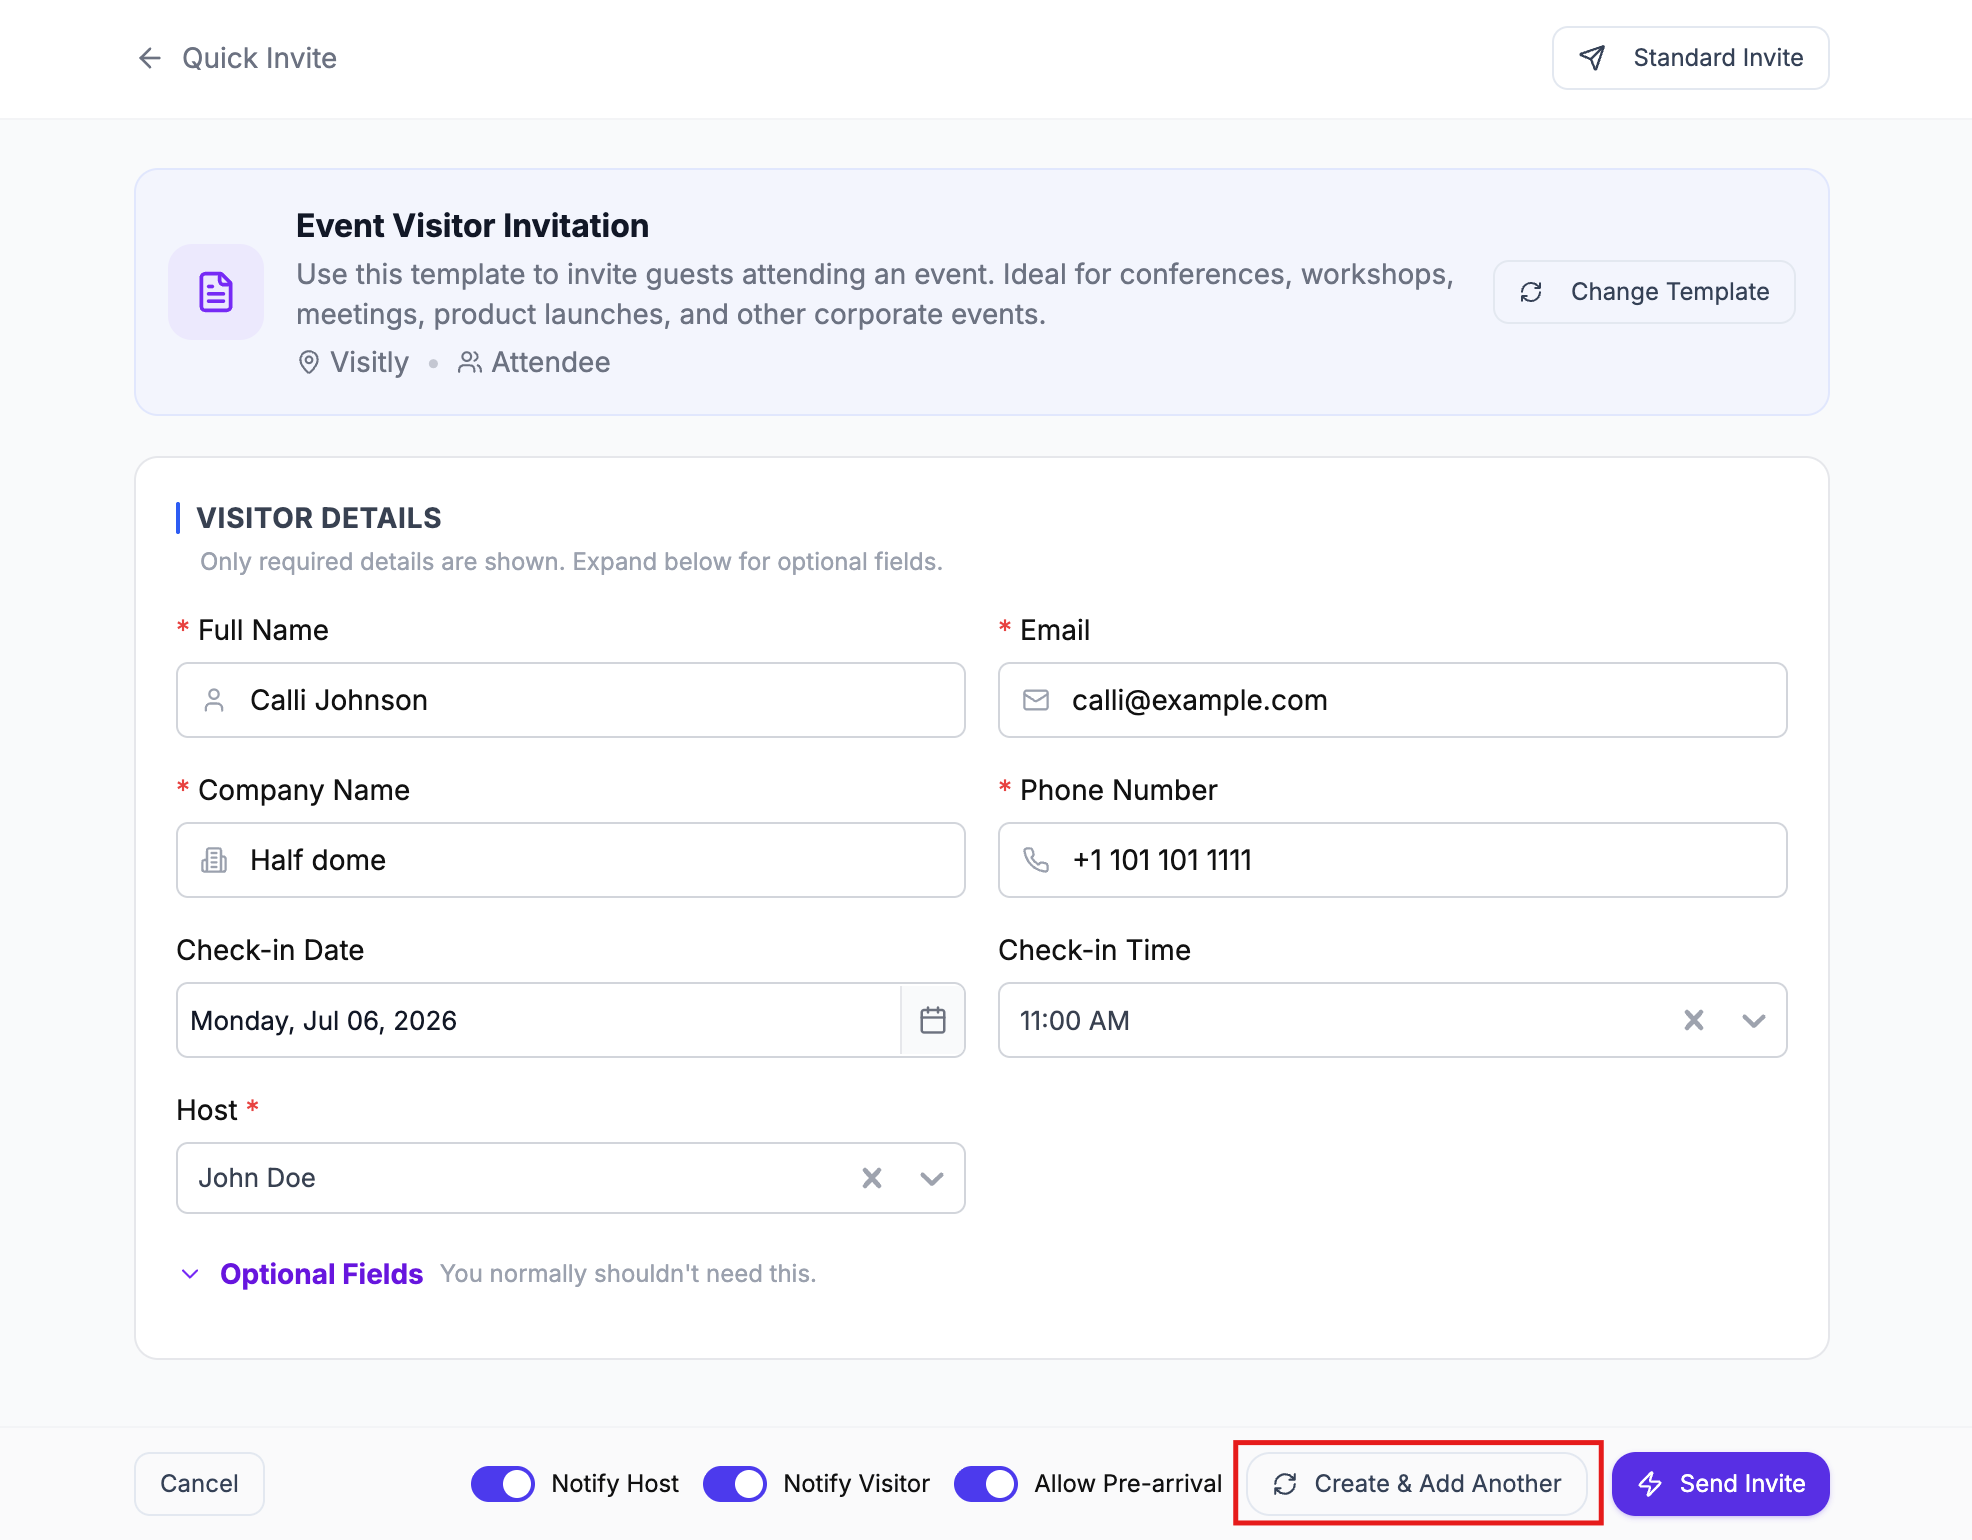
Change Template
If you selected the wrong template, click Change Template in the top-right of the template header. This takes you back to the template selection modal so you can pick a different one. Any details you've already entered will be cleared.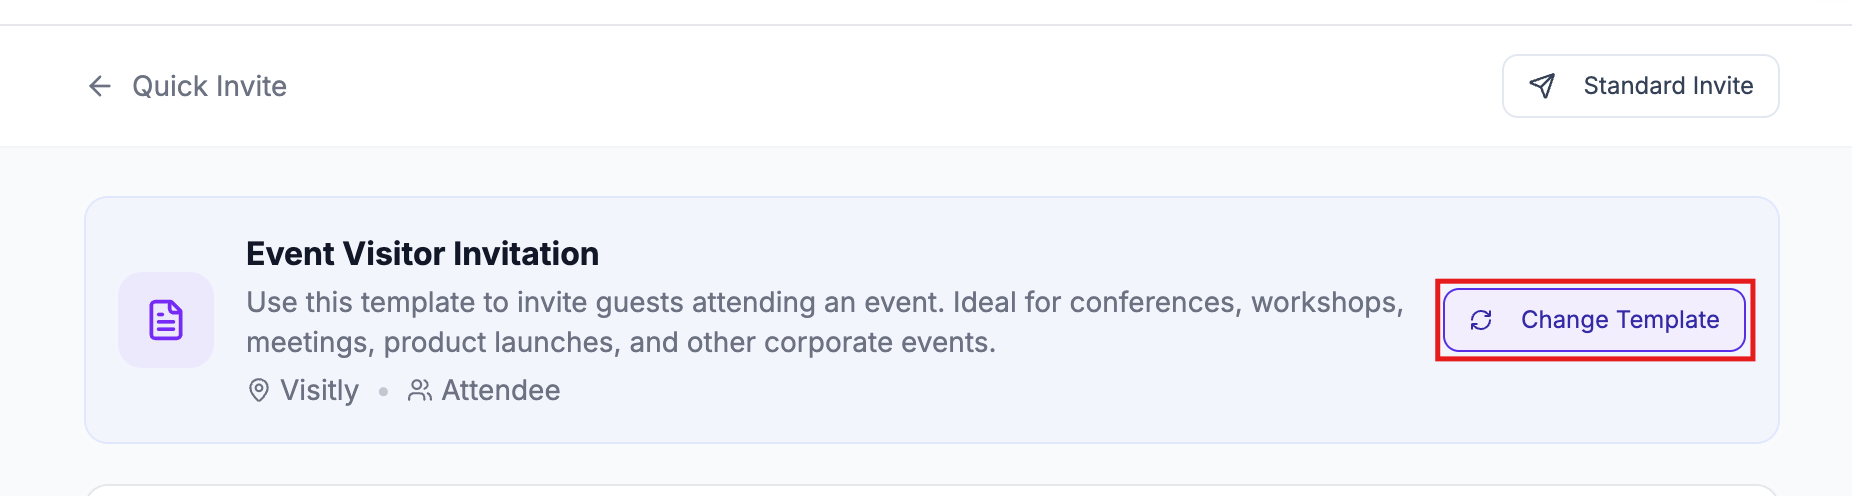
Switch to Standard Invite
If you realize you need access to the full invite form — for example, to configure fields not available in Quick Invite — you can switch to Standard Invite at any time. Click Standard Invite in the top-right corner of the Quick Invite form, or select "Use Standard Invite" from the template selection modal. This opens the full Standard Invite form. Note that template pre-fills do not carry over to Standard Invite; it opens as a blank form. 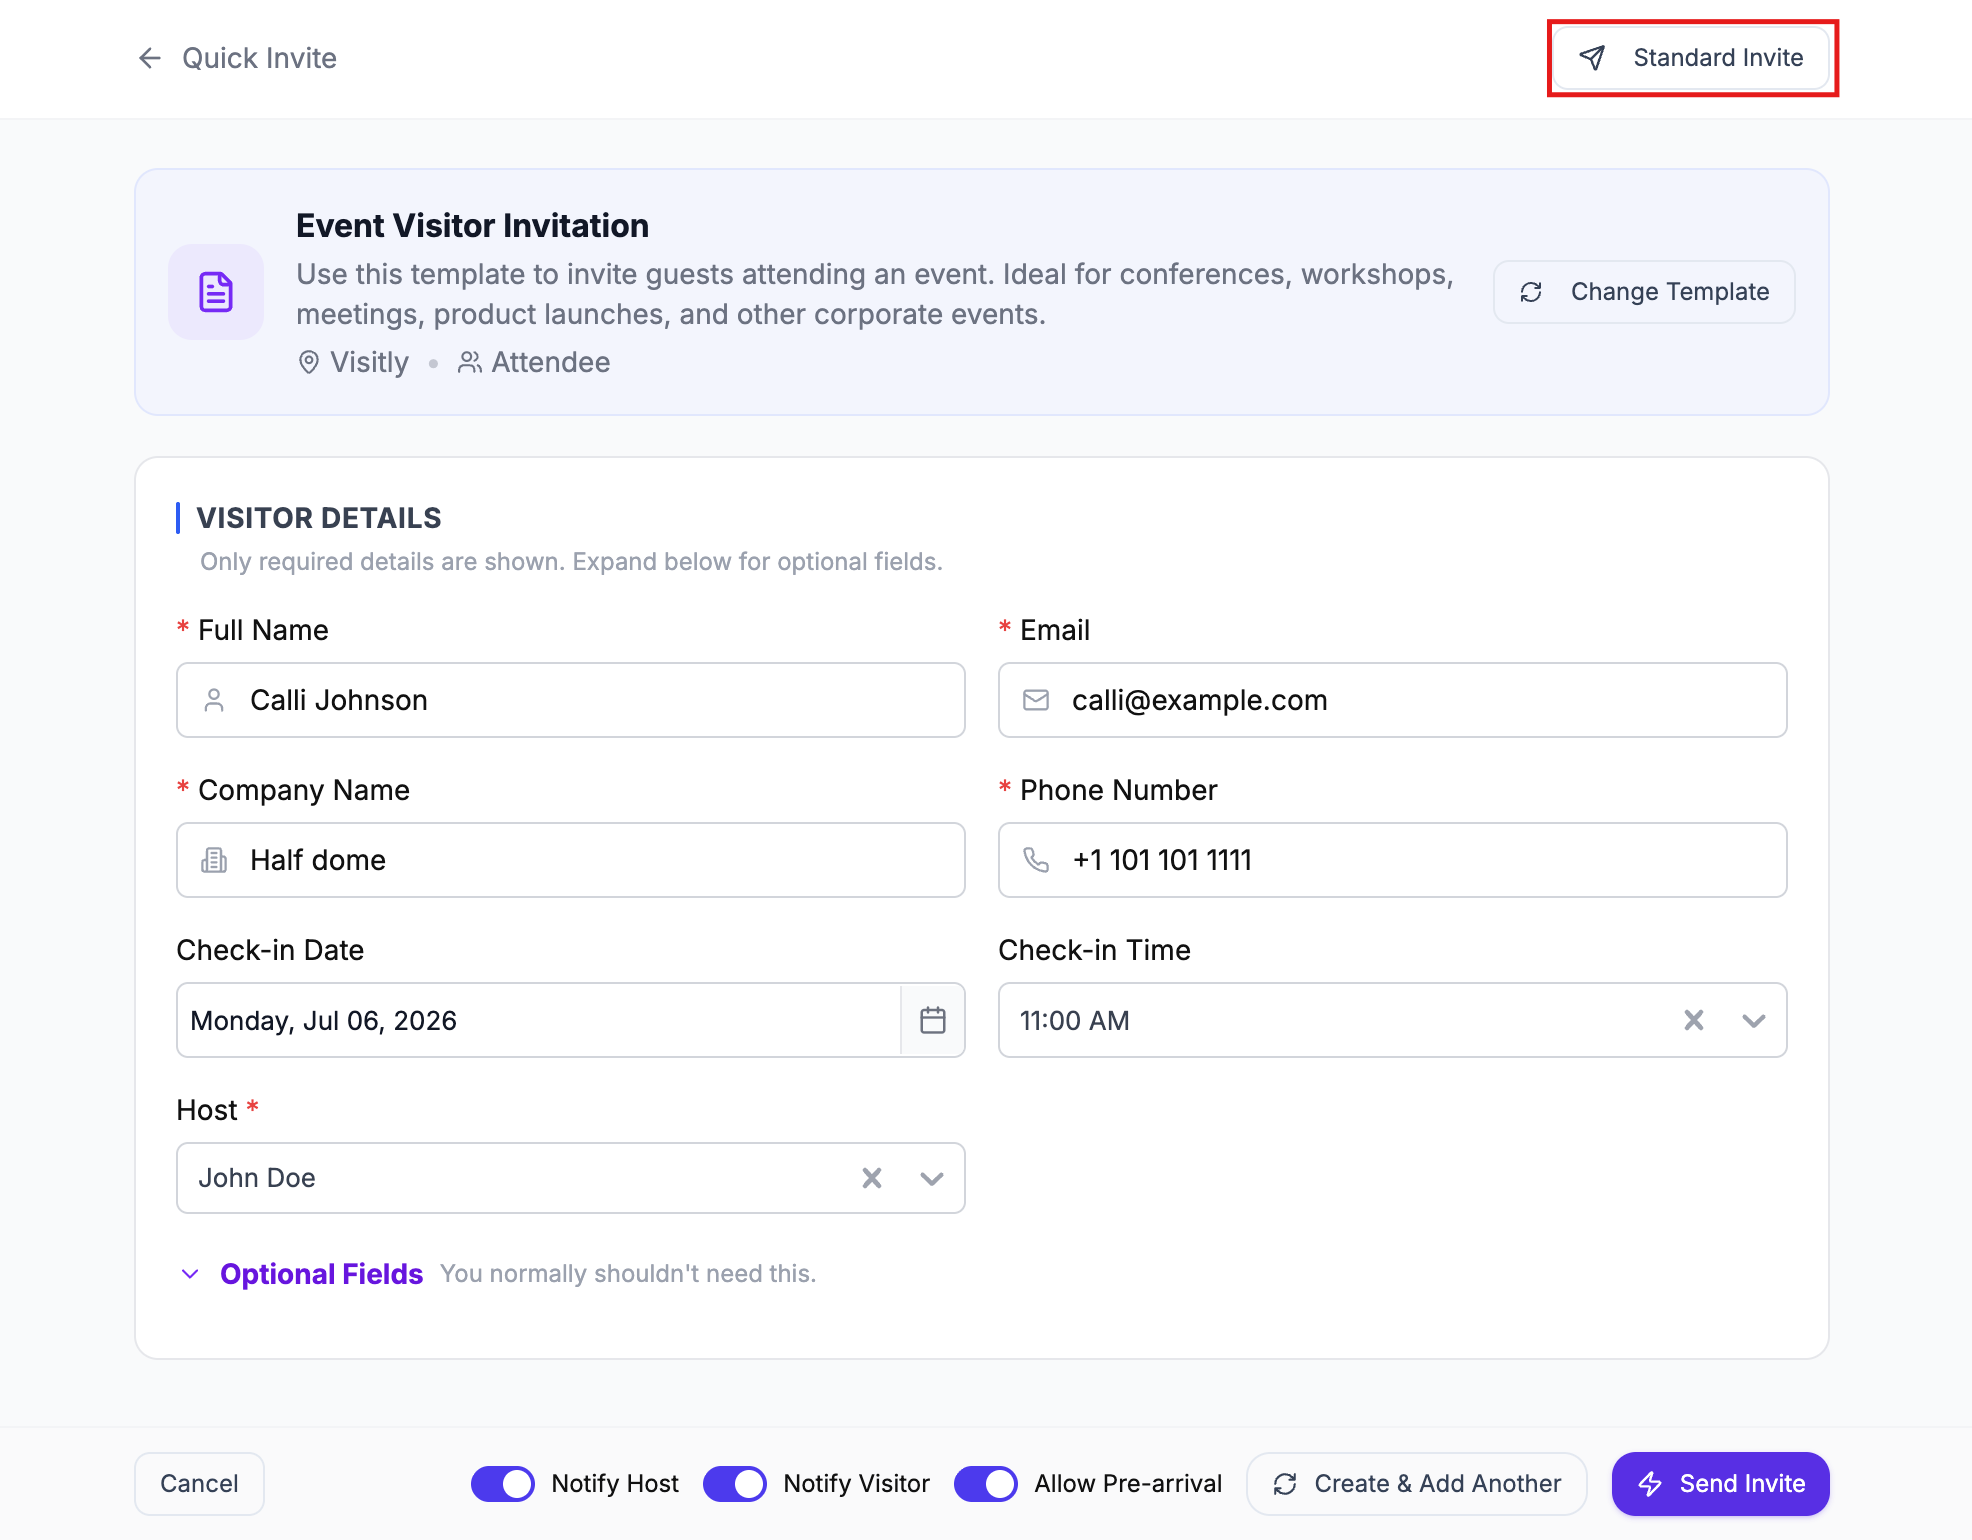
Good to Know
Templates are location-specific. Each template is tied to a single location and visitor type. If you need the same configuration for multiple locations, create a separate template for each.
Check-in Date defaults to today. If the template doesn't specify a date, the Quick Invite form defaults to today's date.
The Host is always the logged-in user. The Host field in Quick Invite is automatically set to whoever is sending the invite. This cannot be changed from the Quick Invite form.
Quick Invite shows only required fields by default. All other fields — including any that were pre-filled in the template — are tucked under Optional Fields. Expand that section to review or edit them.
Was this article helpful?
That’s Great!
Thank you for your feedback
Sorry! We couldn't be helpful
Thank you for your feedback
Feedback sent
We appreciate your effort and will try to fix the article