Learn how to integrate Visitly with OneLogin for SSO & provisioning.

Visitly Configuration
1. Log in to your OneLogin Admin Account.
2. Go to the Applications section and click on Add Application.
3. Search for Visitly in the application directory. Select the Visitly application and click Save.
4. Navigate to the SSO menu and click on More Actions.

5. Select SAML Metadata to download an XML file to your computer.
6. Log in to the Visitly Dashboard.
7. Navigate to Integrations > Single Sign-On > OneLogin.
8. Click Integrate on the OneLogin card.
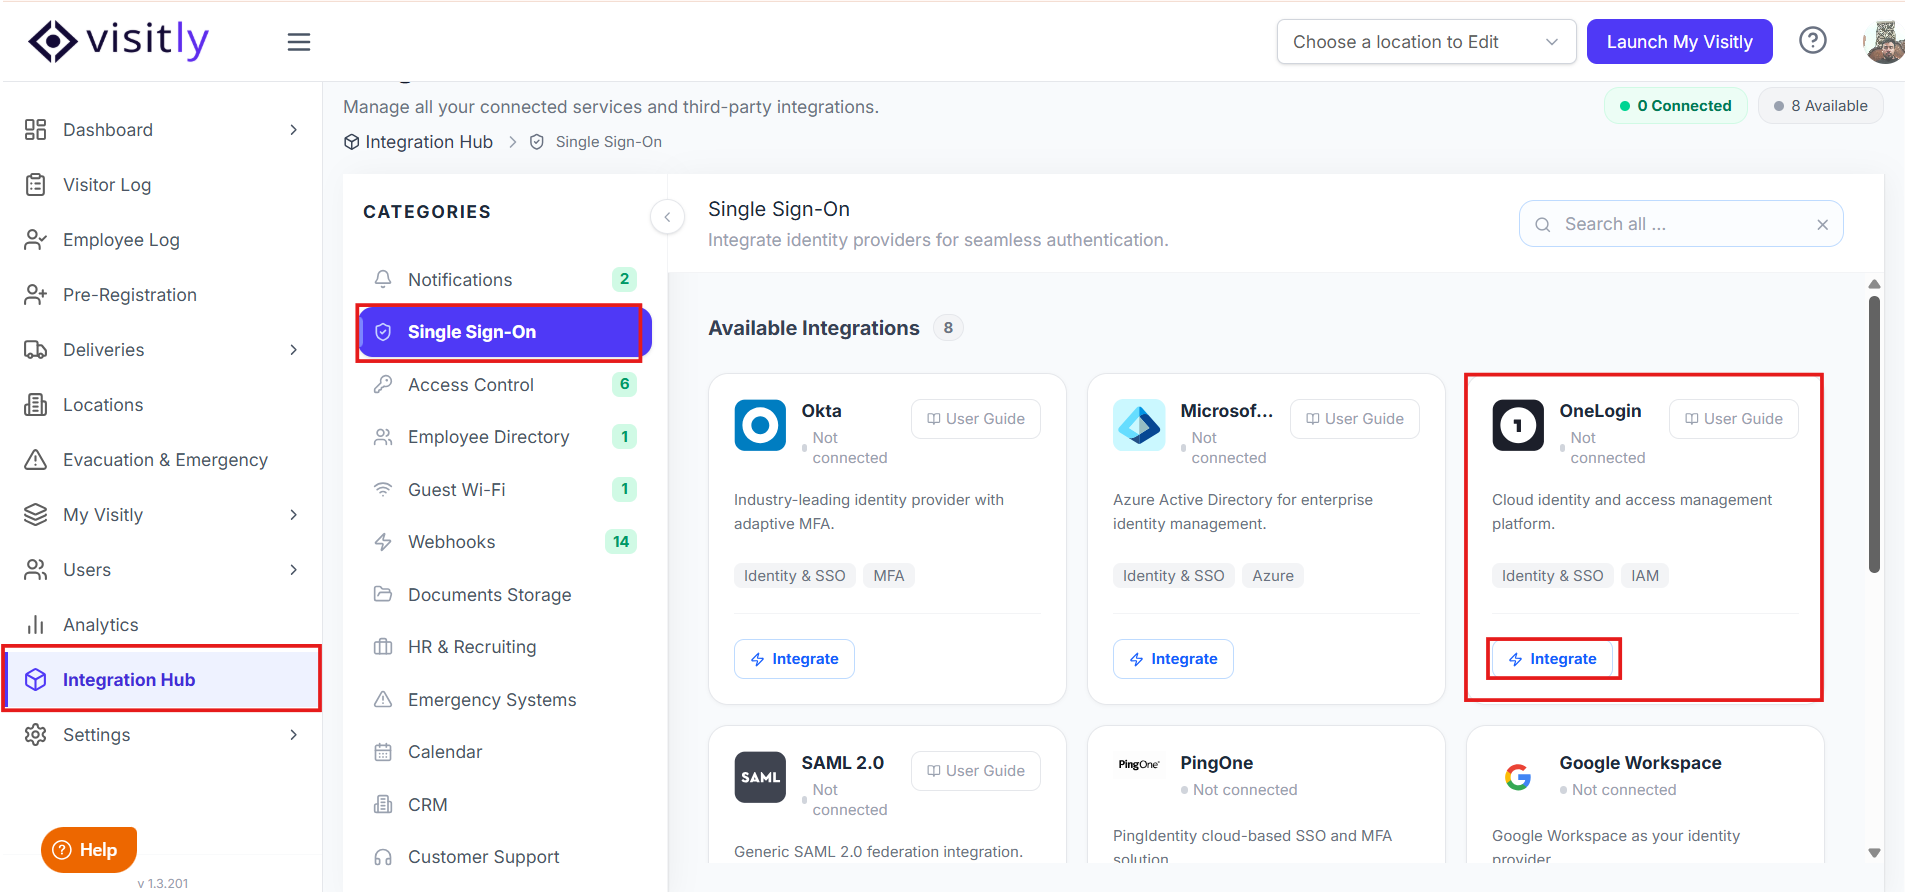
⭐ Note: If the option is not enabled for your organization, please contact Visitly Support.
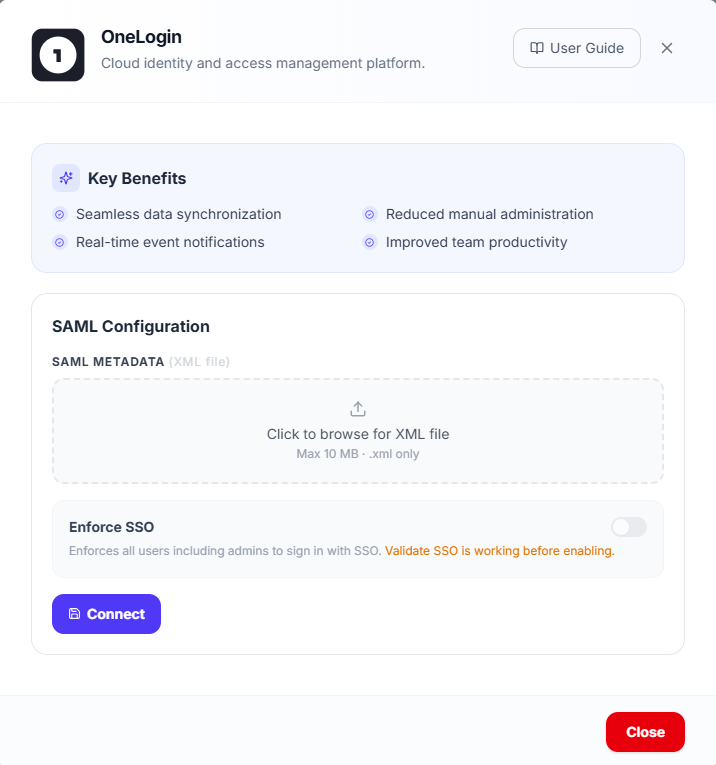
9. Upload the downloaded SAML Metadata XML file.
10. In OneLogin, assign roles to users who need access to the Visitly portal. These roles determine which users will be synchronized with Visitly.
OneLogin Integration
1. Log in to the Visitly Dashboard.
2. Navigate to Integrations Hub> Single Sign-On from the left-hand menu.
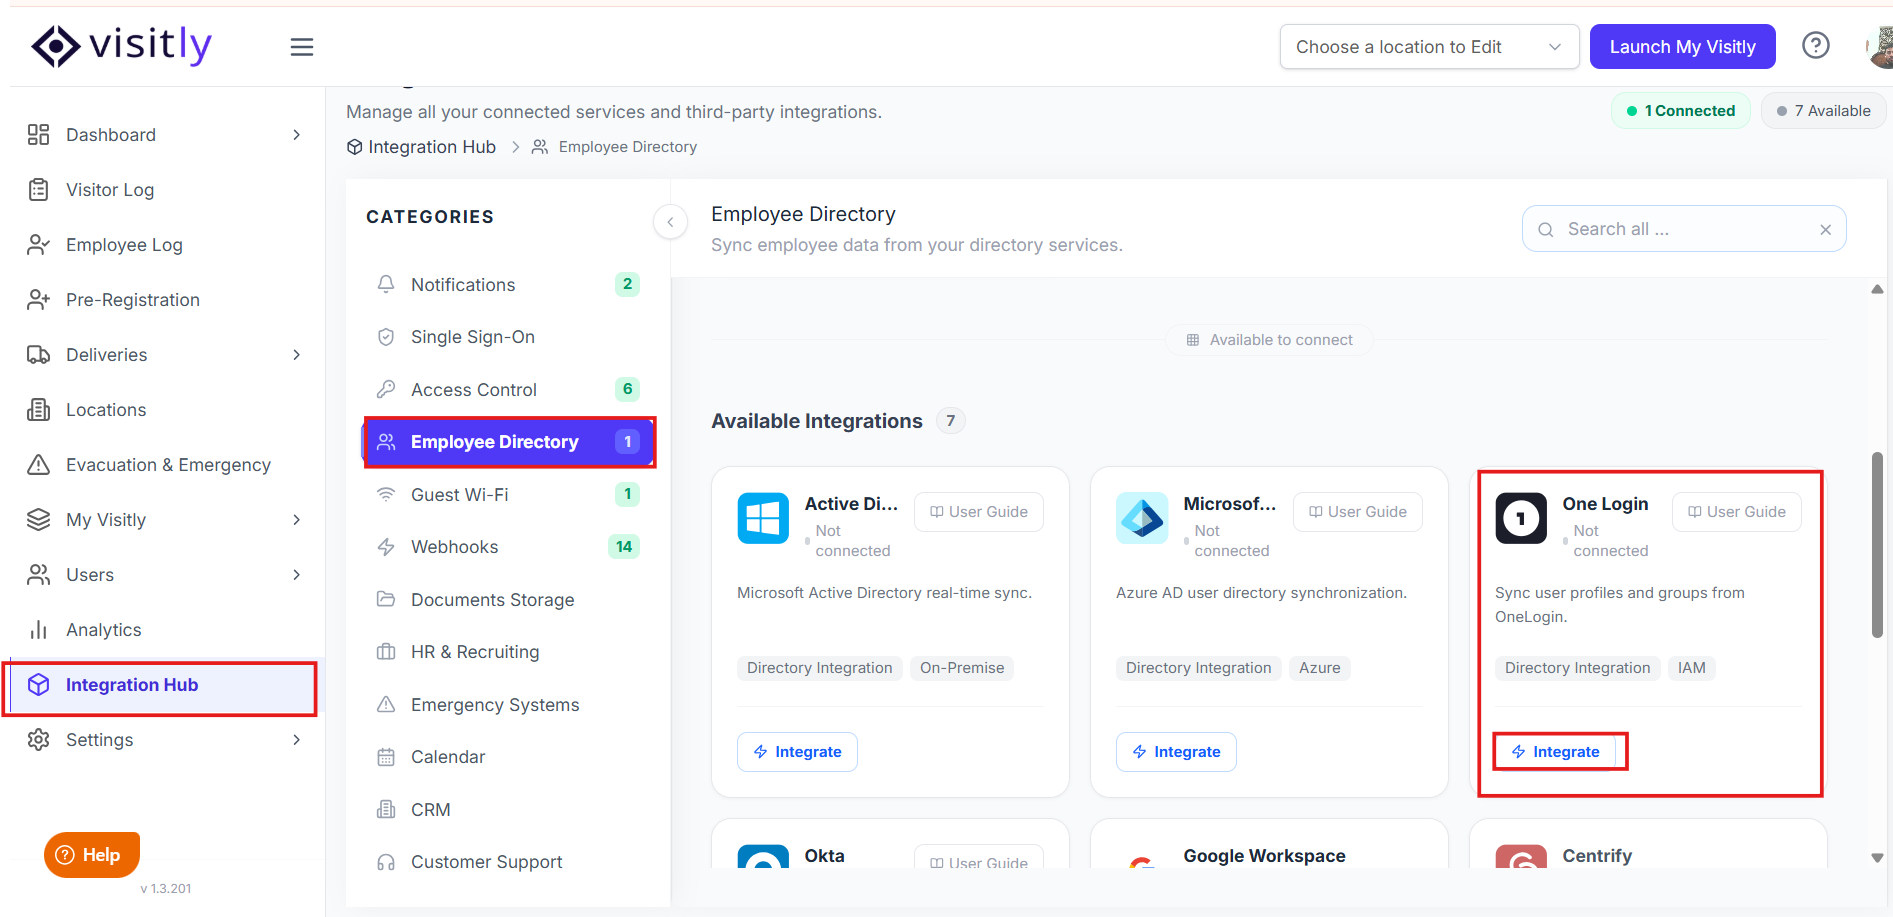
3. Click Integrate on the OneLogin card.

4. Copy the API Key from the screen.
5. Log in to OneLogin and paste the copied API Key into the appropriate field.

6. Click Enable and then Save to complete the step.
7. Navigate to the Provisioning tab.
8. Select Enable Provisioning and keep the default settings for other options.

9. Click Save to finalize provisioning.
10. Assign roles in OneLogin via the Acess tab to synchronize users with the Visitly portal.

After completion, users will appear in the Visitly Dashboard under Users/Employees. Users can now log in to the Visitly Portal directly from their OneLogin accounts.
For further assistance, please reach out to Visitly Support.
Was this article helpful?
That’s Great!
Thank you for your feedback
Sorry! We couldn't be helpful
Thank you for your feedback
Feedback sent
We appreciate your effort and will try to fix the article