Admin role required: Global Admin

Feature availability varies by plan. Check What's in each plan on our pricing page to see if it's included in yours, or talk to our sales team about upgrading.
Overview
Connect Visitly to Microsoft Teams to receive real-time visitor and employee notifications directly in your Teams workspace, delivered as a private message to the host. Once connected, hosts get notified the moment their visitor signs in or out, with no manual checking required.
This article covers the full setup, from installing the app to confirming your first notification arrives.
What you'll receive
The Visitly app for Microsoft Teams delivers the following notifications:
- Visitor sign-in and sign-out
- Visitor watchlist alerts
- Pre-registration created and cancelled
- Delivery notifications
- Employee sign-in and sign-out
- Employee watchlist alerts
Each notification arrives as a card showing the visitor's name, their host, company, and the time of the event.
The Visitly app for Teams is notification-only. It delivers alerts into Teams but does not include tabs, chat commands, or search. All configuration happens in the Visitly admin portal.
Before you begin
You'll need:
- An active Visitly subscription with the Microsoft Teams integration enabled on your plan
- Admin access to your Visitly account
- Permission in Microsoft Teams to install apps
- A Microsoft 365 account whose email address matches a user in your Visitly organization
Why the email address matters
Visitly links your Teams workspace to your Visitly organization by matching the email address of the person who installs the app against the users in your Visitly account. If there's no match, the connection won't be established.
The same matching rule decides who receives personal notifications: a host only receives a direct message in Teams if their Visitly email address matches their Microsoft Teams account.
This is the most common reason setup fails, so it's worth confirming before you start.
Step 1: Confirm the installing user exists in Visitly
Before installing anything in Teams, make sure the Microsoft 365 account you'll use to install the app exists as a user in Visitly.
- Sign in to the Visitly admin portal at app.visitly.io.
- Go to Settings > Users.
- Check whether the email address of your Microsoft 365 account is listed.
- If it isn't, select Add User, enter the email address, and assign the Admin role.
Keep this account signed in to Teams for the next step.
Step 2: Install Visitly from Microsoft Teams
- In the Visitly admin portal, go to Integration Hub → Notifications, select Microsoft Teams, and select Connect to enable the integration for your organization.

- In Microsoft Teams, search the Microsoft Marketplace for "Visitly" and open the Visitly listing.
- On the Visitly product page, select Get it now.

- On the Confirm your details to continue screen, review the Microsoft 365 account you're signed in as, then select Get it now.

- After clicking Get it now, Microsoft redirects you to the Teams launcher. Choose Open Microsoft Teams if you have the desktop app installed, or select Use the web app instead to continue in the browser.

- On the Visitly app page, select Open to add Visitly to Teams.

Visitly is now added to your Microsoft Teams workspace.
Choosing where notifications appear
- When prompted, select a standard Channel and click to Go.

Within a few seconds, Visitly posts a confirmation card. This confirms the integration connected to your Visitly organization automatically — there are no keys to copy and nothing further to configure in Teams.
If no card appears, see Troubleshooting.
Step 3: Open notification settings in Visitly
All notification rules are configured per location in the Visitly admin portal.
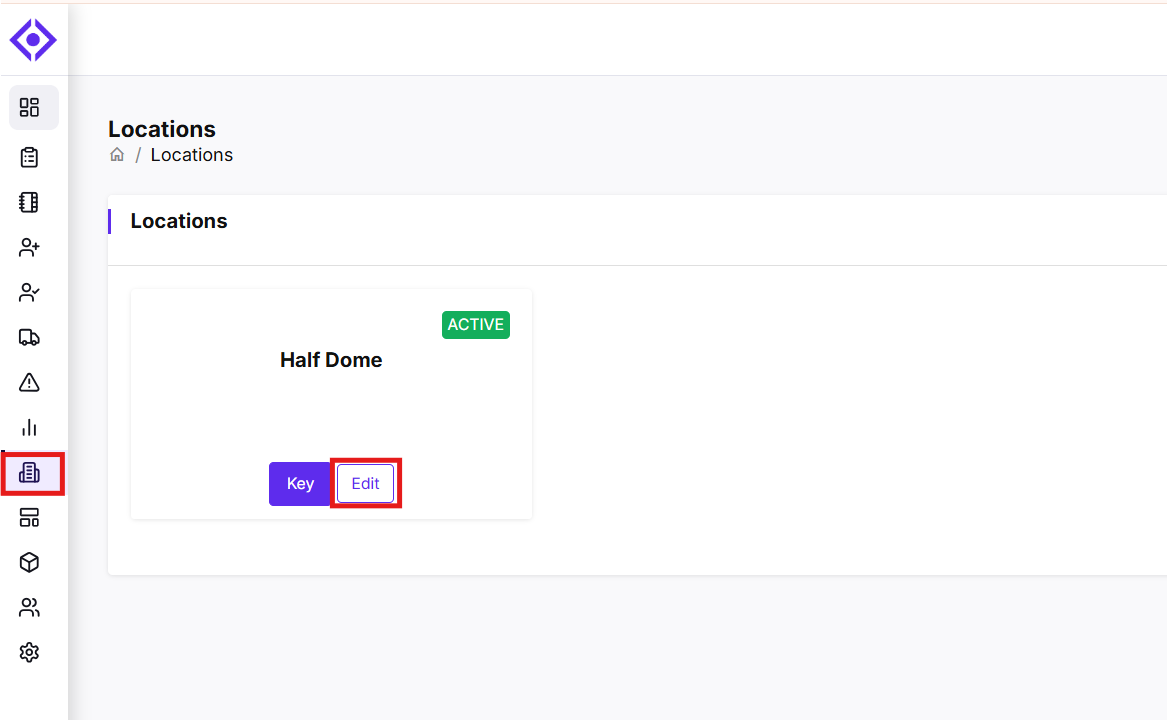
- In the Visitly admin portal, go to Locations.
- Select Edit on the location you want to configure.
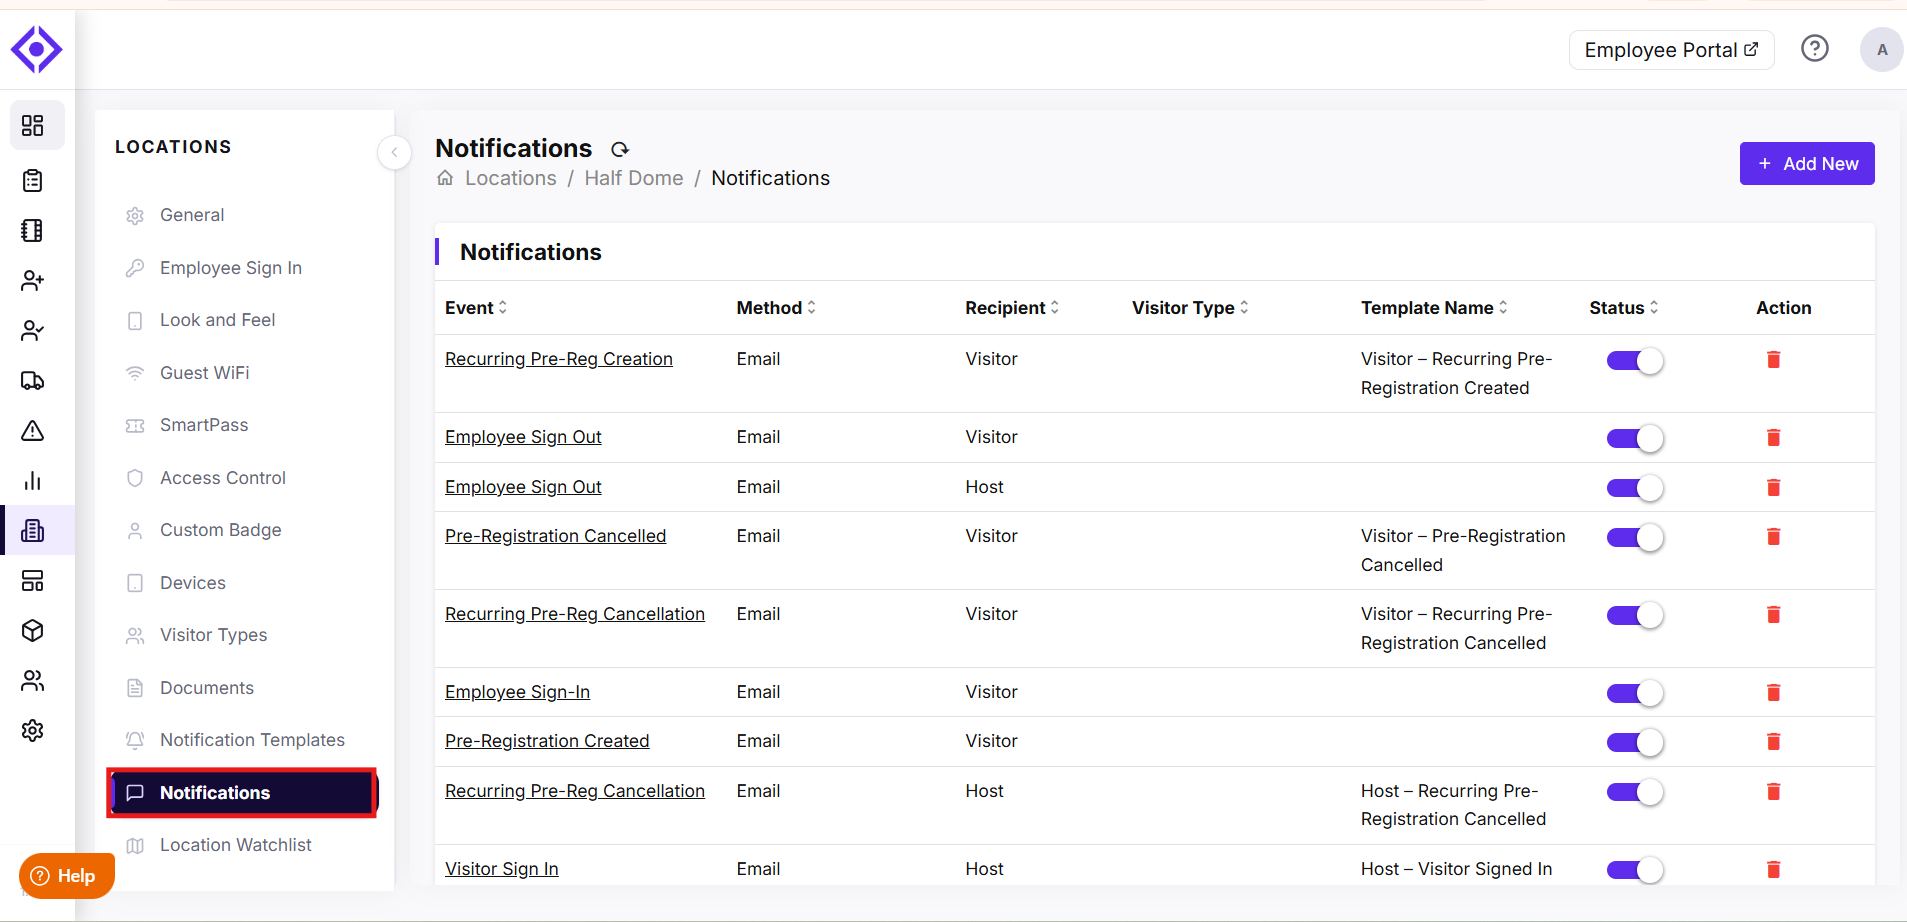
- In the side menu, select Notifications. You'll see the rules already configured for this location.
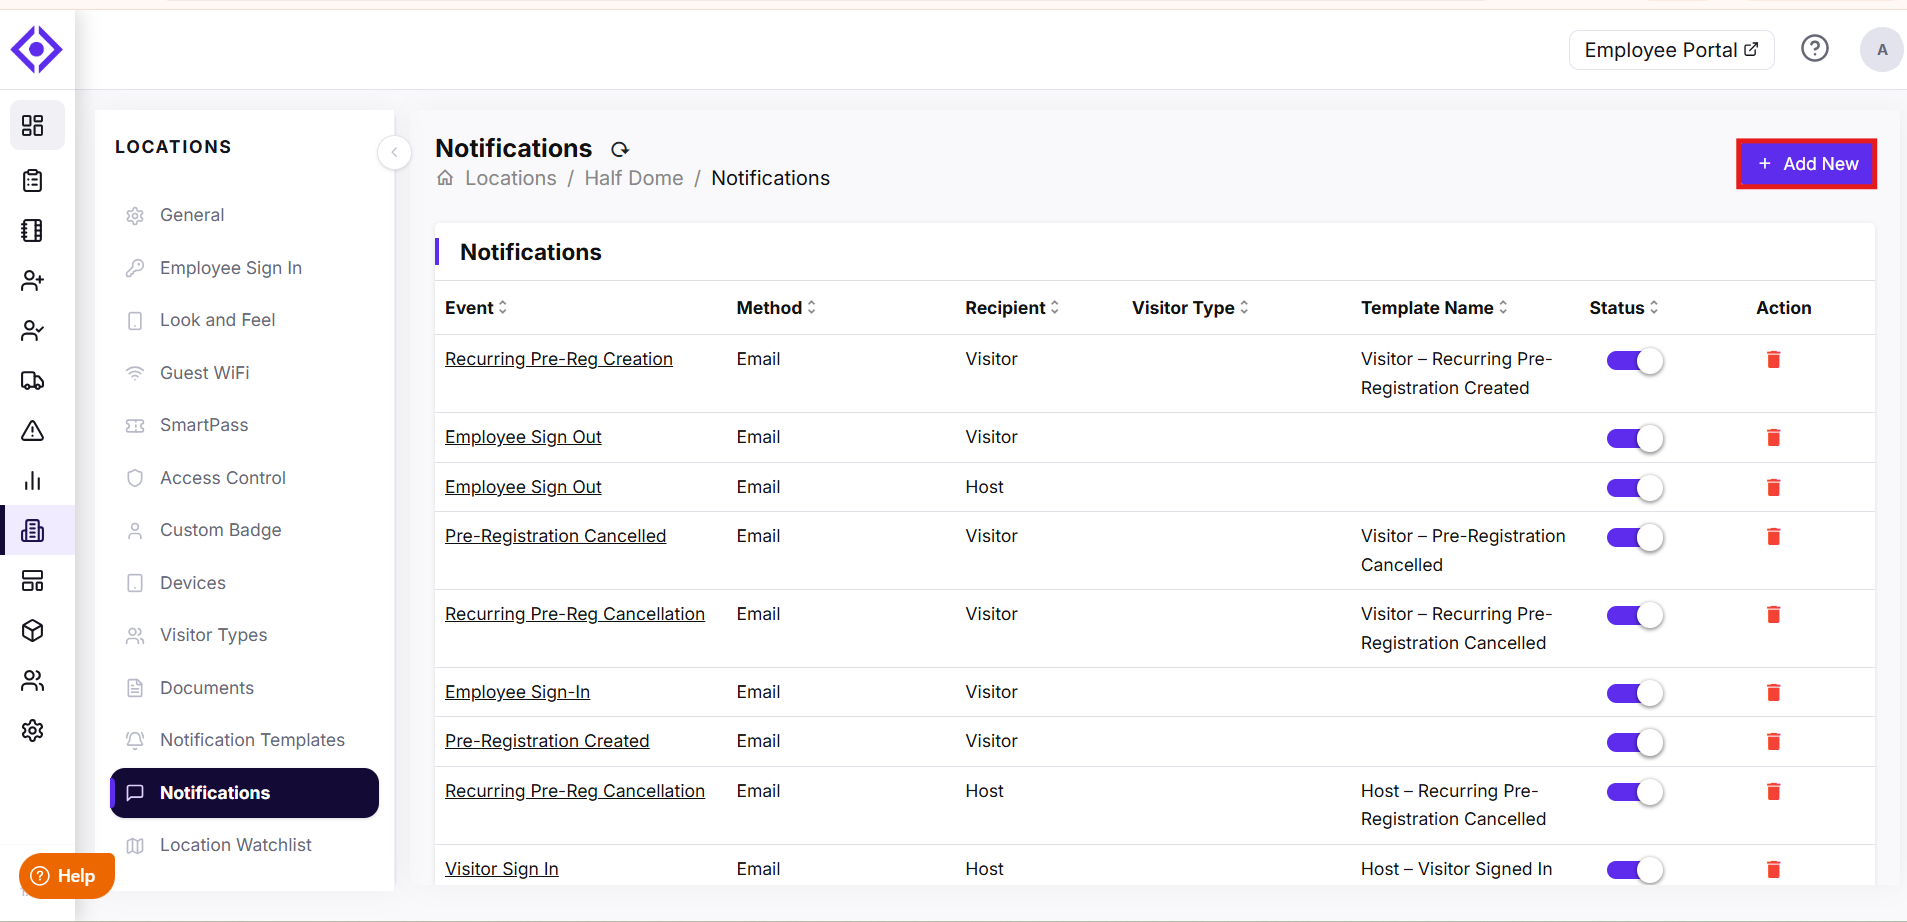
- On the Notifications screen, select Add New.
Managing multiple locations? Rules are set per location. A rule you create applies only to that location. Repeat these steps for each location you want covered
Step 4: Set up personal notifications to hosts
Personal notifications send a private one-to-one message in Teams to the host whose visitor has arrived.
- On the Notifications screen, select Add New.
- Configure the rule:
- Event: The activity that triggers the notification, for example Visitor Sign In
- Recipient: Select Host
- Method: Select Microsoft Teams
- Visitor Type (optional): Restrict the rule to a single visitor type
- Custom Fields (optional): Add up to six extra fields to the notification card

- Select Save.
For a host to receive the message, their email address in Visitly must match their Microsoft 365 account, and they must be a member of the Teams workspace where the Visitly app is installed.
Step 5: Confirm notifications are working
Create a test visit to verify your rules.
- In the Visitly admin portal, go to Visitor Log and select Add Visit.

- Fill in the visitor's details, selecting the location you configured and a host whose email address matches a Microsoft Teams account.
- Select Notify Host if you're testing personal notifications.
- Select Check-In.
Within a few seconds, an arrival card appears in the host's direct messages in Teams, showing the visitor's name, company, host, and sign-in time.
Testing the sign-out notification
- Return to the Visitor Log and find the visit you just created.
- Sign the visitor out.
The host receives a second card confirming the visitor has left, with the check-in time, check-out time, and total duration of the visit.
A sign-out card only arrives if you created a rule for the Visitor Sign Out event. If you only configured Visitor Sign In, add a second rule following Step 4.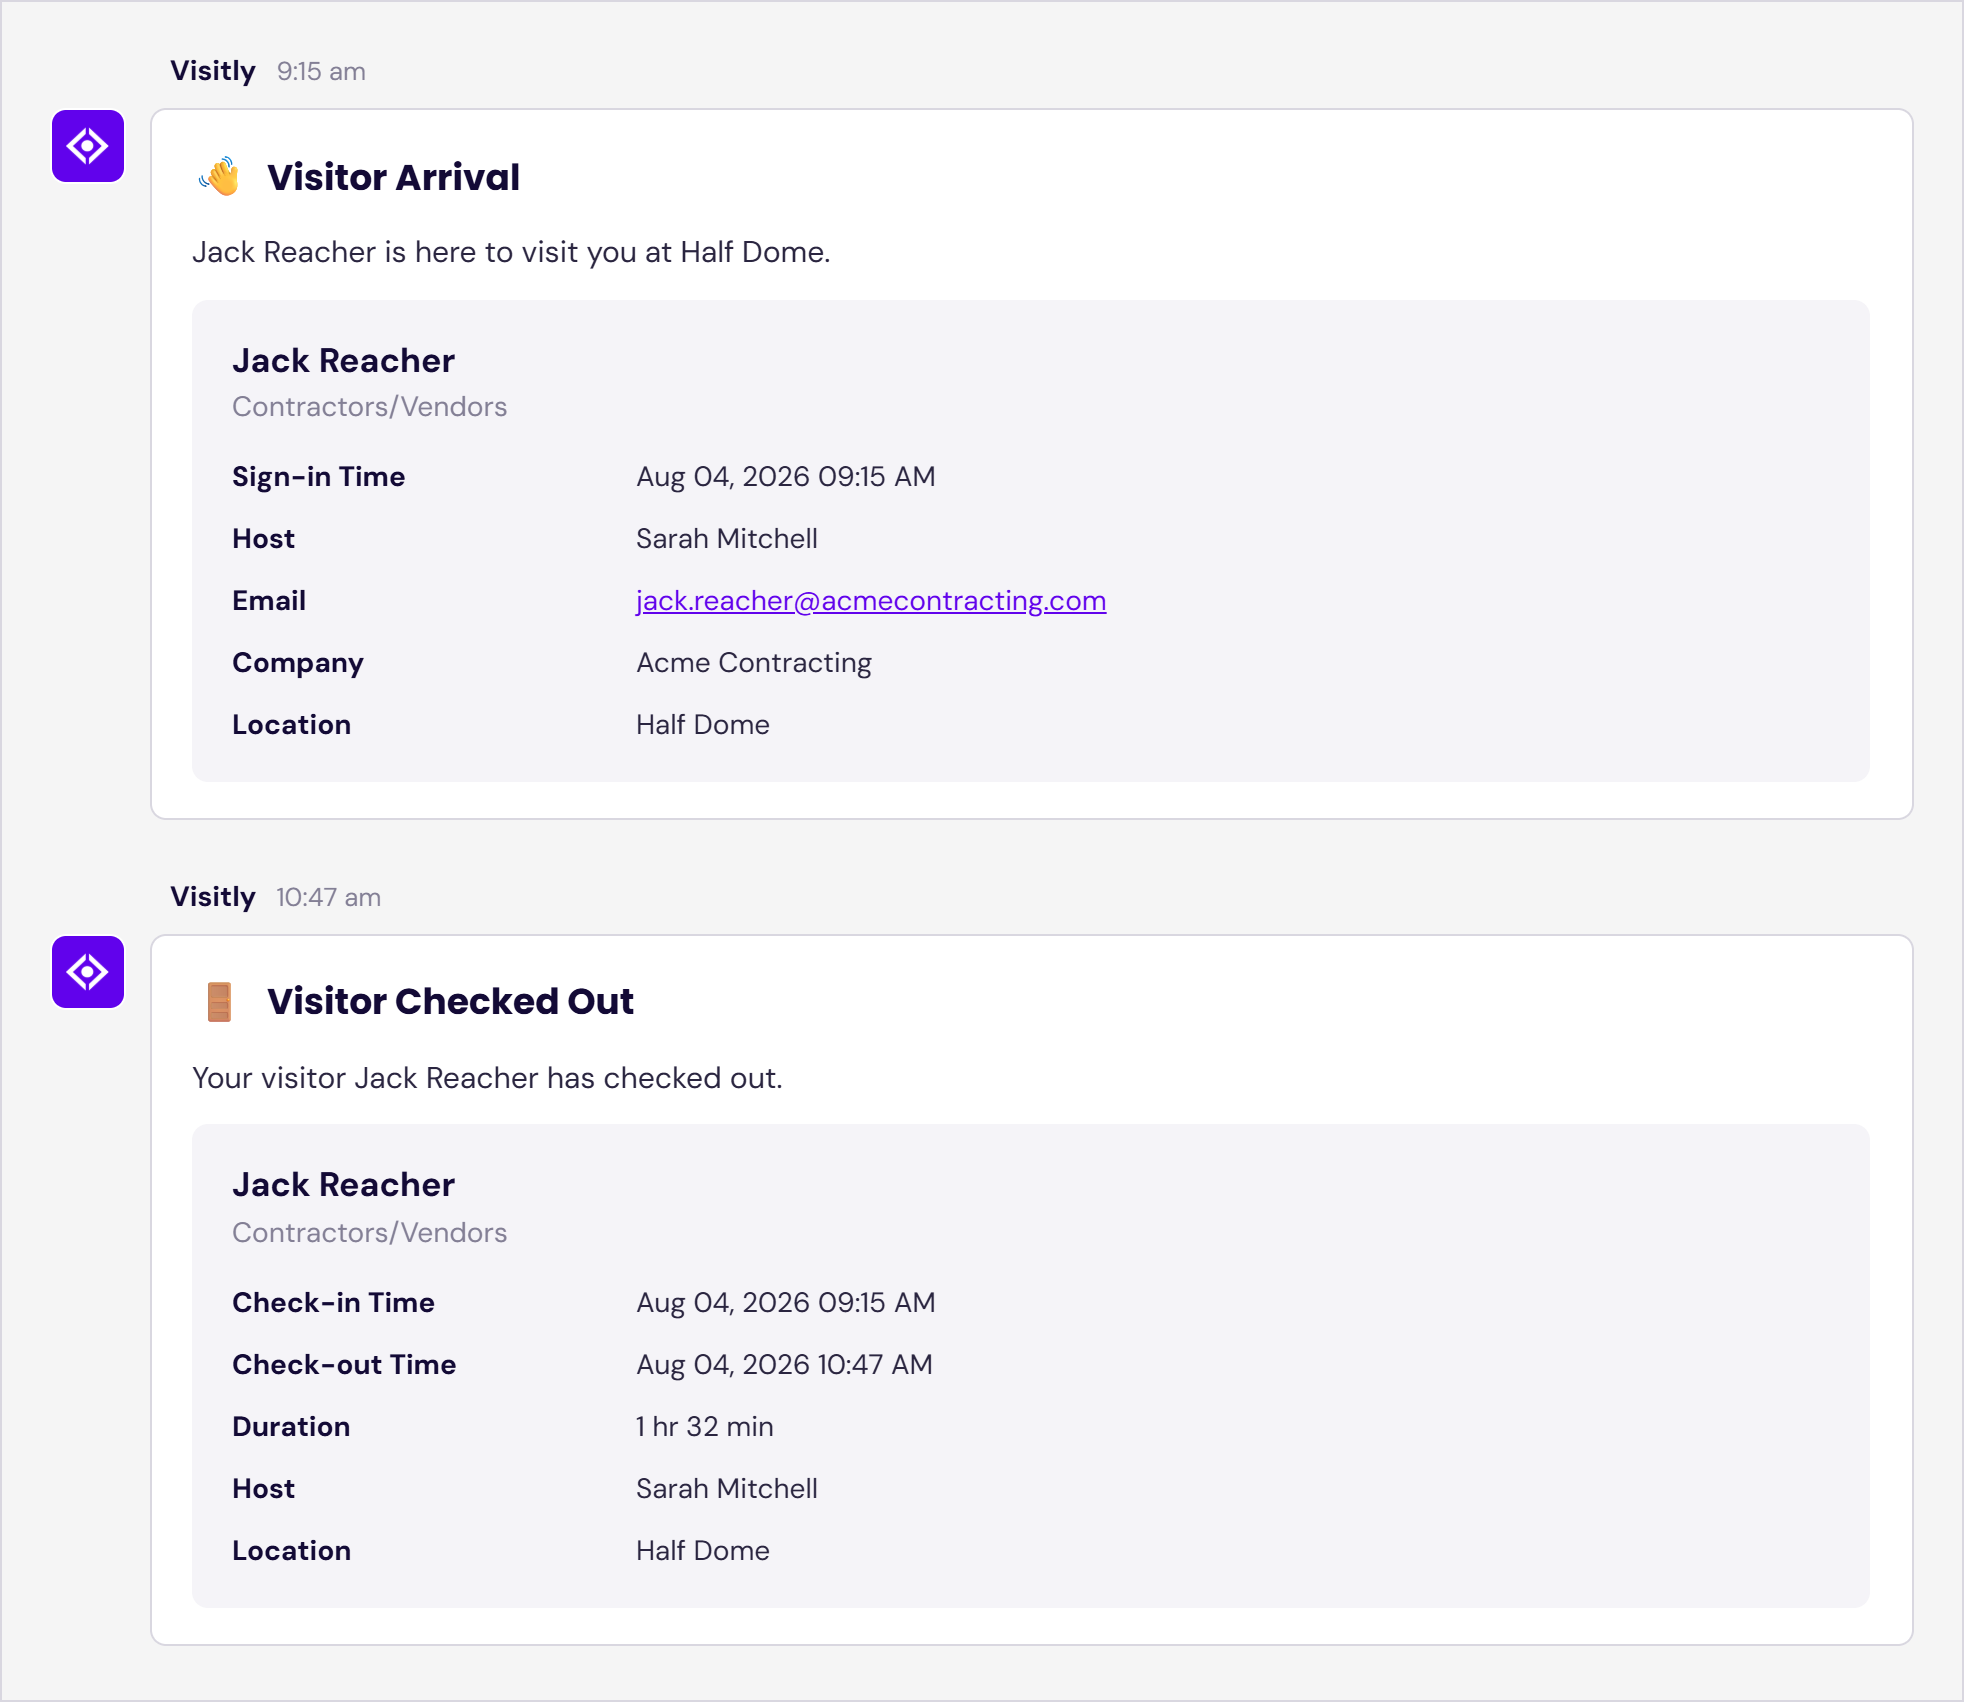
Your setup is complete. Notifications will now arrive automatically as visitors sign in and out.
Things to know
- Rules are configured per location. A rule applies only to the location it was created under. Add rules separately for each location.
- Duplicate notifications are suppressed for five minutes. If the same event fires repeatedly within that window, only the first notification is sent. When testing, use a different visitor for each check-in.
- Host notifications depend on email matching. A host whose Visitly email address differs from their Microsoft 365 address won't receive personal notifications.
- Notifications are one-way. Cards are informational; visitor records are managed in the Visitly portal, not from Teams.
Troubleshooting
No confirmation card appeared after installing the app
The email address of the Microsoft 365 account used to install the app most likely doesn't match a user in your Visitly organization. Add that address as a user under Settings > Users in Visitly, then remove and reinstall the app in Teams.
Microsoft Teams isn't available as a Method when creating a rule
The Microsoft Teams integration may not be enabled on your plan. Contact your account manager or support@visitly.io to confirm.
Notifications have stopped arriving
Confirm the rule is still switched on under Locations > Edit location > Notifications. If the app was removed from Teams and reinstalled, check for a new confirmation card to verify the connection.
I'm receiving fewer notifications than expected
Check whether the events you're missing have their own rules. Each event type — sign-in, sign-out, watchlist, pre-registration, delivery — needs a separate rule per location.
Need more help?
Contact our support team at support@visitly.io.
Was this article helpful?
That’s Great!
Thank you for your feedback
Sorry! We couldn't be helpful
Thank you for your feedback
Feedback sent
We appreciate your effort and will try to fix the article