Admin role required: Global Admin

Feature availability varies by plan. Check What's in each plan on our pricing page to see if it's included in yours, or talk to our sales team about upgrading.
Overview
Connect Visitly to Google Chat so hosts are alerted the moment their visitors arrive. Visitly can send each host a direct message, post alerts to a Google Chat space and @mention the host, or both. This article covers the full setup, from connecting Google Workspace to confirming your first notification arrives. If you're a Google Workspace administrator, also see Google Chat admin setup for Visitly.
How notifications are delivered
- Direct message to the host: when a rule's recipient is Host, the host receives a private message from the Visitly app. Co-hosts and delegates receive it too.
- Post in a space: when a rule's recipient is Channel, Visitly posts to the Google Chat space you choose and @mentions the host. You can use different spaces for different rules.
What you'll receive
You can create Google Chat rules for these events:
- Visitor sign-in and sign-out
- Visitor watchlist alerts
- Pre-registration created and cancelled
- Employee sign-in, sign-out and watchlist alerts
Each notification arrives as a card showing the visitor's details. Some events, such as deliveries and employee watchlist alerts, can't be sent to a host; send them to a space or a specific user instead.
All notification rules are configured in the Visitly admin portal. In Google Chat, you can message the Visitly app help to see setup steps, or stop to see how to turn notifications off.
Before you begin
You'll need:
- An active Visitly subscription with the Google Chat integration enabled on your plan
- Global Admin access to your Visitly account
- A Google Workspace super admin account, or a super admin who can help with Steps 1 and 2
Why the email address matters
Visitly finds each host in Google Workspace using their email address in Visitly. A host only receives direct messages, or gets @mentioned in a space, if their Visitly email address matches their Google Workspace email address.
This is the most common reason hosts don't receive notifications, so it's worth checking under Settings > Users before you start.
Step 1: Install Visitly for your domain
Hosts can only receive direct messages from Visitly if the Visitly app is installed for them. Installing it for your whole domain covers every host at once.
- Go to Google Workspace Marketplace and search for "Visitly".
- Open the Visitly listing and select Admin install.
- Choose Everyone in your organization, or the organizational units your hosts belong to.
- Review the permissions and select Allow.
If you can't find Visitly or the install is blocked, see Google Chat admin setup for Visitly.
Step 2: Connect Google Workspace in Visitly
- Sign in to the Visitly admin portal at app.visitly.io.
- Go to Integration Hub → Notifications, select Google Chat, and select Integrate.
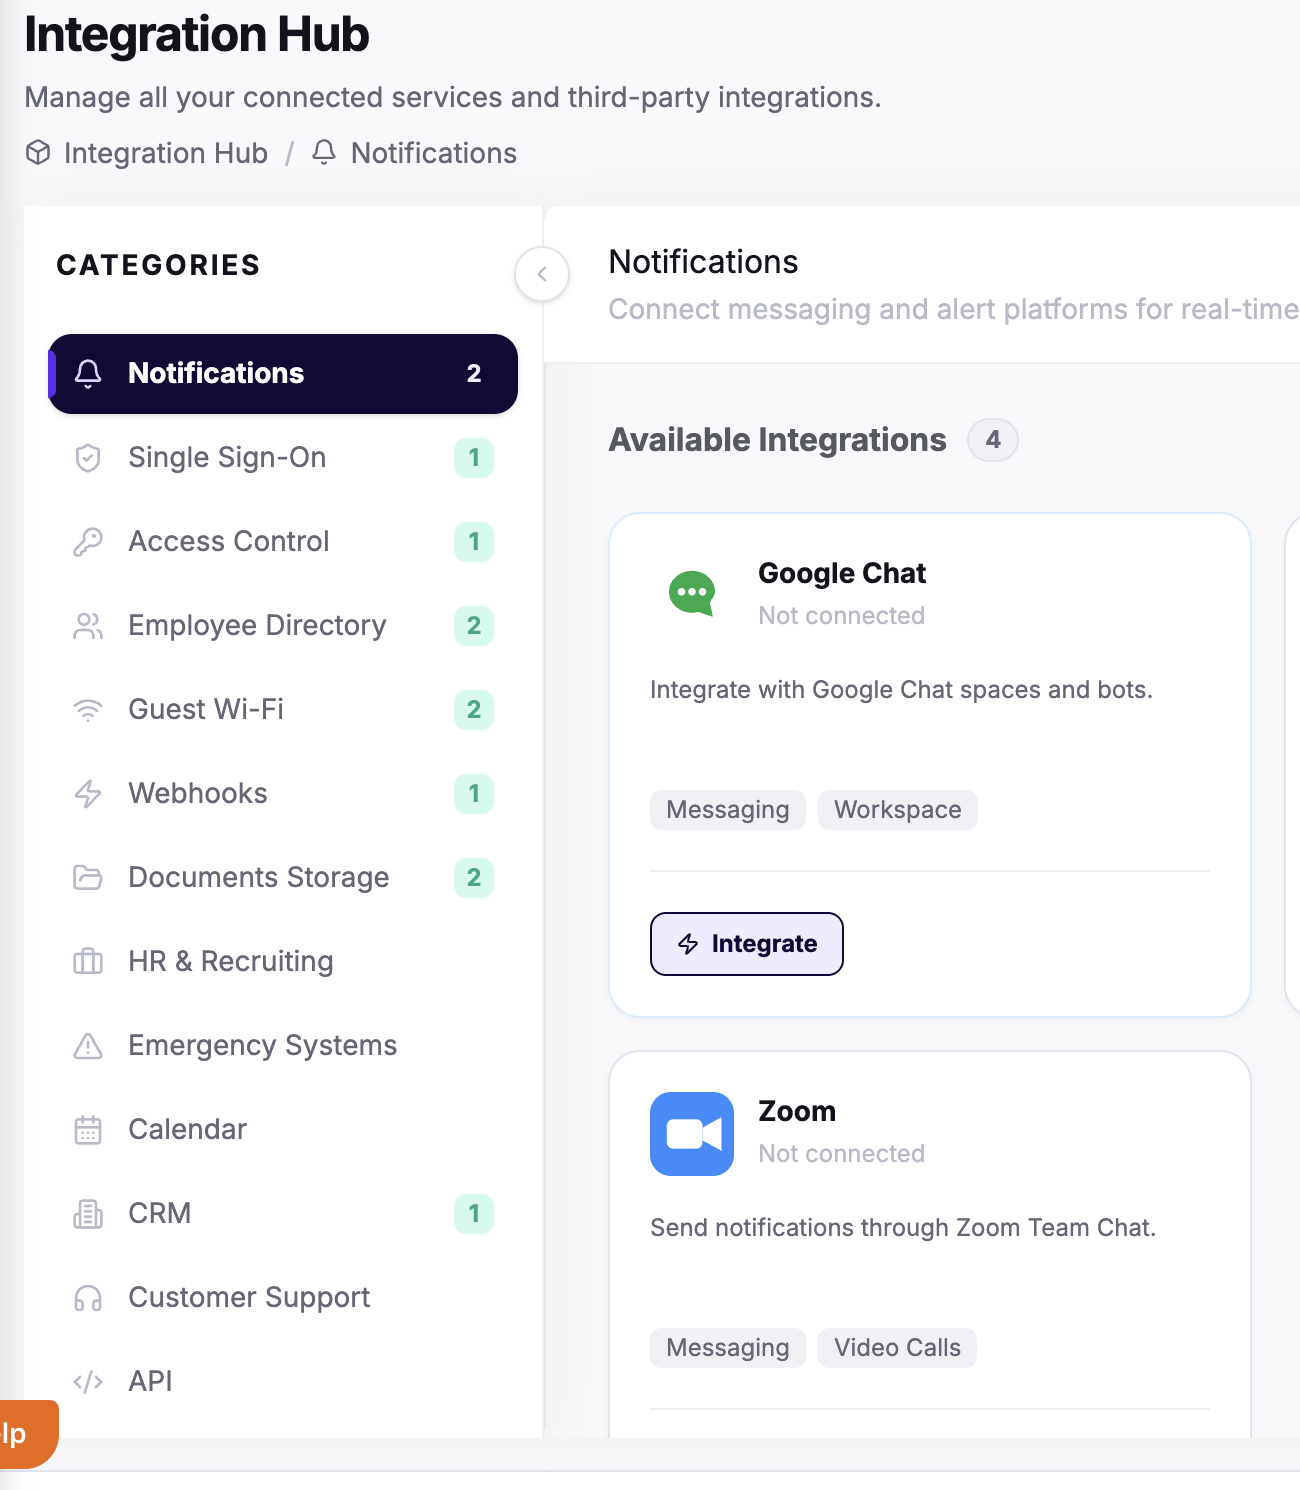
- A Google sign-in window opens. Sign in with your Google Workspace super admin account.
- Review the permissions Google asks for and select Allow.
Visitly uses these permissions to find each host in your directory, list your Chat spaces so you can choose one in a rule, and add the Visitly app to the spaces you choose. It doesn't change anything in your directory. For details, see Google Chat admin setup for Visitly.
Step 3: Set up notification rules in Visitly
All notification rules are configured per location in the Visitly admin portal.
- In the Visitly admin portal, go to Locations.
- Select Edit on the location you want to configure.
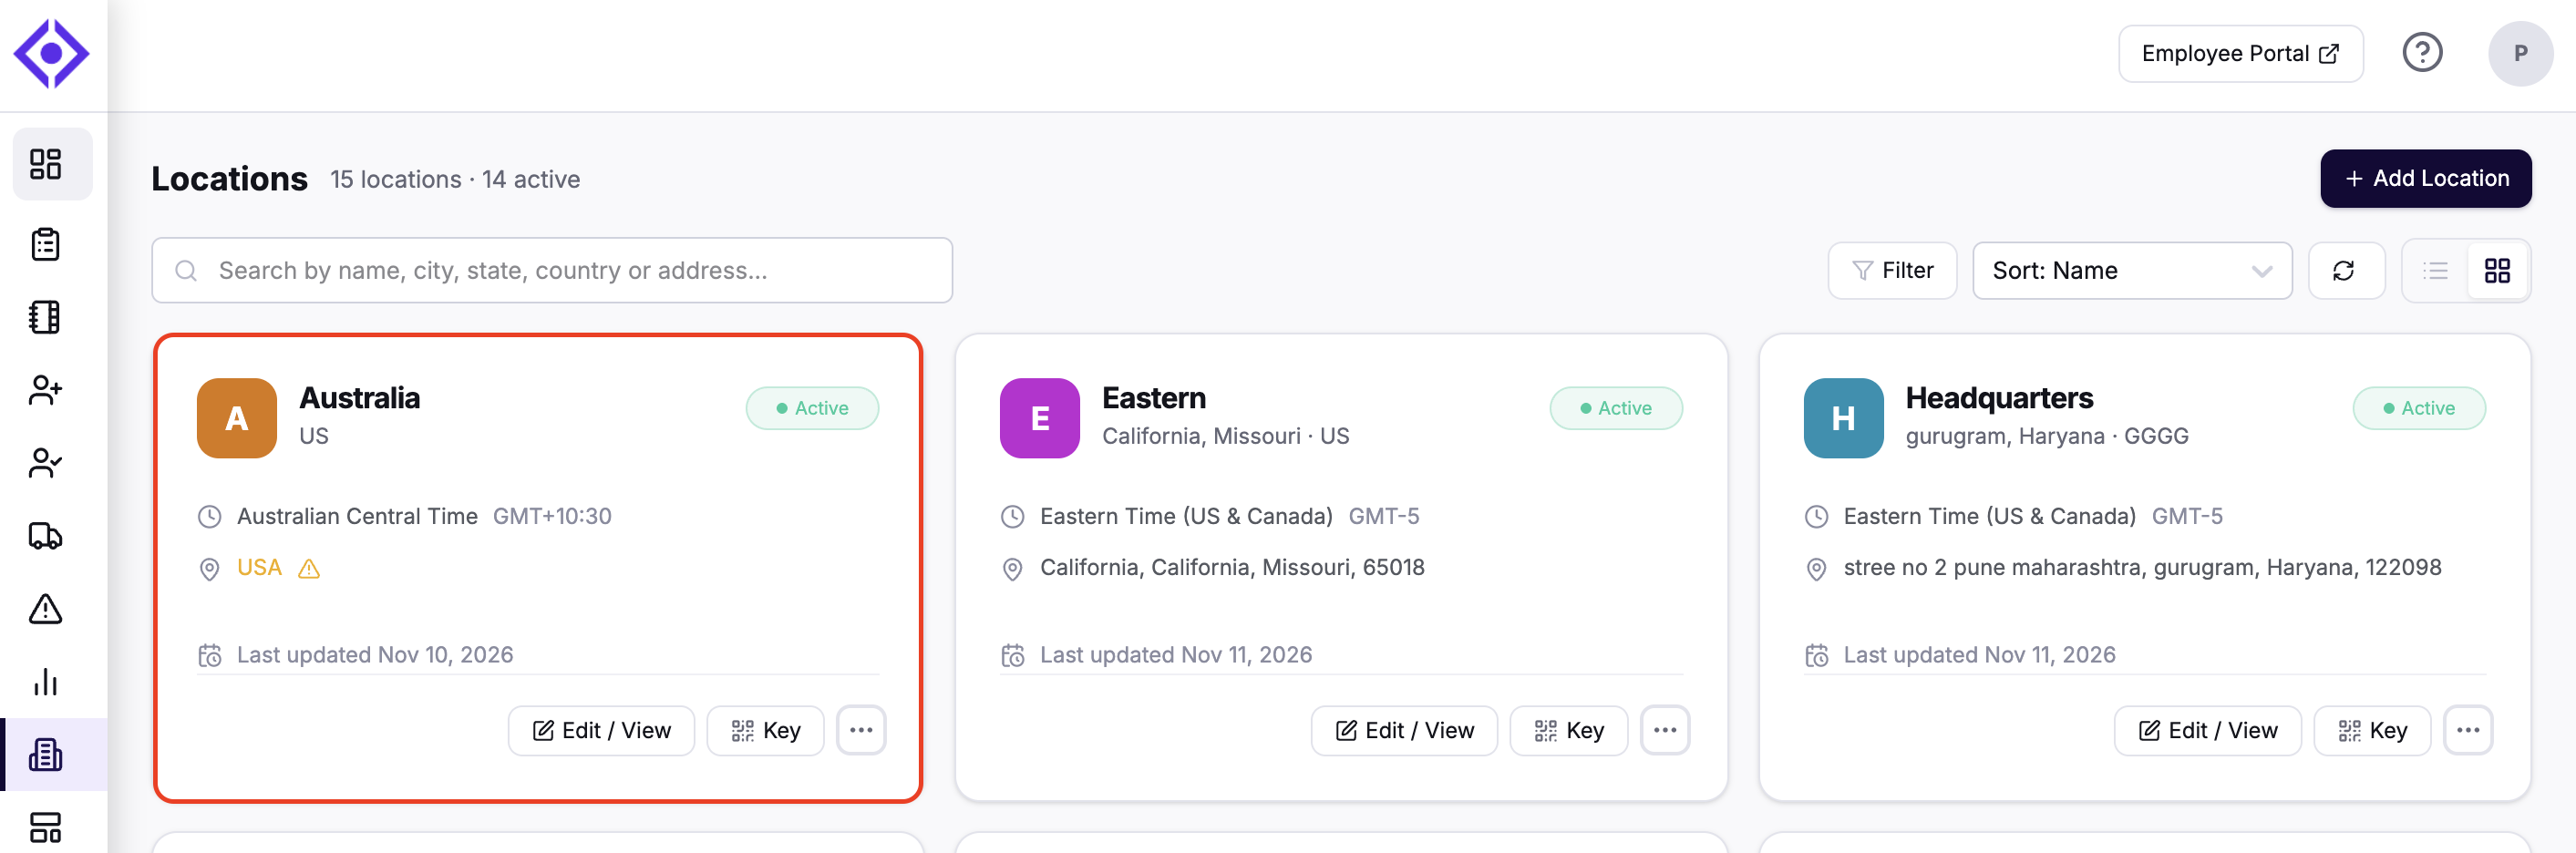
- In the side menu, select Notifications. You'll see the rules already configured for this location.
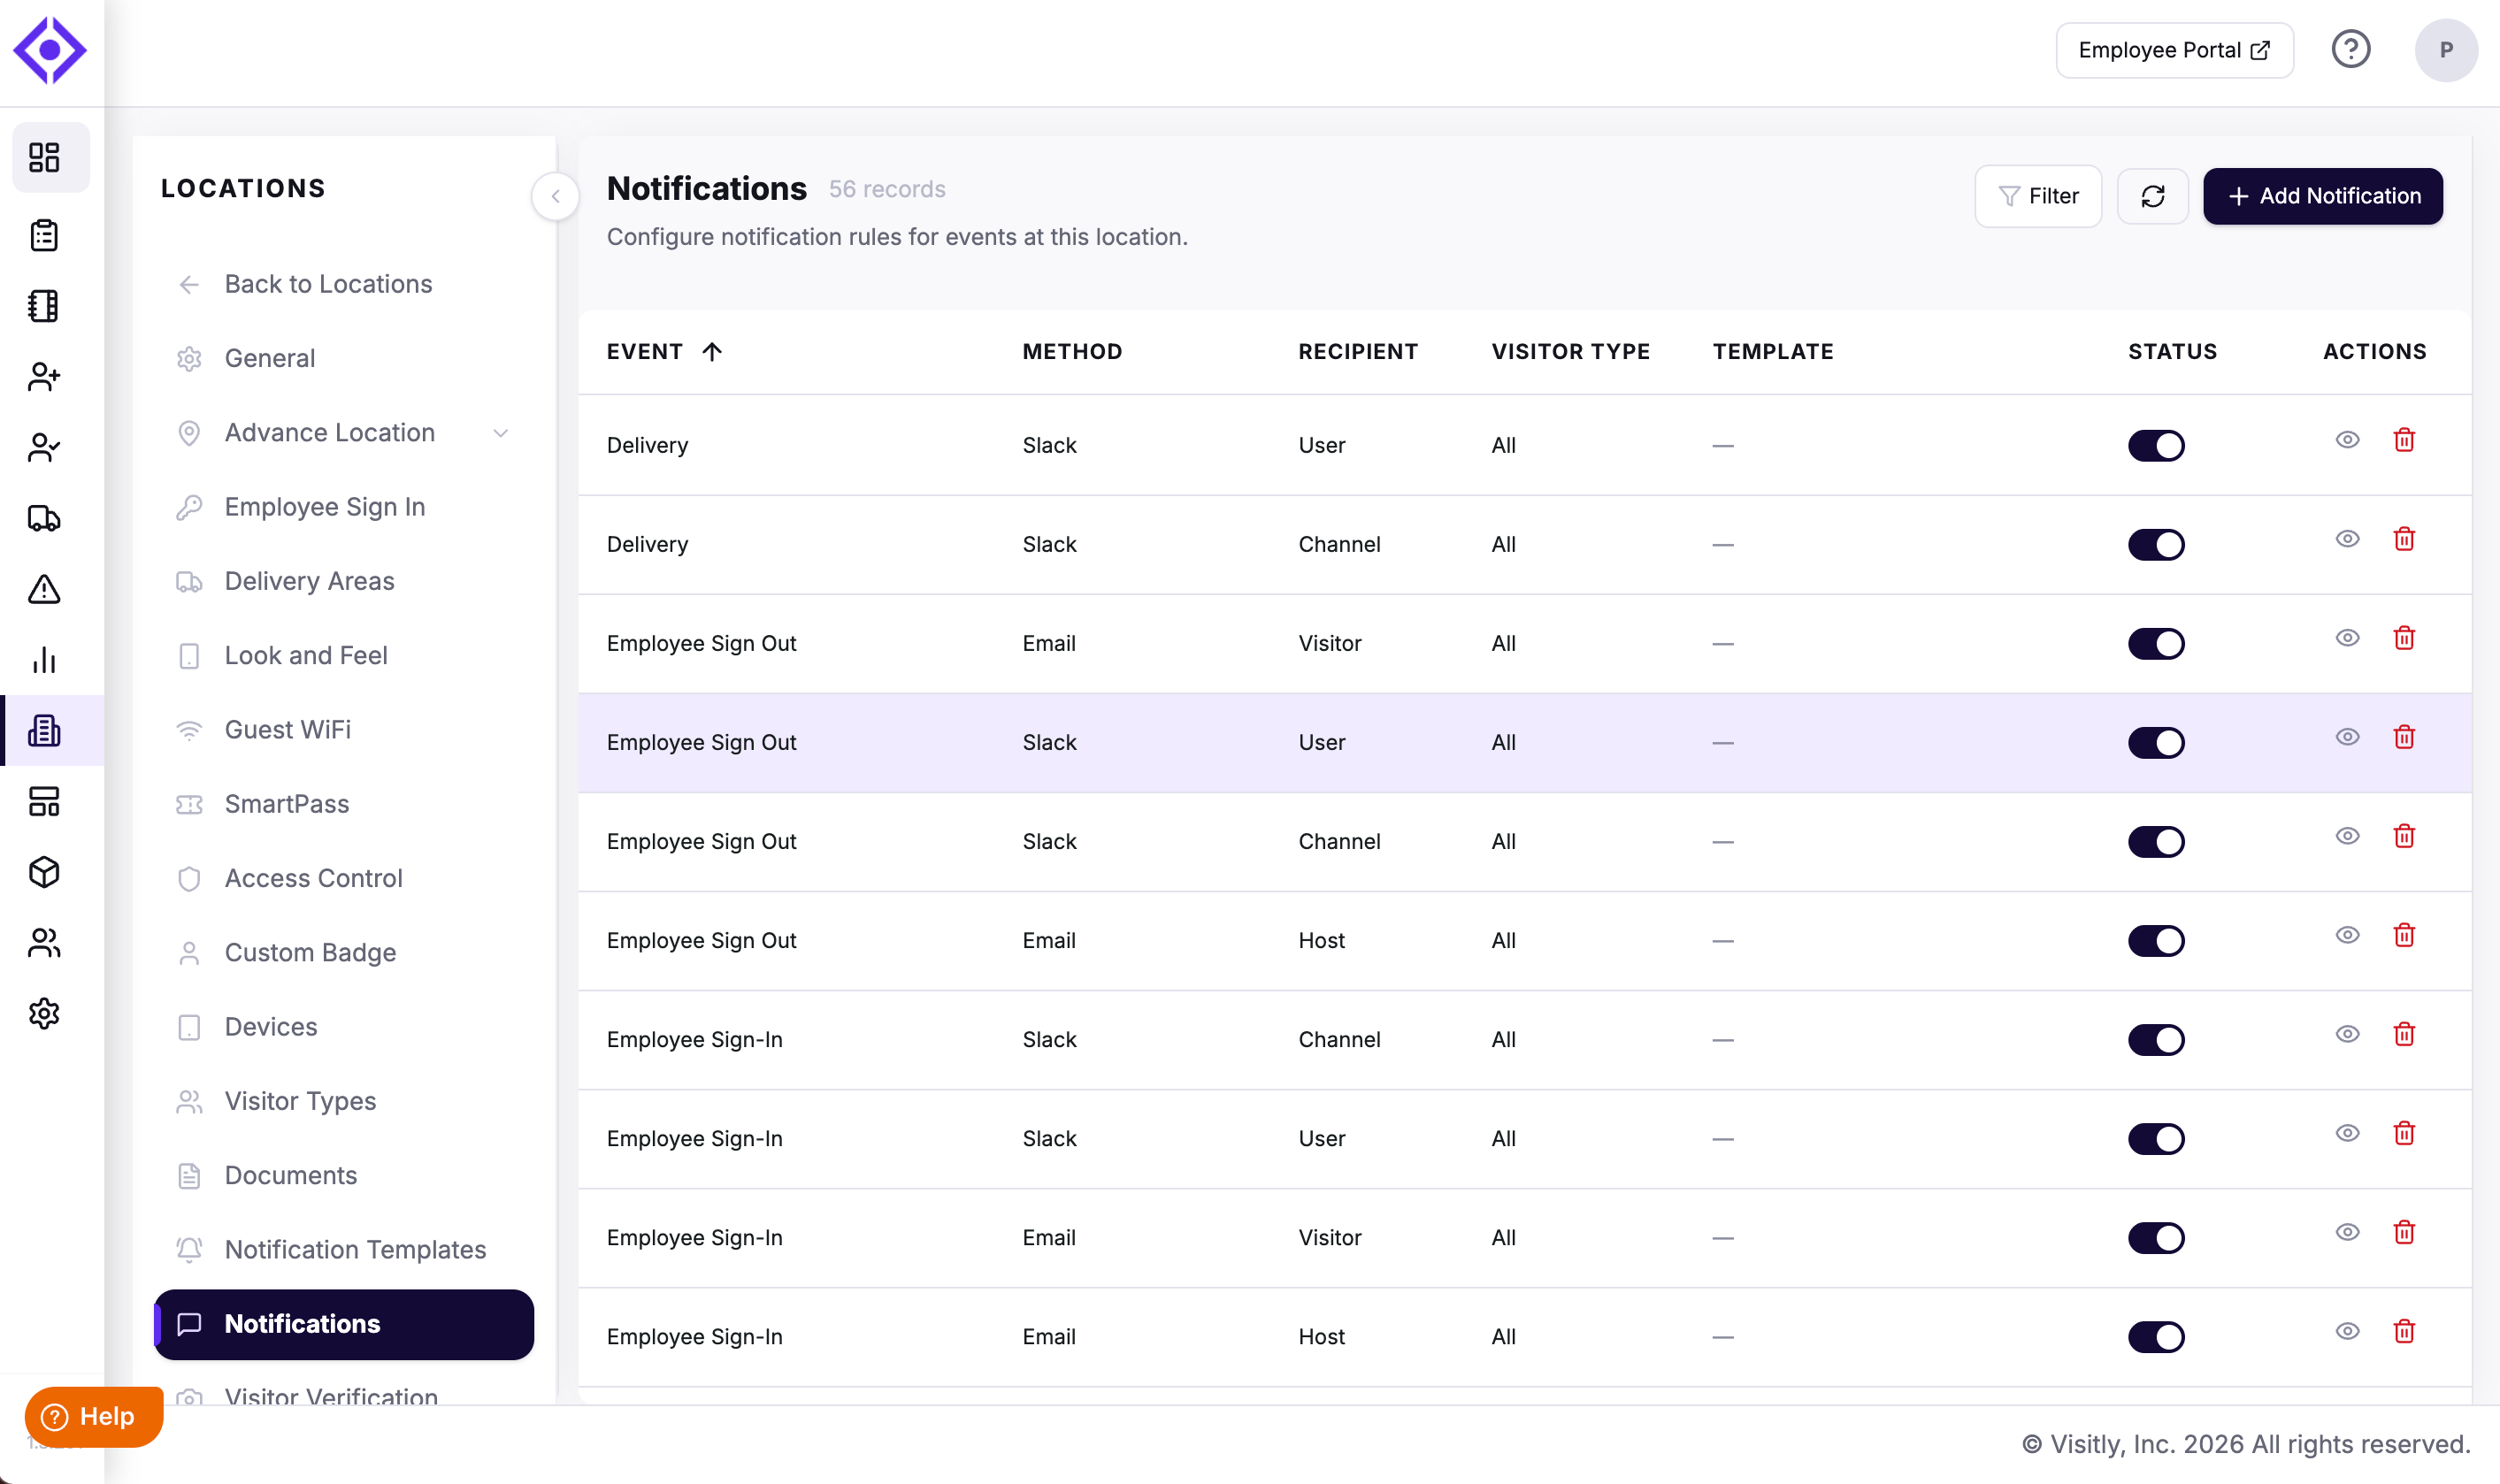
- Select Add New. In the Add Notification form, configure the rule:
- Event: The activity that triggers the notification, for example Visitor Sign In
- Recipient: Select Host to send a direct message to the host, or Channel to post in a space
- Method: Select Google-Chat
- Google Chat Space (Channel only): Choose the space to post in. Visitly adds itself to the space automatically.
- Visitor Type (optional): Restrict the rule to a single visitor type
- Select Save.
Managing multiple locations? Rules are set per location. A rule you create applies only to that location. Repeat these steps for each location you want covered.
Step 4: Confirm notifications are working
Create a test visit to verify your rules.
- In the Visitly admin portal, go to Visitor Log and select Add Visit.
- Fill in the visitor's details, selecting the location you configured and a host whose Visitly email matches their Google Workspace email.
- Make sure Notify Host is selected. Direct messages to the host are only sent when it's on.
- Select Check-In.
Within a few seconds:
- For a Host rule, the host receives a direct message from Visitly in Google Chat.
- For a Channel rule, a card appears in the chosen space and @mentions the host.
Testing the sign-out notification
- Return to the Visitor Log and find the visit you just created.
- Sign the visitor out.
A sign-out card only arrives if you created a rule for the Visitor Sign Out event. If you only configured Visitor Sign In, add a second rule following Step 3.
Your setup is complete. Notifications will now arrive automatically as visitors sign in and out.
Things to know
- Rules are configured per location. A rule applies only to the location it was created under. Add rules separately for each location.
- Co-hosts and delegates are included. Host rules also send a direct message to the visit's co-hosts and to the host's delegates.
- Each rule can use its own space. Channel rules post only to the space selected in that rule.
- Delivery depends on email matching. A host whose Visitly email address differs from their Google Workspace address won't receive direct messages or @mentions.
- Notifications are one-way. Cards are informational; visitor records are managed in the Visitly portal, not from Google Chat.
Turning off Google Chat notifications
- To stop a specific notification, go to Locations > Edit > Notifications and turn off or delete the rule that uses the Google-Chat method.
- To stop posting to a space, remove the Visitly app from that space in Google Chat.
- To stop all Google Chat notifications, go to Integration Hub → Notifications, select Google Chat, and select Disconnect.
You can also message the Visitly app stop in Google Chat to see these steps.
Troubleshooting
The host didn't receive a direct message
Check that the Visitly app is installed for the host (Step 1), that the host's Visitly email address matches their Google Workspace address, and that Notify Host was selected on the visit.
The card appears in the space but the host isn't @mentioned
Check that the host's Visitly email address matches their Google Workspace address.
The space I want isn't listed under Google Chat Space
The list shows the spaces available to the Google account used in Step 2. Make sure that account can access the space, then try again. If the problem continues, repeat Step 2.
Notifications stopped, or Visitly asks you to reconnect
The Google authorization may have expired, or the admin account used in Step 2 lost its admin role. Repeat Step 2 to reconnect.
Visitly can't be found or installed in Google Workspace Marketplace
Your Google Workspace administrator may need to allow Chat apps or add Visitly to the allowlist. See Google Chat admin setup for Visitly.
Google-Chat isn't available as a Method when creating a rule
The Google Chat integration may not be enabled on your plan, or Step 2 wasn't completed. Contact your account manager or support@visitly.io to confirm.
I'm receiving fewer notifications than expected
Check whether the events you're missing have their own rules. Each event type needs a separate rule per location.
Need more help?
Contact our support team at support@visitly.io.
Was this article helpful?
That’s Great!
Thank you for your feedback
Sorry! We couldn't be helpful
Thank you for your feedback
Feedback sent
We appreciate your effort and will try to fix the article