Admin role required: Global Admin and Location Admin

Feature availability varies by plan. Check What's in each plan on our pricing page to see if it's included in yours, or talk to our sales team about upgrading.
Enhance security and showcase important information by creating custom badges with Visitly. Personalize badges for a polished look and improved visitor management.
How To Customize A Visitor Badge
- Navigate to the Locations page from the Visitly dashboard.
- Click Edit on the location card you want to update.
- Click Custom Badge in the left panel to open the customization options.
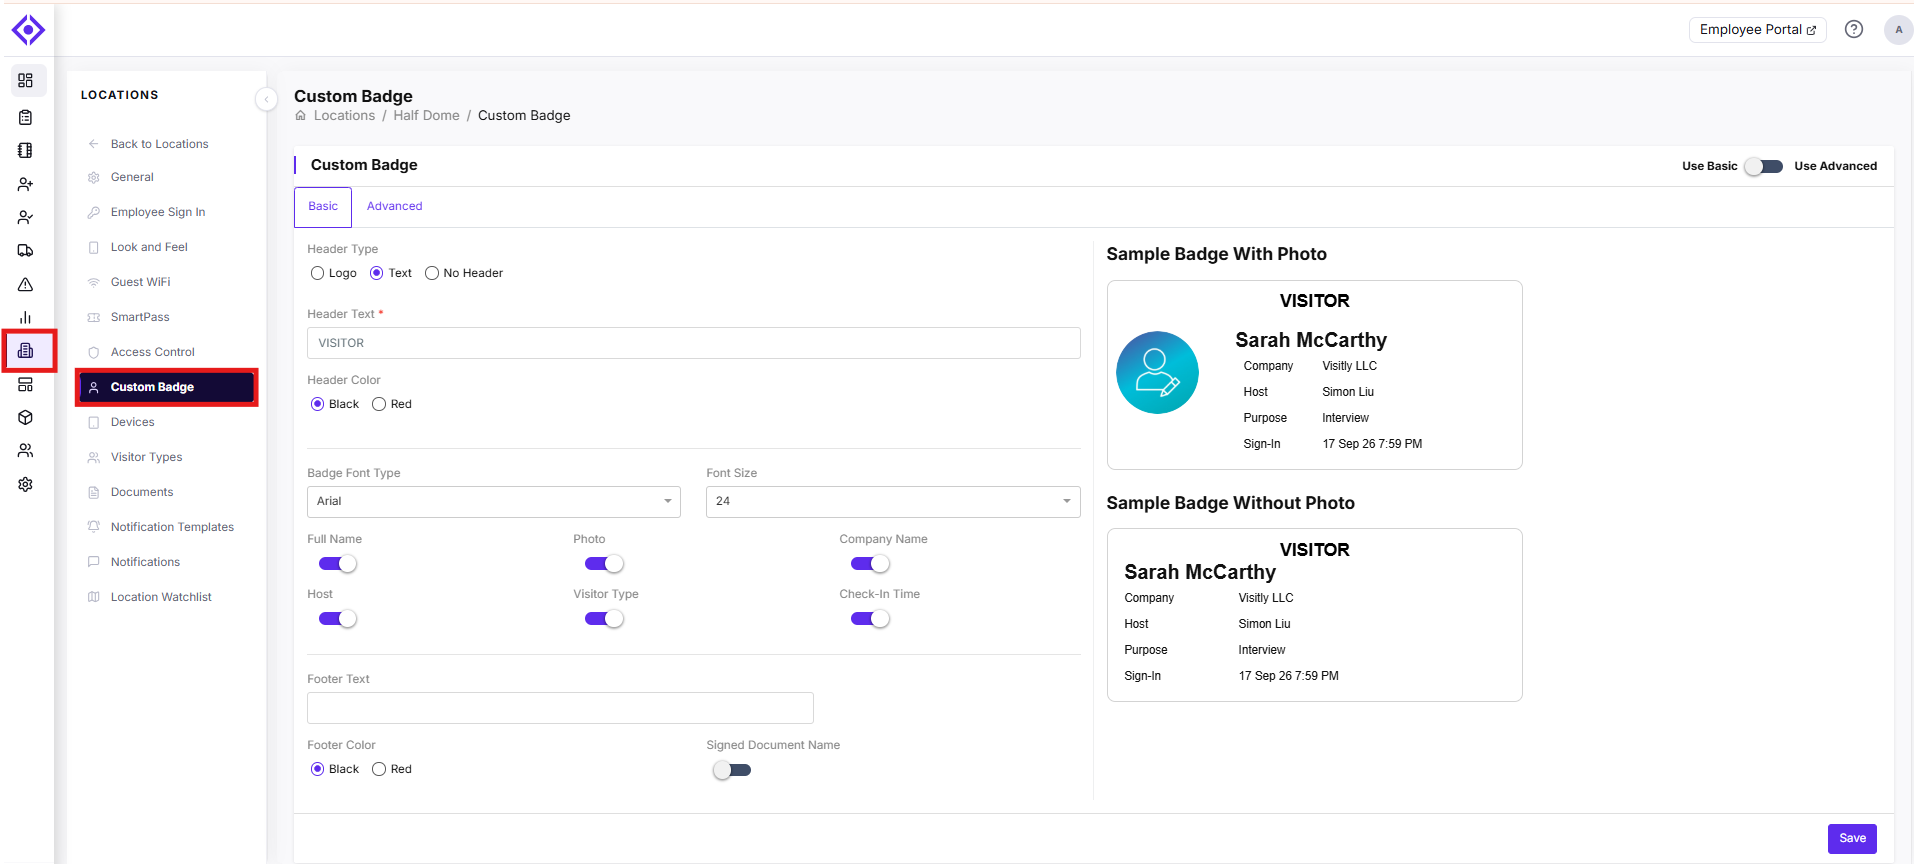
Basic Customization
The Basic Customization option allows you to quickly customize essential elements of the badge, such as text, font size, and essential visitor information.
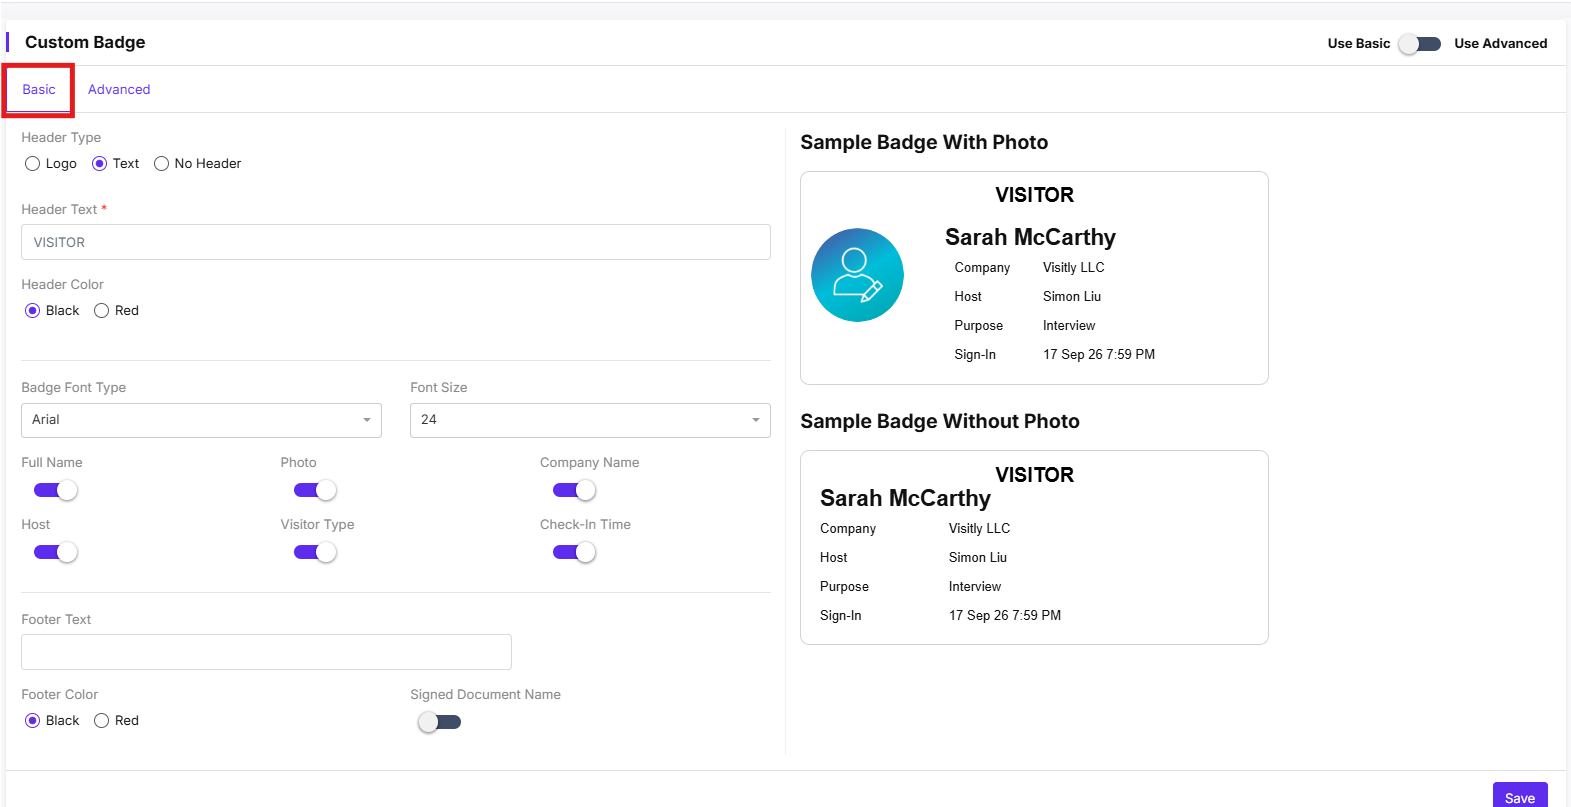
- Open the Custom Badge page.
- Choose the Header Type:
- Pick Font Options:
- Select Information to Display:
- Full Name
- Photo
- Company Name
- Host
- Visitor Type
- Check-In Time
- Customize the Footer:
- Enter Footer Text
- Choose Footer Color
- Enable/Disable Signed Document.
- Click Save to apply your changes.
Advanced Customization
If you need more design flexibility, use the Advanced Customization option. Modify layout elements, image sizes, and other design components. You can also add QR codes for easier access control.
⭐ Note: Advanced badge customization is available exclusively with the Enterprise plan.
- Open the Custom Badge page.
- Click Advanced to access advanced options.
- Drag and Drop Elements:
- Drag elements (like the visitor's photo or name) from the left panel and drop them onto the badge.
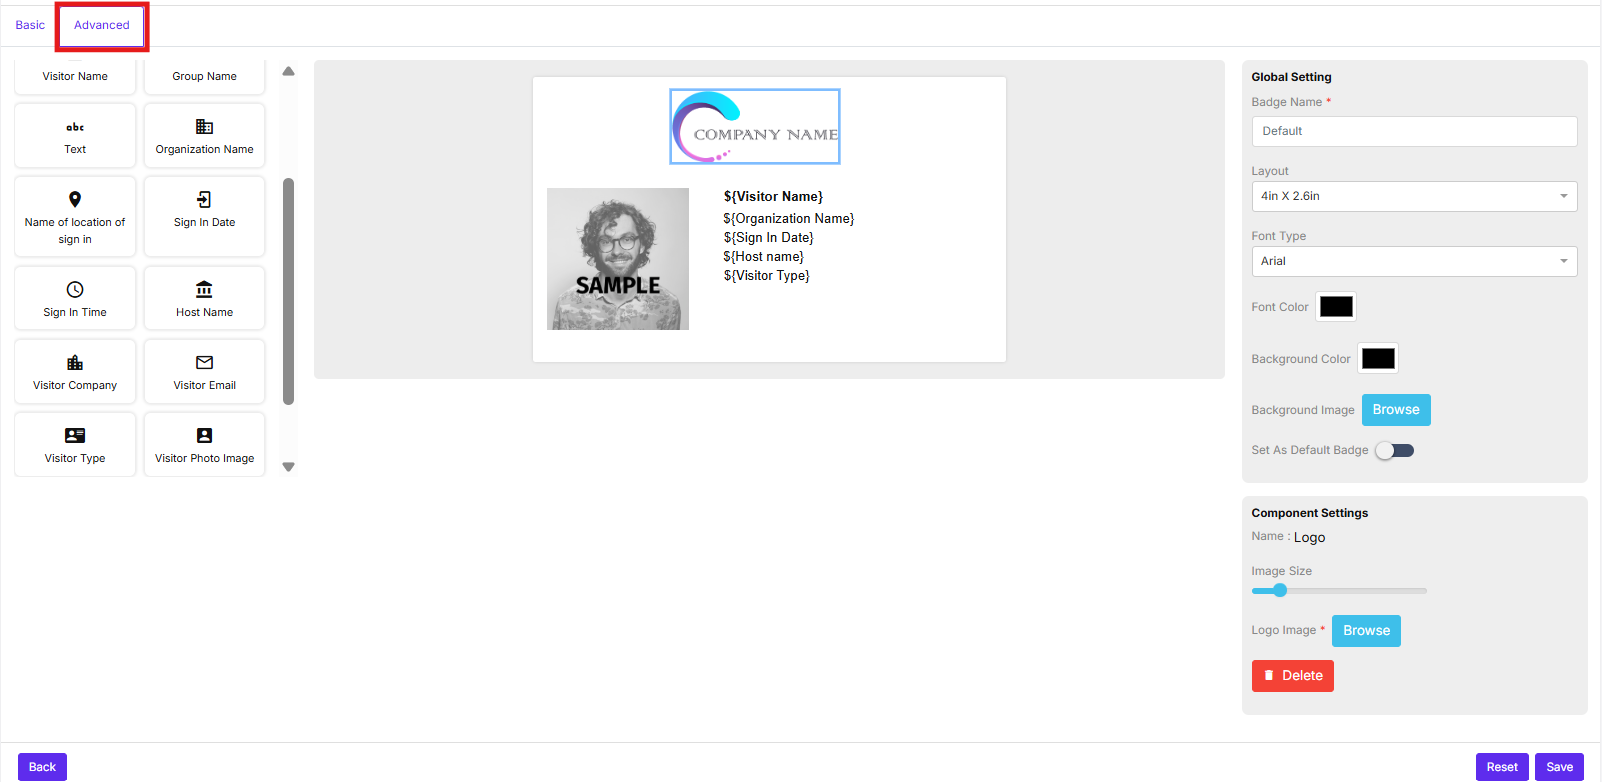
- Adjust layout and settings from the Global Setting panel:
- Choose the badge layout size from the Layout dropdown.
- Select the font style from the Font Type dropdown.
- Enable the Border option if you want a border.
- Adjust Image Size:
- Use the slider in the Component Settings panel to resize the image.
- Click Save to apply your changes.
⭐ Note: To ensure the advanced badge prints correctly, make sure to enable the Advanced Badge toggle in the top right corner.
Adding Custom Fields to Your Badge
Beyond the built-in visitor details, you can add any of your organization's custom fields to an advanced badge design, so the printed badge shows exactly the information you need.
In the fields toolbar, alongside built-in options like Visitor Name, Company, and Host Name, you'll find a Custom Field card.
- Drag Custom Field onto the badge canvas.
- Select the dropped element to open its properties panel.
- Under Custom Field, use the Select Custom Field dropdown to choose which of your organization's custom fields this element should show.
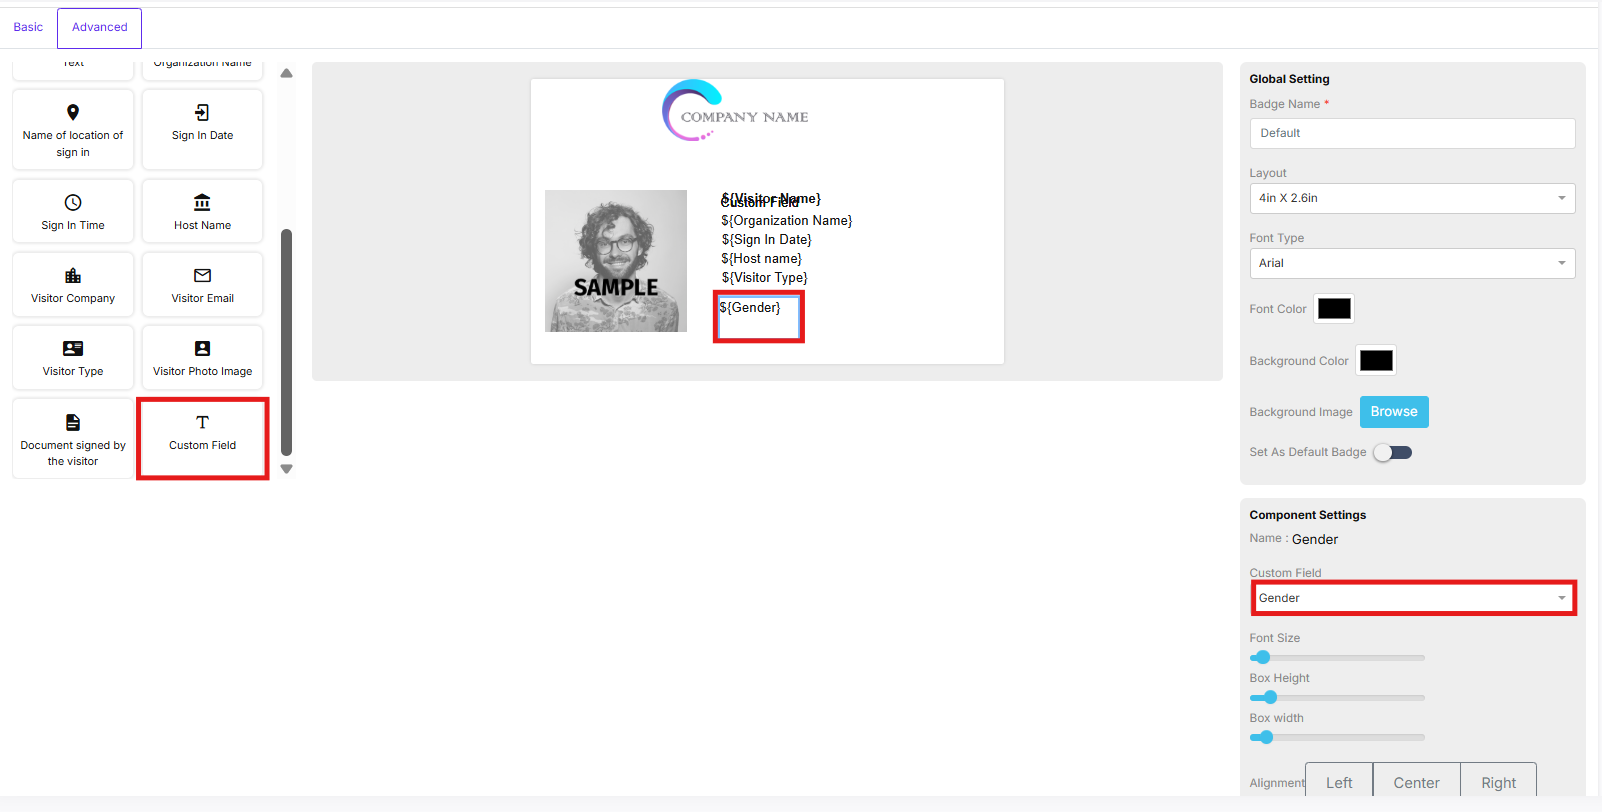
- To edit a field already placed on the canvas, select it and use the same Select Custom Field dropdown to switch it to a different field at any time.
- Use the text styling controls (font, size, color, alignment) to adjust the element like any other text field on the badge.
Only active custom fields appear in the Select Custom Field dropdown — a deleted or deactivated custom field won't show as an option. While designing, the canvas shows a placeholder with the field's name; when a badge prints for a visitor, that placeholder is replaced with their actual value for that field.
⭐ Note: Adding custom fields to a badge only applies to the Advanced badge designer, not the Basic badge layout, and requires the Advanced Badge Designer entitlement on your plan.
Whether you require a simple setup with key details or a fully branded, custom design, Visitly ensures an effortless and efficient process tailored to your business needs.