Admin role required: Global Admin

Feature availability varies by plan. Check What's in each plan on our pricing page to see if it's included in yours, or talk to our sales team about upgrading.
Visitly allows you to assign user delegates to receive important notifications on behalf of specified users, ensuring seamless information flow, effective communication, and keeping key contacts informed.
Adding A User Delegate
1. Go to Users and select a user by clicking on it.
2. Click Assign Delegate on the user profile page.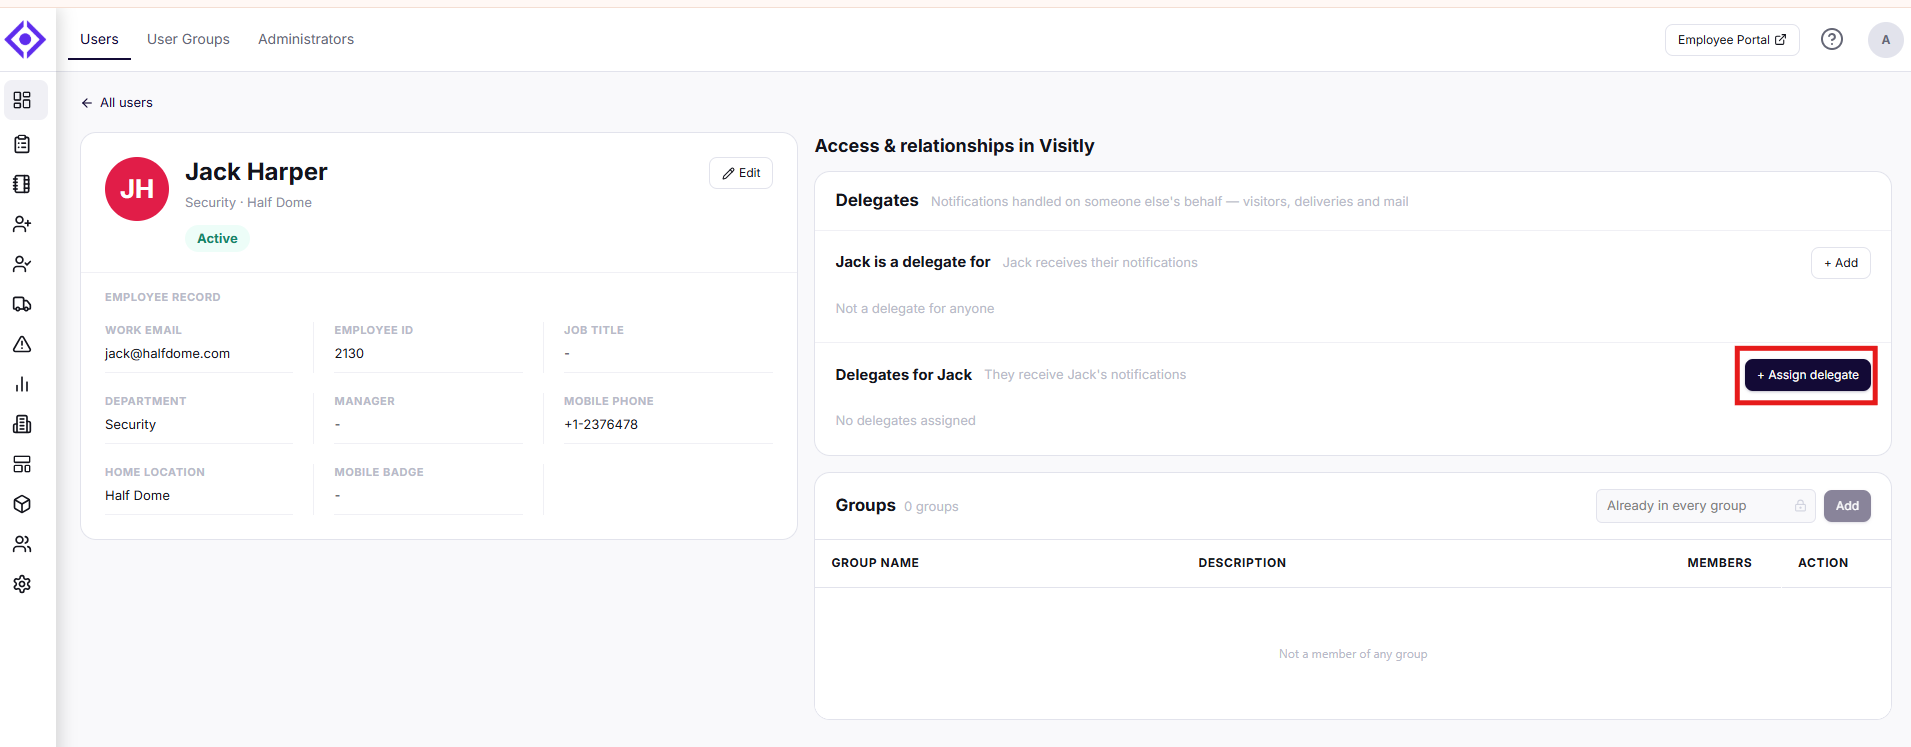
3. Fill in the fields in the Assign Delegate popup.
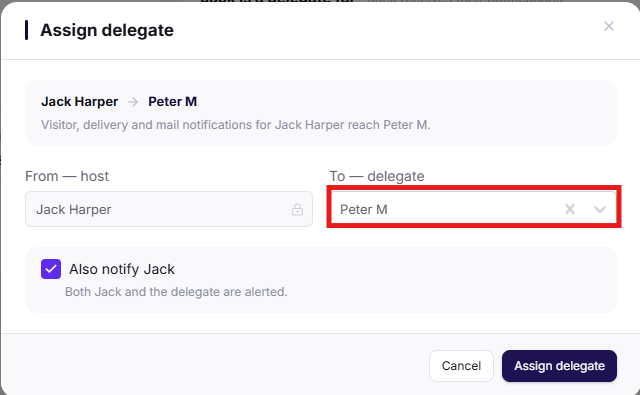
⭐ Note: Only registered users in the system can be assigned as delegates. For more details, refer to Import Users & Hosts.
4. Select Also notify {{user name}} if you wish to notify the user as well.
5. Click Assign delegate to complete the setup.
Deleting A User Delegate
1. On the User profile page, locate the delegate you wish to remove.
3. Click Yes to confirm deletion.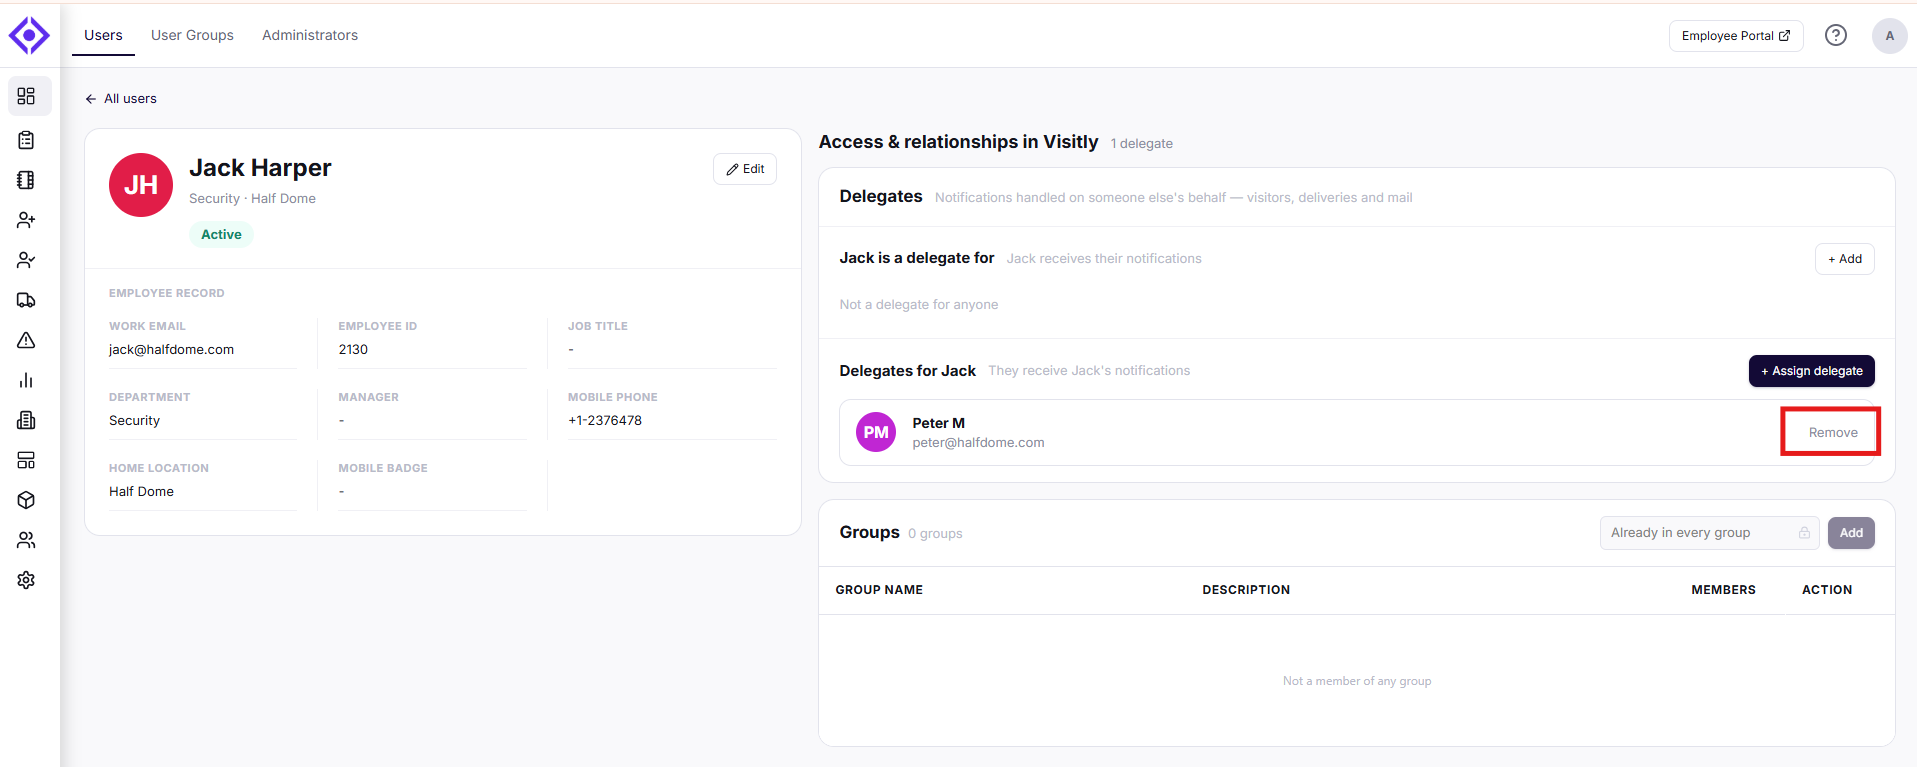
Need help? Contact the Visitly support team at support@visitly.io
Was this article helpful?
That’s Great!
Thank you for your feedback
Sorry! We couldn't be helpful
Thank you for your feedback
Feedback sent
We appreciate your effort and will try to fix the article