Admin role required: Global Admin and Location Admin

Feature availability varies by plan. Check What's in each plan on our pricing page to see if it's included in yours, or talk to our sales team about upgrading.
Strengthen your business security with Watchlist feature. Configure a Location Watchlist for specific sites — with severity-based flagging and automated notifications for every watchlist hit.
Enable the Watchlist for a Location
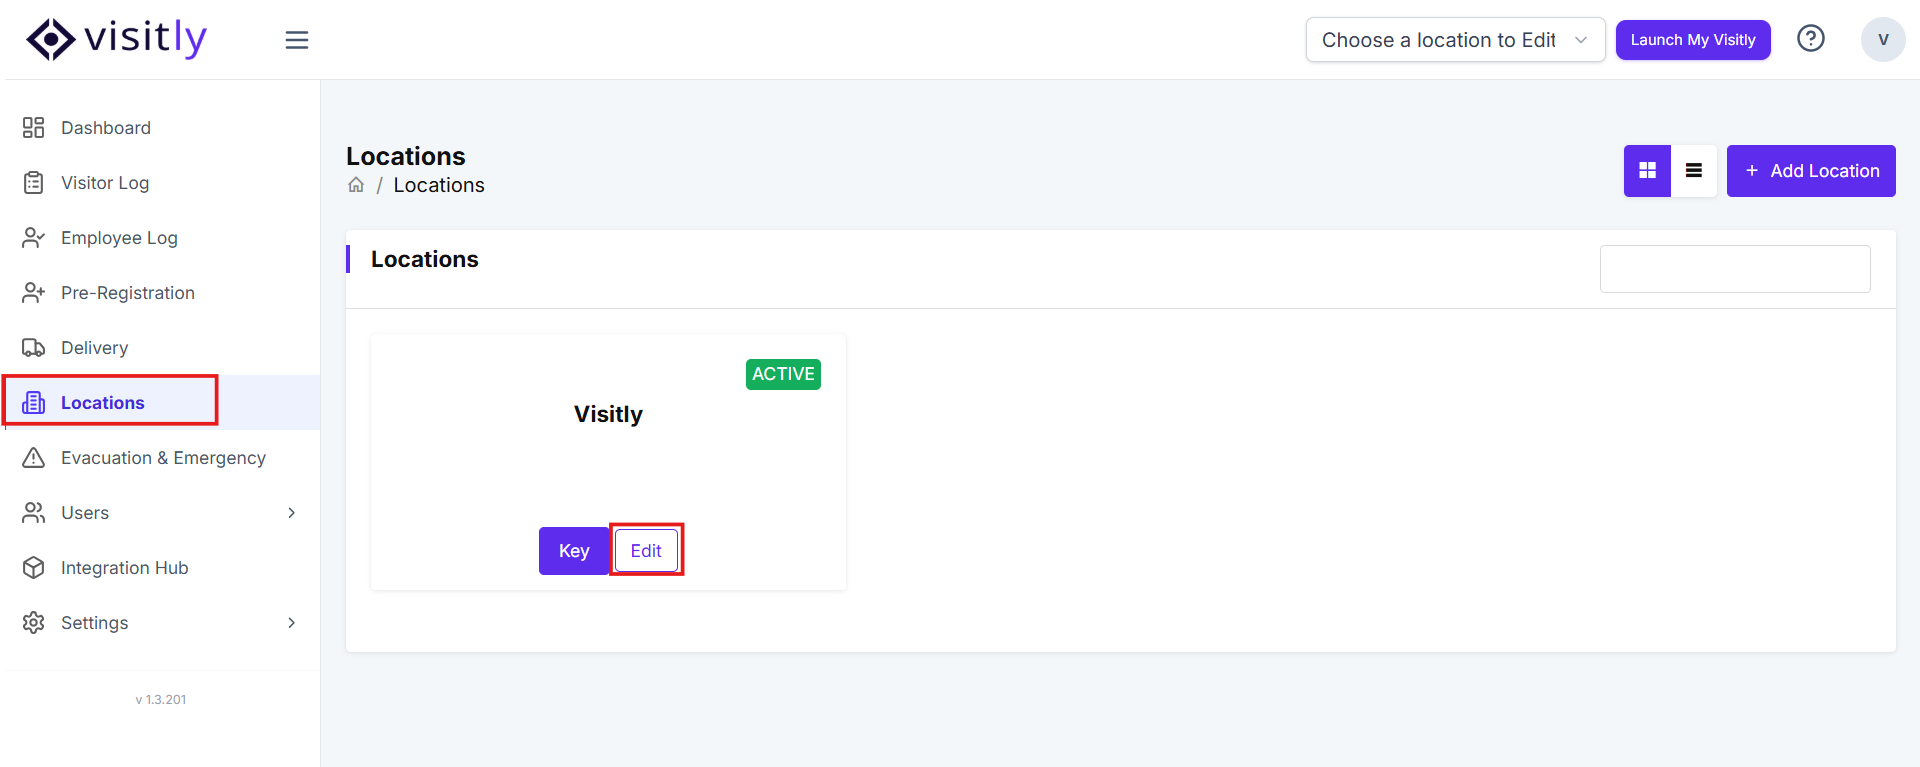
- Navigate to the Admin Dashboard > Select the Location > Edit .
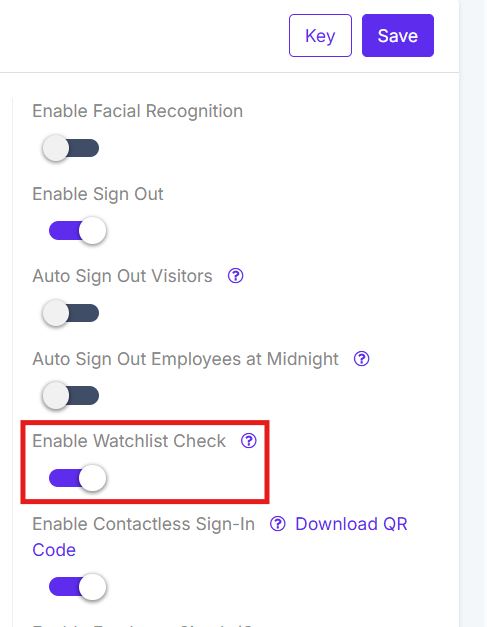
- Toggle the Enable Watchlist Check button to activate visitor checks against the watchlist for that location.
Your watchlist check is now active for this location.
Add a New Location Watchlist Entry
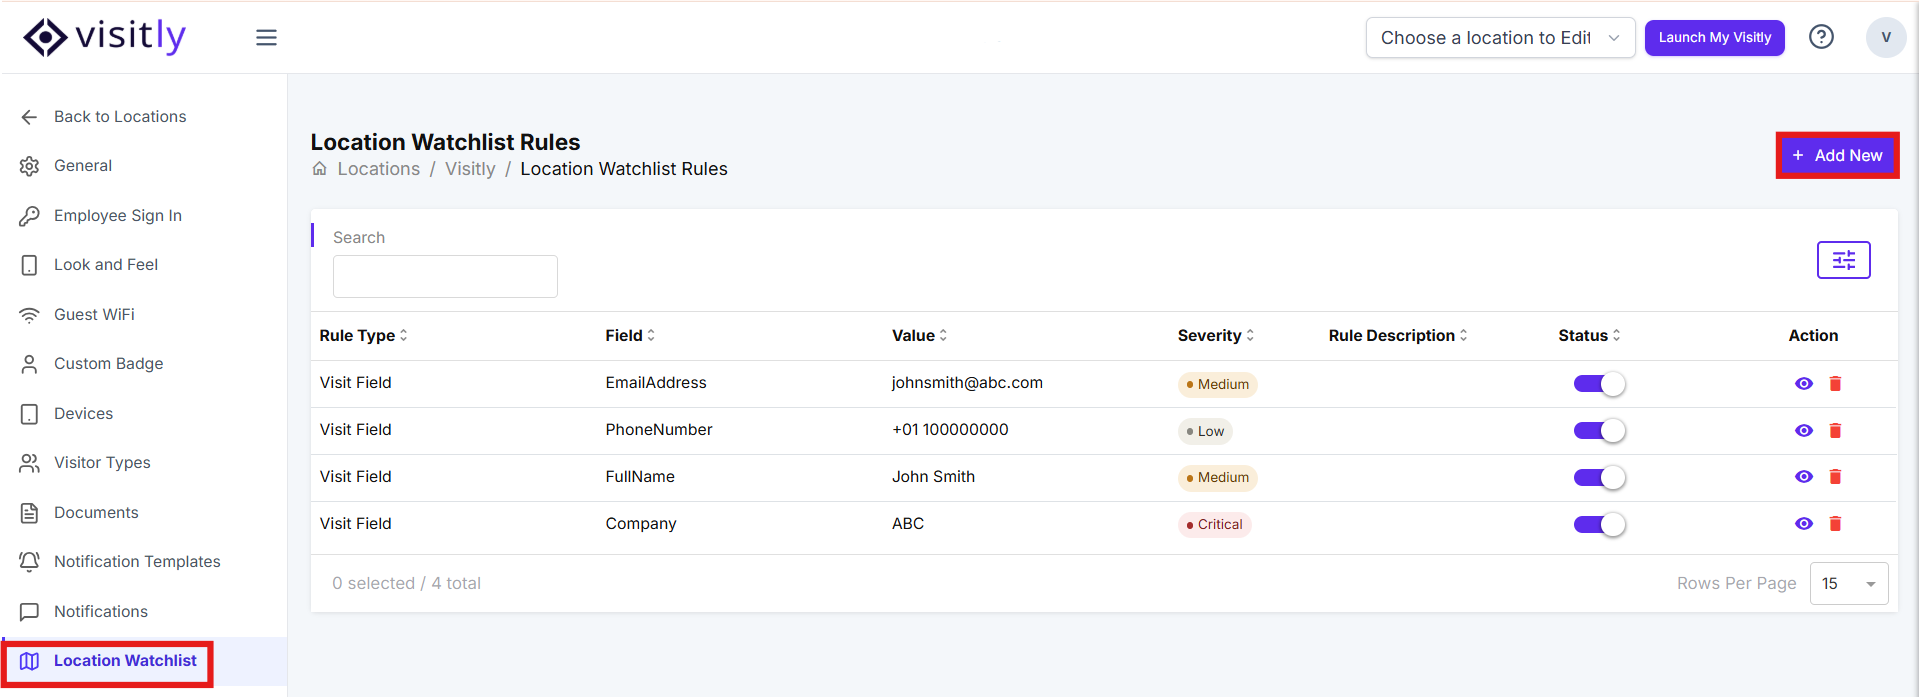
- Navigate to the Admin Dashboard> Select a Location> Edit.
- Click the Location Watchlist tab at the bottom of the left panel.
- Select Add New in the top-right corner to open the Create Local Watchlist panel.
- Select a Watchlist Group Type:
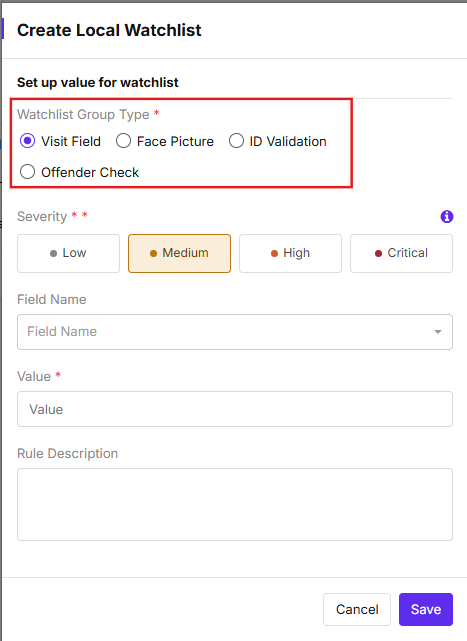
Group Type | What it monitors |
|---|---|
Visit Field | A specific data field collected during check-in (e.g., Full Name, Company) |
Face Picture | A photo of a person to match against visitor face data at check-in |
ID Validation | Visitor identity documents scanned during check-in |
Offender Check | Flags visitors matched against registered offender records |
- Set the Severity level for this watchlist entry:
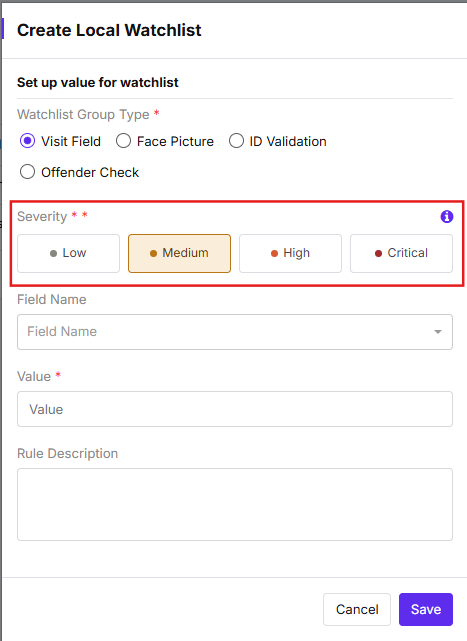
Severity | When to use |
|---|---|
Low | General awareness; low-risk flag |
Medium | Moderate concern requiring review |
High | Elevated risk requiring immediate attention |
Critical | Highest risk; requires urgent action |
- Complete the remaining fields based on your selected group type:
For Visit Field: 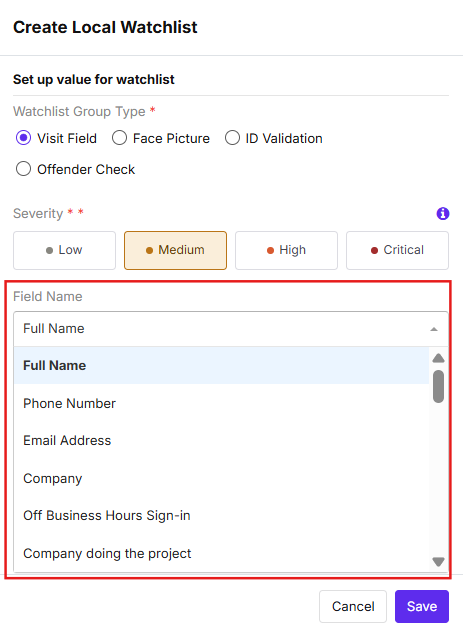
- Select a Field Name (e.g., Full Name) to specify the attribute to monitor.
- Enter the Value that will trigger a watchlist match (e.g., a specific name or company).
For Face Picture: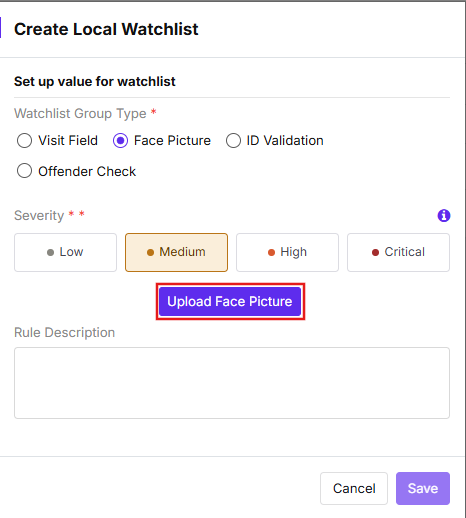
- Click Upload Face Picture to upload a clear image of the person to include in the watchlist.
For ID Validation: 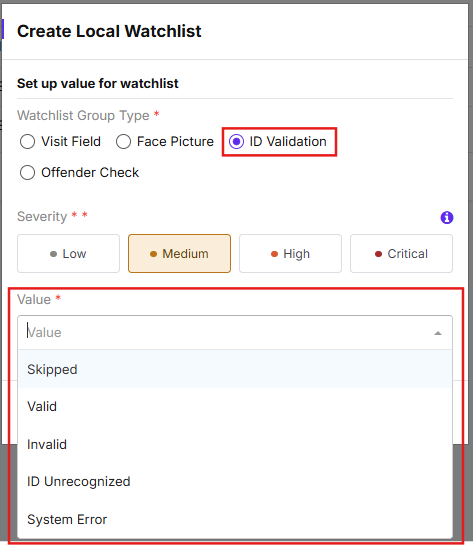
- Select the Value that will trigger a watchlist match:
Value | Description |
|---|---|
Skipped | Visitor skipped the ID scan step |
Valid | ID was scanned and verified as valid |
Invalid | ID was scanned but failed validation |
ID Unrecognized | ID was presented but could not be read |
System Error | A technical error occurred during the ID scan |
For Offender Check: 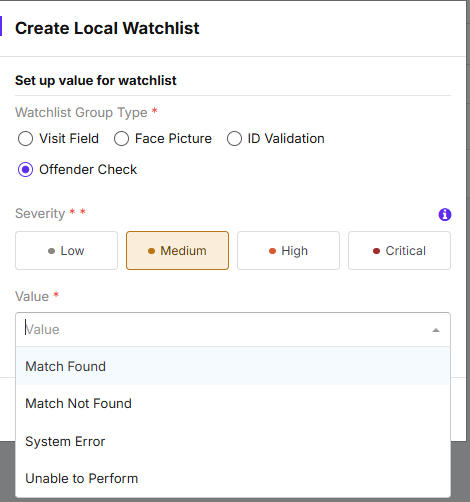
- Select the Value that will trigger a watchlist match.
Value | Description |
|---|---|
Match Found | Visitor matched a record in the offender database |
Match Not Found | No offender record match was found |
System Error | A technical error occurred during the check |
Unable to Perform | The offender check could not be completed |
- Add an optional Rule Description to clarify the purpose of this entry.
- Click Save to activate the watchlist rule.
Tip: Use descriptive Rule Descriptions so your team understands why each entry was added — especially helpful for entries created by others.
Managing multiple locations? Repeat these steps for each location where you want the watchlist rule to apply. Global watchlist entries apply automatically across all locations.
Set Up Watchlist Notifications
Configure automated alerts so the right people are notified the moment a watchlist match occurs.
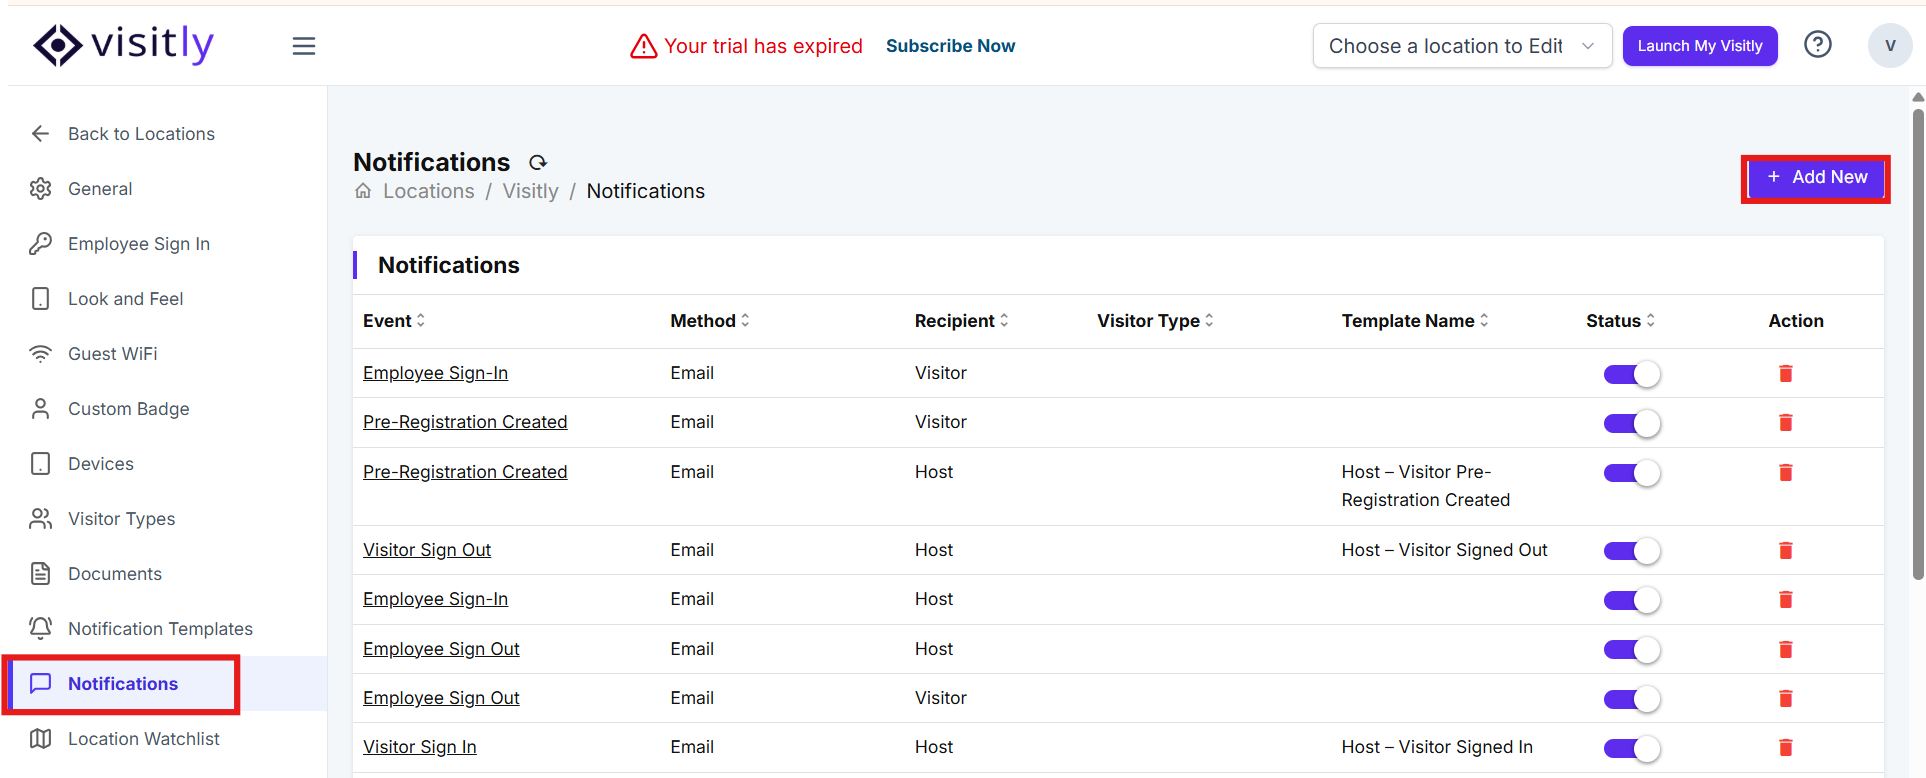
- Navigate to Admin Dashboard> Select the location with the watchlist rules> Edit> Notifications page for the target location.
- Click Add New in the top-right corner.
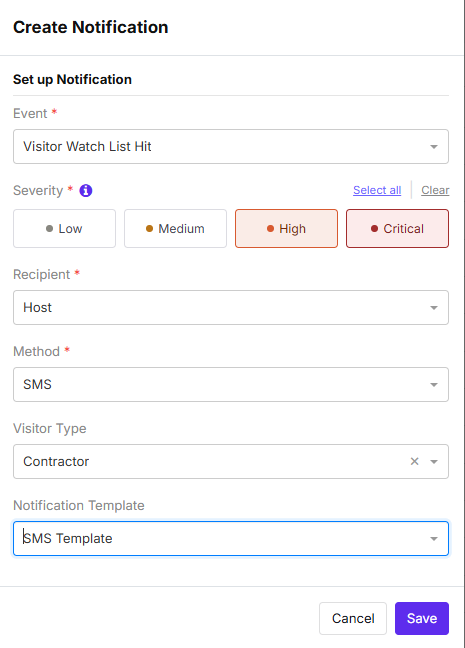
- Set the Event to Visitor Watch List Hit.
- Select the Severity levels that should trigger this notification. Use Select all to notify for every severity level, or choose specific levels (Low, Medium, High, Critical) to target alerts by risk tier.
- Choose the Recipient for this notification:
Recipient TypeDescriptionHostThe person expecting the visitorCustomA person not listed as a Visitly user — enter their email addressUserA registered Visitly user or employee — search and select their nameChannelA connected messaging channel (e.g., a Slack or Microsoft Teams channel) - Select the Method for delivery:
MethodNotesEmailStandard delivery, no add-on requiredSMSAvailable as an add-on feature — contact support to enableSlackDelivers notifications to a connected Slack channelMicrosoft TeamsDelivers notifications to a connected Microsoft Teams channel - Optionally, select a Visitor Type to limit notifications to a specific visitor category. Leave blank to receive notifications for all visitor types.
- Click Save to apply the notification rule.
Your watchlist notification is now active for this location.
Review Flagged Visitors Flagged in the Visitor Log
Visitors who match watchlist criteria during sign-in are flagged for review. 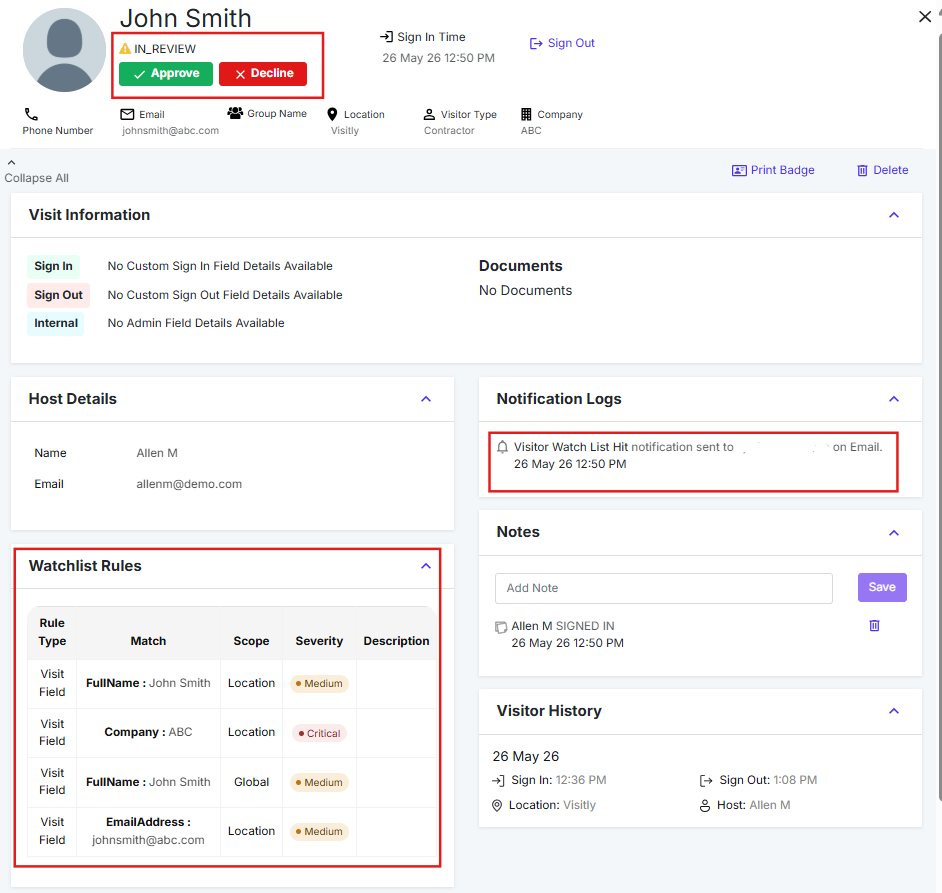
- Navigate to Admin Dashboard>Visitor Log> Visitor Details for the flagged visitor.
- Review the visitor's information and the watchlist match details.
- Select Approve or Decline to record your decision.
- Add relevant notes for record-keeping and future reference.
Best practice: Always add a note when declining a visitor so your team has a clear record of the reason.
Troubleshooting
- A visitor wasn't flagged despite matching a watchlist entry.
Confirm the Enable Watchlist Check toggle is active for the location. For Visit Field entries, verify the Field Name and Value match the visitor's submitted data exactly, including spacing and capitalization. - The watchlist notification wasn't delivered.
Check that the notification rule is saved and that the correct severity levels are selected. If using SMS, confirm the add-on is enabled for your account by contacting support@visitly.io. - The severity level isn't saving correctly.
Severity is a required field — ensure one level is selected before clicking Save. If the issue persists, refresh the page and re-enter the entry. - A Face Picture entry isn't matching on check-in.
Ensure the uploaded image is clear, well-lit, and shows the person's full face. Low-resolution or partially obscured images may reduce match accuracy.
Need help? Contact the Visitly support team at support@visitly.io.
Was this article helpful?
That’s Great!
Thank you for your feedback
Sorry! We couldn't be helpful
Thank you for your feedback
Feedback sent
We appreciate your effort and will try to fix the article