Admin role required: Global Admin, Location Admin and Front Desk Admin

Feature availability varies by plan. Check What's in each plan on our pricing page to see if it's included in yours, or talk to our sales team about upgrading.
Visitly makes it simple to record visitor details for tracking and on-site management. Efficiently manage visitor information and maintain accurate records.
Add Visitor Entries
1. Go to the Visitor Log from your Visitly dashboard.
Note: Visitor Entry can also be added from the Dashboard.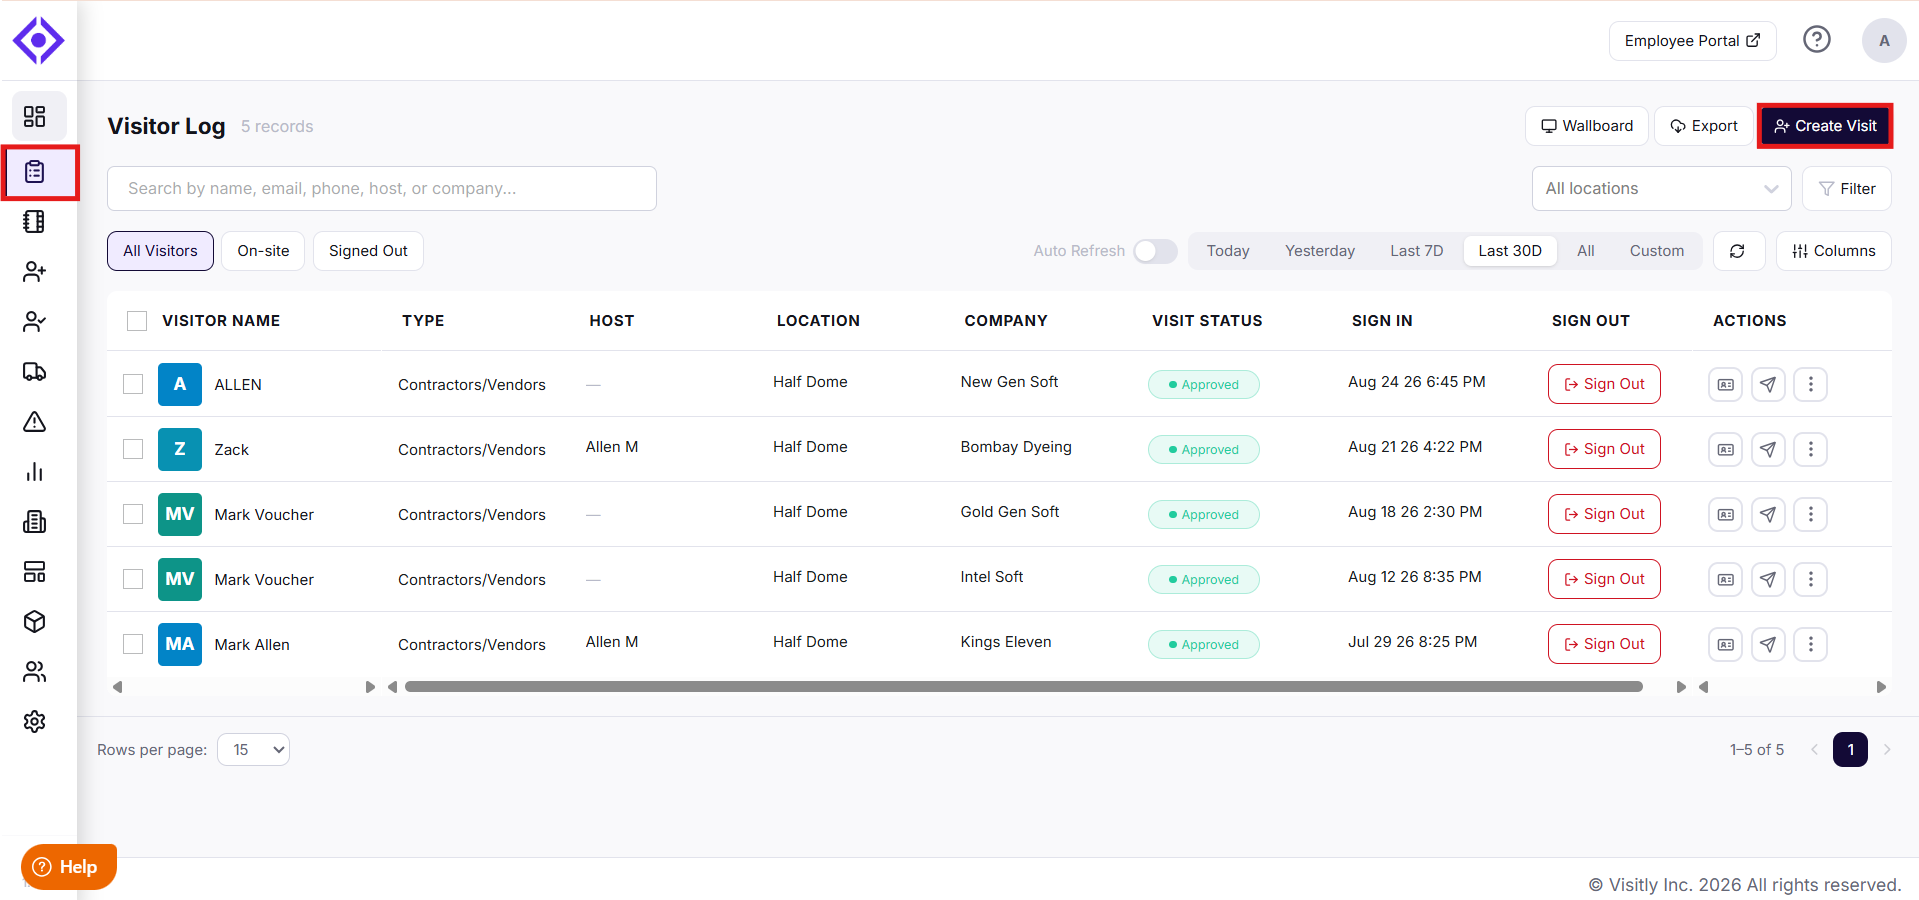
2. Click on the Create Visit button in the top-right corner of the page.
3. Fill in Visitor Details.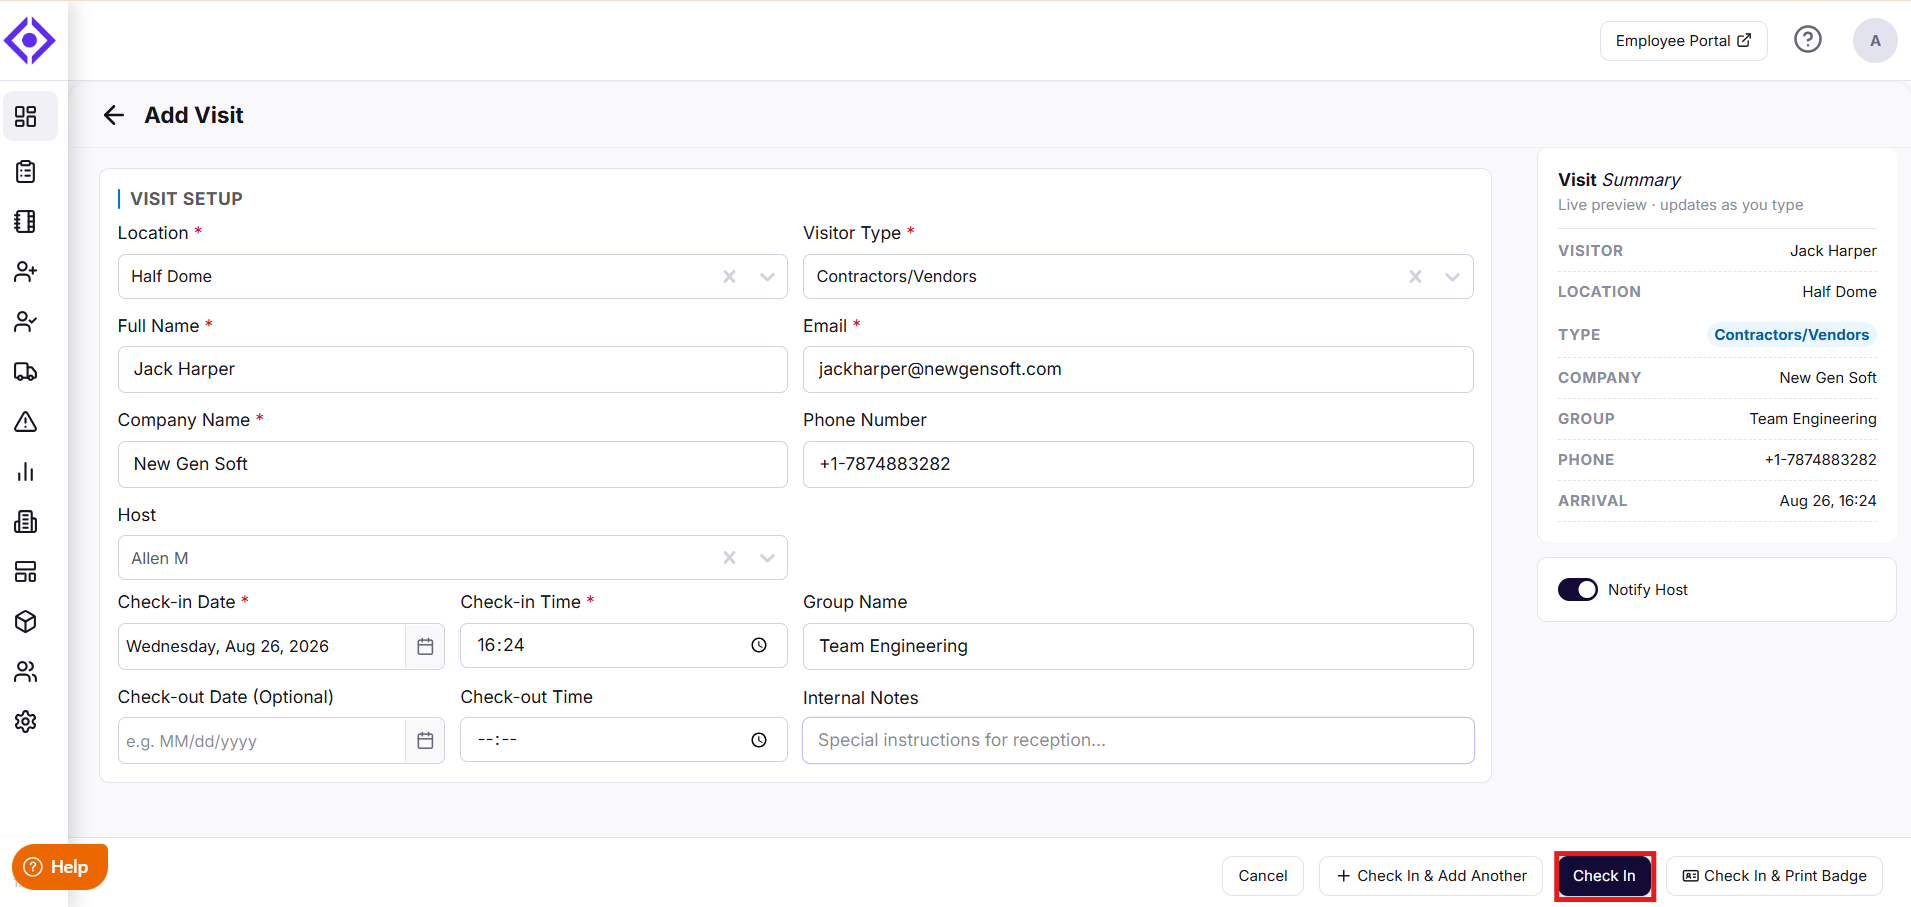
- Location: Select the visitor’s location from the dropdown.
- Visitor Type: Choose the appropriate type from the dropdown.
- Full Name: Provide the visitor’s first and last name.
- Email: Enter the visitor’s email address.
- Host: Specify the name of the person the visitor is meeting.
- Company Name: Enter the visitor’s company name.
- Phone Number: Input the visitor’s contact number.
- Notify Host: Enable this to send a notification to the host.
- Check-In Date & Time: Enter the visitor’s check-in date and time.
- Check-Out Date & Time: Enter the visitor’s check-out date and time.
- Notes: Add any additional details or purpose of the visit (optional).
4. Click on check in to add the Visitor Entry.
Note: Select Check-In & Add Another to add another visitor entry.
Download a Visit Report
- Go to the Visitor Log from your Visitly dashboard.
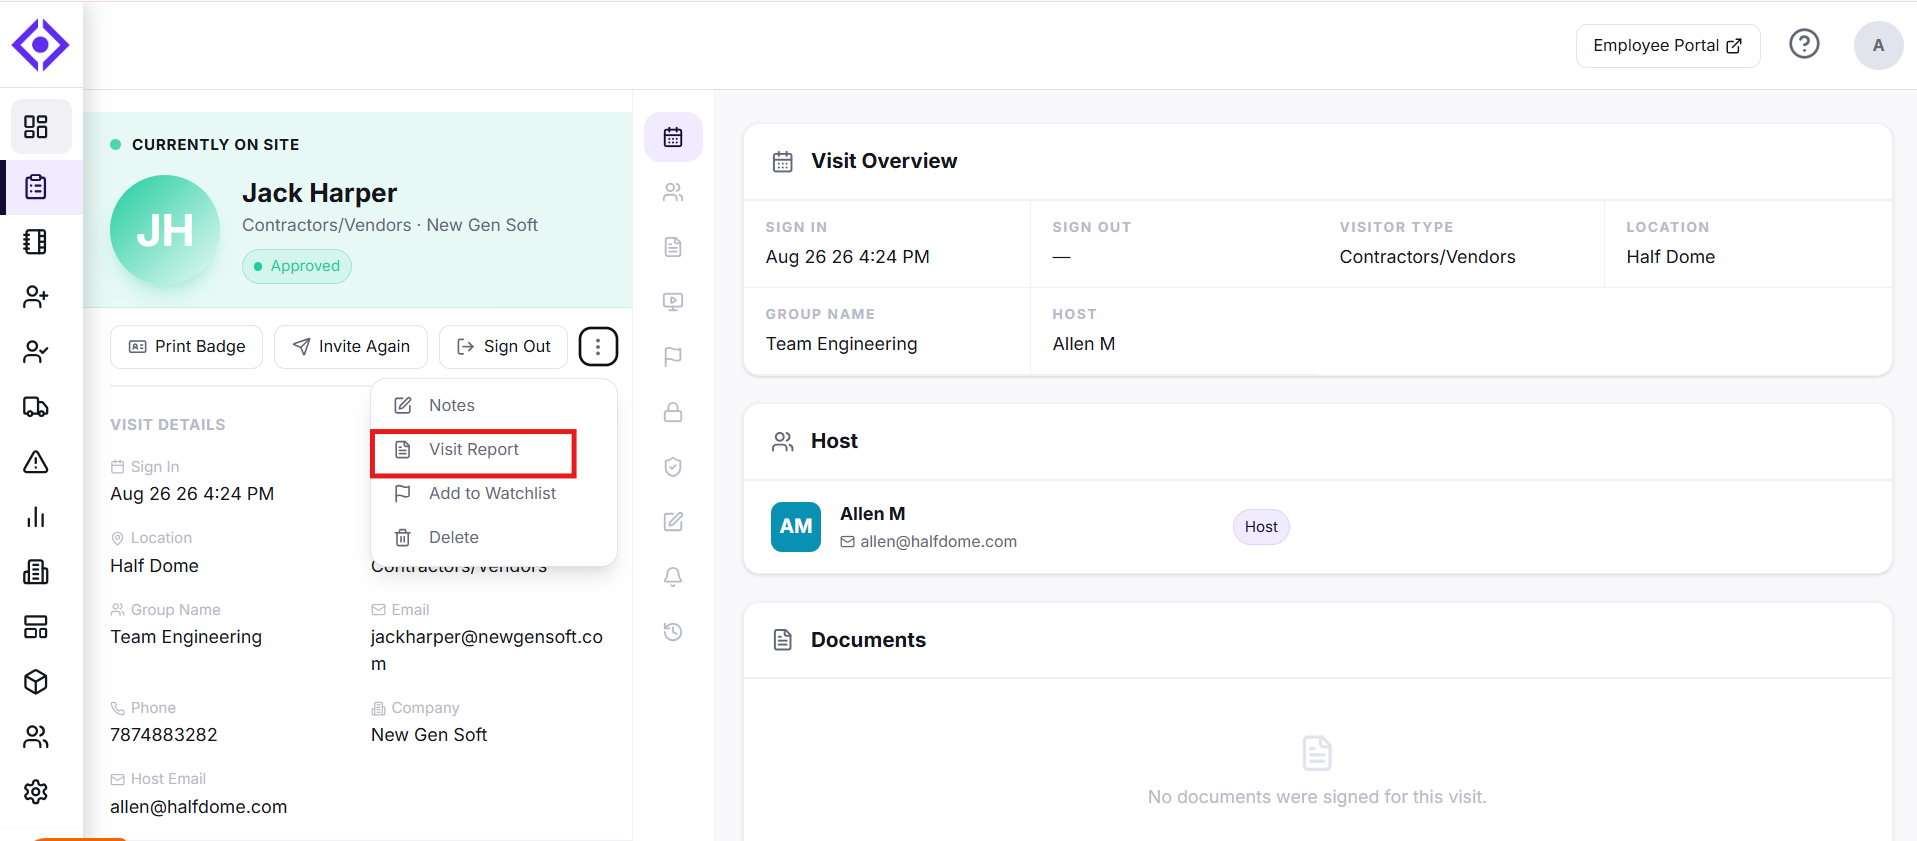
- Click the visitor you want a report for to open their profile.
- Click the three-dot menu next to Invite Again.
- Select Visit Report to download it.
Note: The Visit Report includes sign-in times, visitor type, location, host, and verification status for the visit.
Need help? Contact the Visitly support team at support@visitly.io.
Was this article helpful?
That’s Great!
Thank you for your feedback
Sorry! We couldn't be helpful
Thank you for your feedback
Feedback sent
We appreciate your effort and will try to fix the article