Admin role required: Global Admin

Feature availability varies by plan. Check What's in each plan on our pricing page to see if it's included in yours, or talk to our sales team about upgrading.
Smart Pass gives visitors a digital pass in Apple Wallet or Google Wallet, so they can check in and out of your location without interacting to kiosk. The visitor taps their pass, Visitly confirms they're physically at the location, and they're checked in automatically.
How It Works
- Visitly issues a Smart Pass automatically when a visitor is pre-registered, automatically once a returning visitor reaches a set number of visits, or manually when you issue one from the Visitor Directory.
- The pass confirms the visitor's GPS location before allowing check-in or check-out, so visitors can only use it at your location.
- The pass carries your organization's branding, including your display name, colors, and logo.
- The pass updates automatically as the visitor's status changes, from an upcoming visit to on-site to checked out.
Before You Begin
Complete all prerequisites before starting setup. Missing any of these will prevent Smart Pass from working.
Visitly requirements:
- Global Admin access to your Visitly account
- Smart Pass enabled for your organization (contact support@visitly.io to confirm your plan includes Smart Pass)
- Visitor Directory enabled for your organization (included on Business and Enterprise plans)
- At least one location configured, with a test visitor record that has a valid email address
Setup Guide
Step 1: Set your Smart Pass branding
Navigate to Global Settings → Smart Pass. Configure the following, then save:
- Smart Pass display name
- Pass background color
- Pass text color
- Pass logo
Your organization's branding now appears on every Smart Pass you issue.
Step 2: Enable Smart Pass on a location
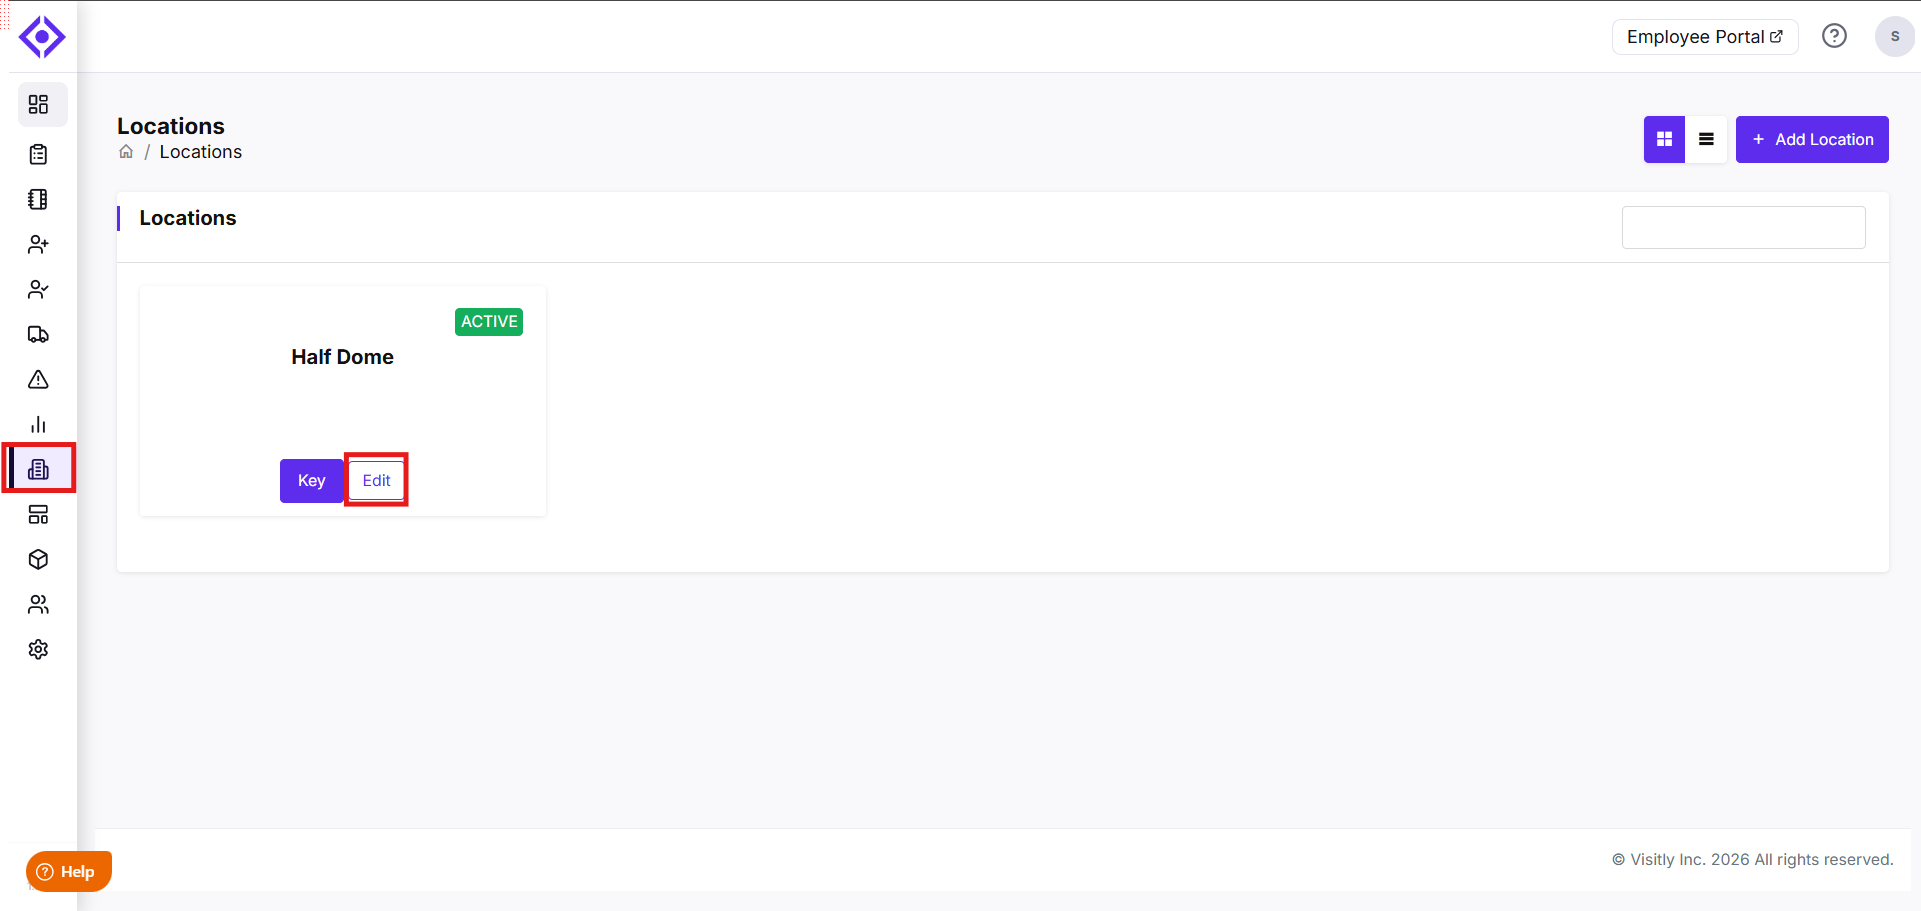
- Navigate to Locations > Edit Location > Smart Pass
- Turn on Smart Pass Enabled and Allow Contactless Check-in Using GeoFence.
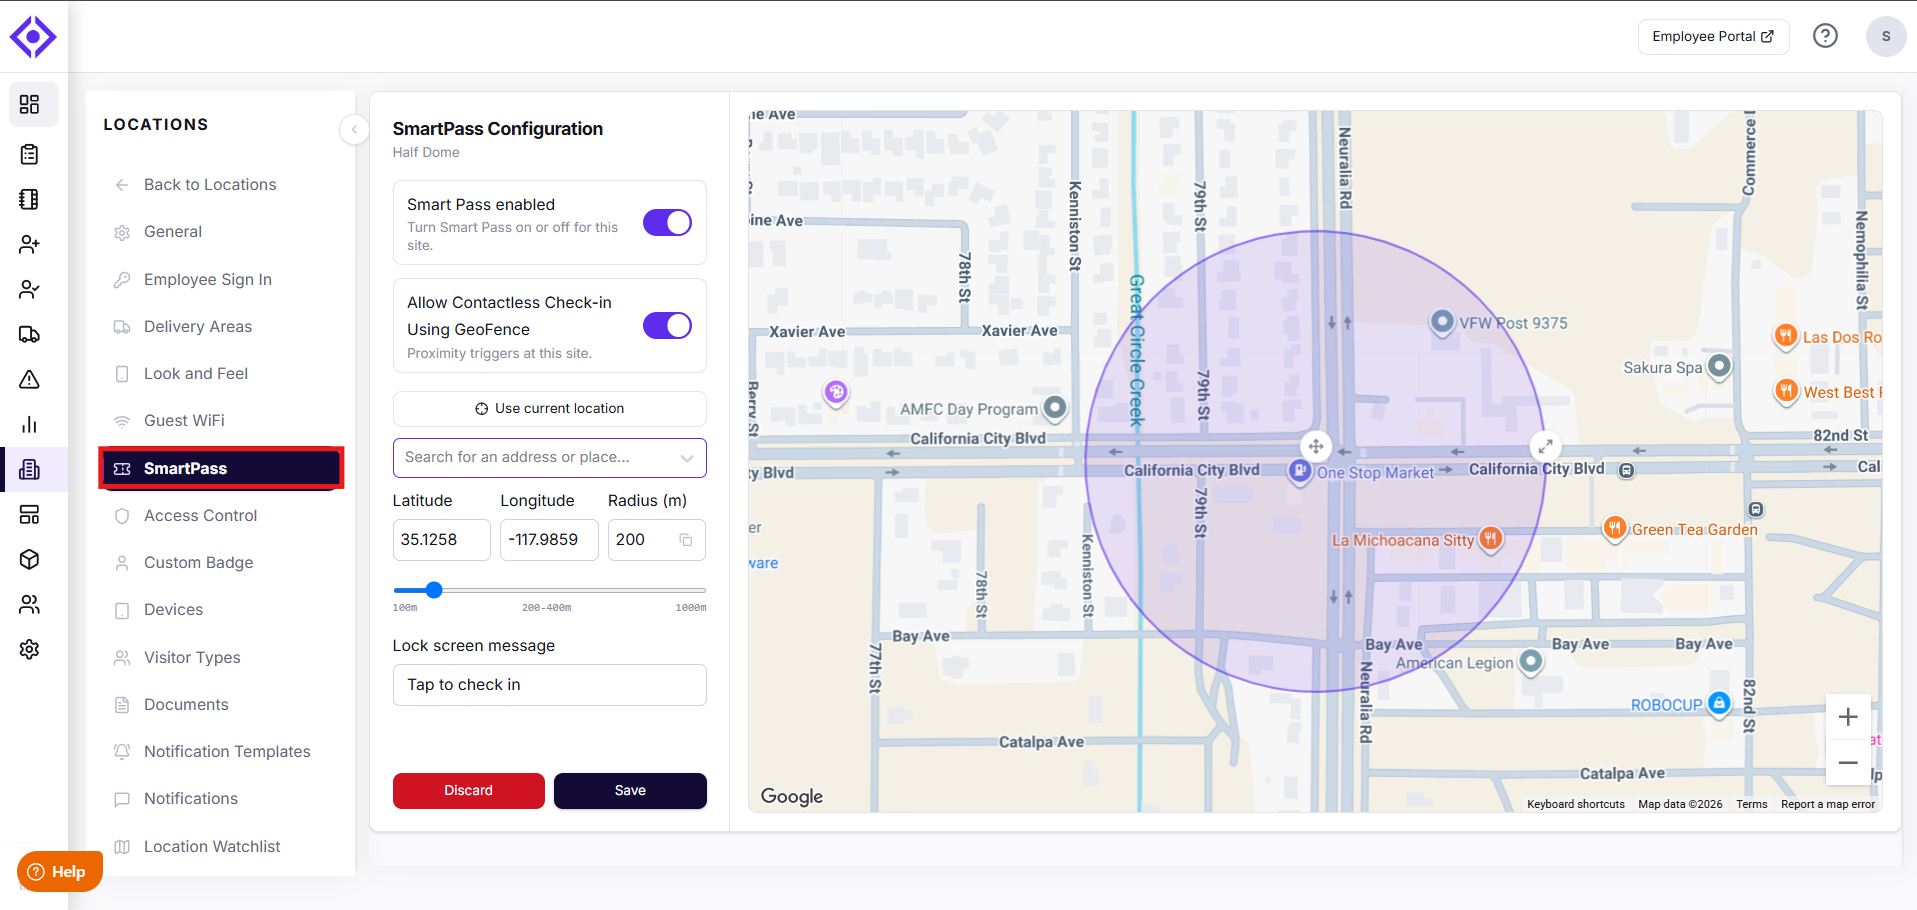
- Set the latitude and longitude (or use your current location), set the radius in meters, and enter the message visitors see on their lock screen.
- Save your changes.
Your location now has an active geofence and is ready to issue Smart Passes.
A location without an enabled geofence cannot be used for Smart Pass. Visitors won't be able to check in or out with their pass at that location.
Managing multiple locations? Repeat this step for each location where you want visitors to use Smart Pass.
Step 3: Confirm the location is ready
- Go to the Visitor Directory and start issuing a Smart Pass to the visitor.
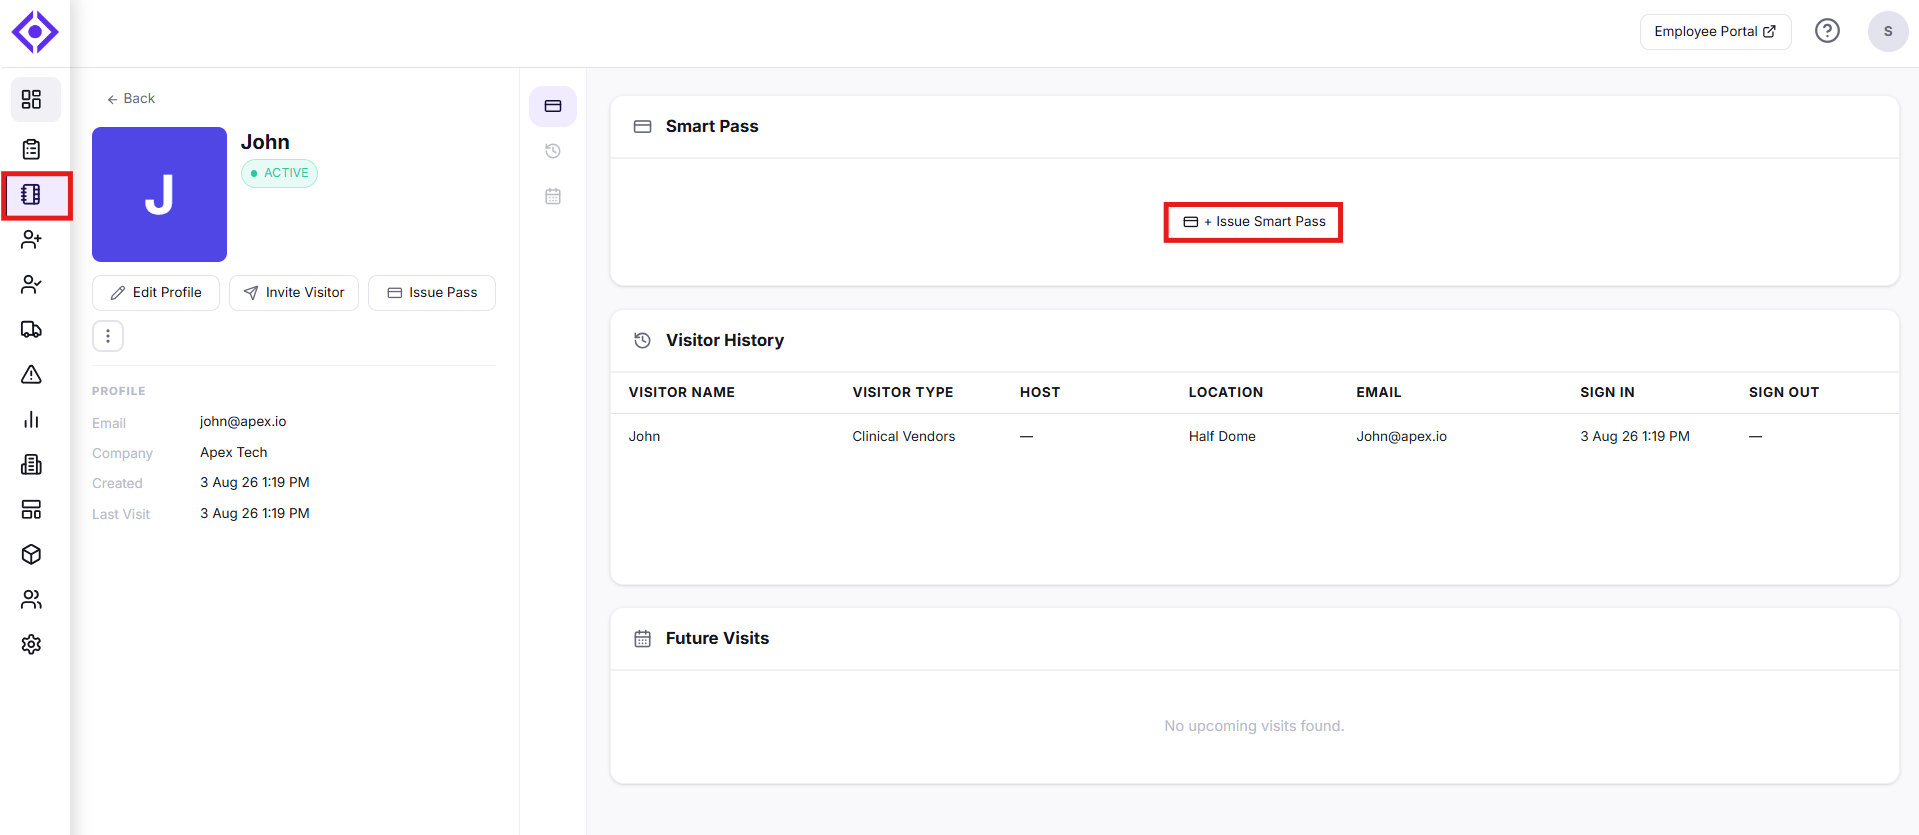
- Your configured location should now appear as a selectable option. If it doesn't, revisit Step 2.
Your location is ready to issue and accept Smart Passes.
Using Smart Pass
Getting a pass to a visitor
A visitor can receive a Smart Pass three ways:
- Automatically, when they're pre-registered (recurring/non-recurring) for an upcoming visit
- Manually, when you issue one from the Visitor Directory
- At the time of check-in by Visitor Log
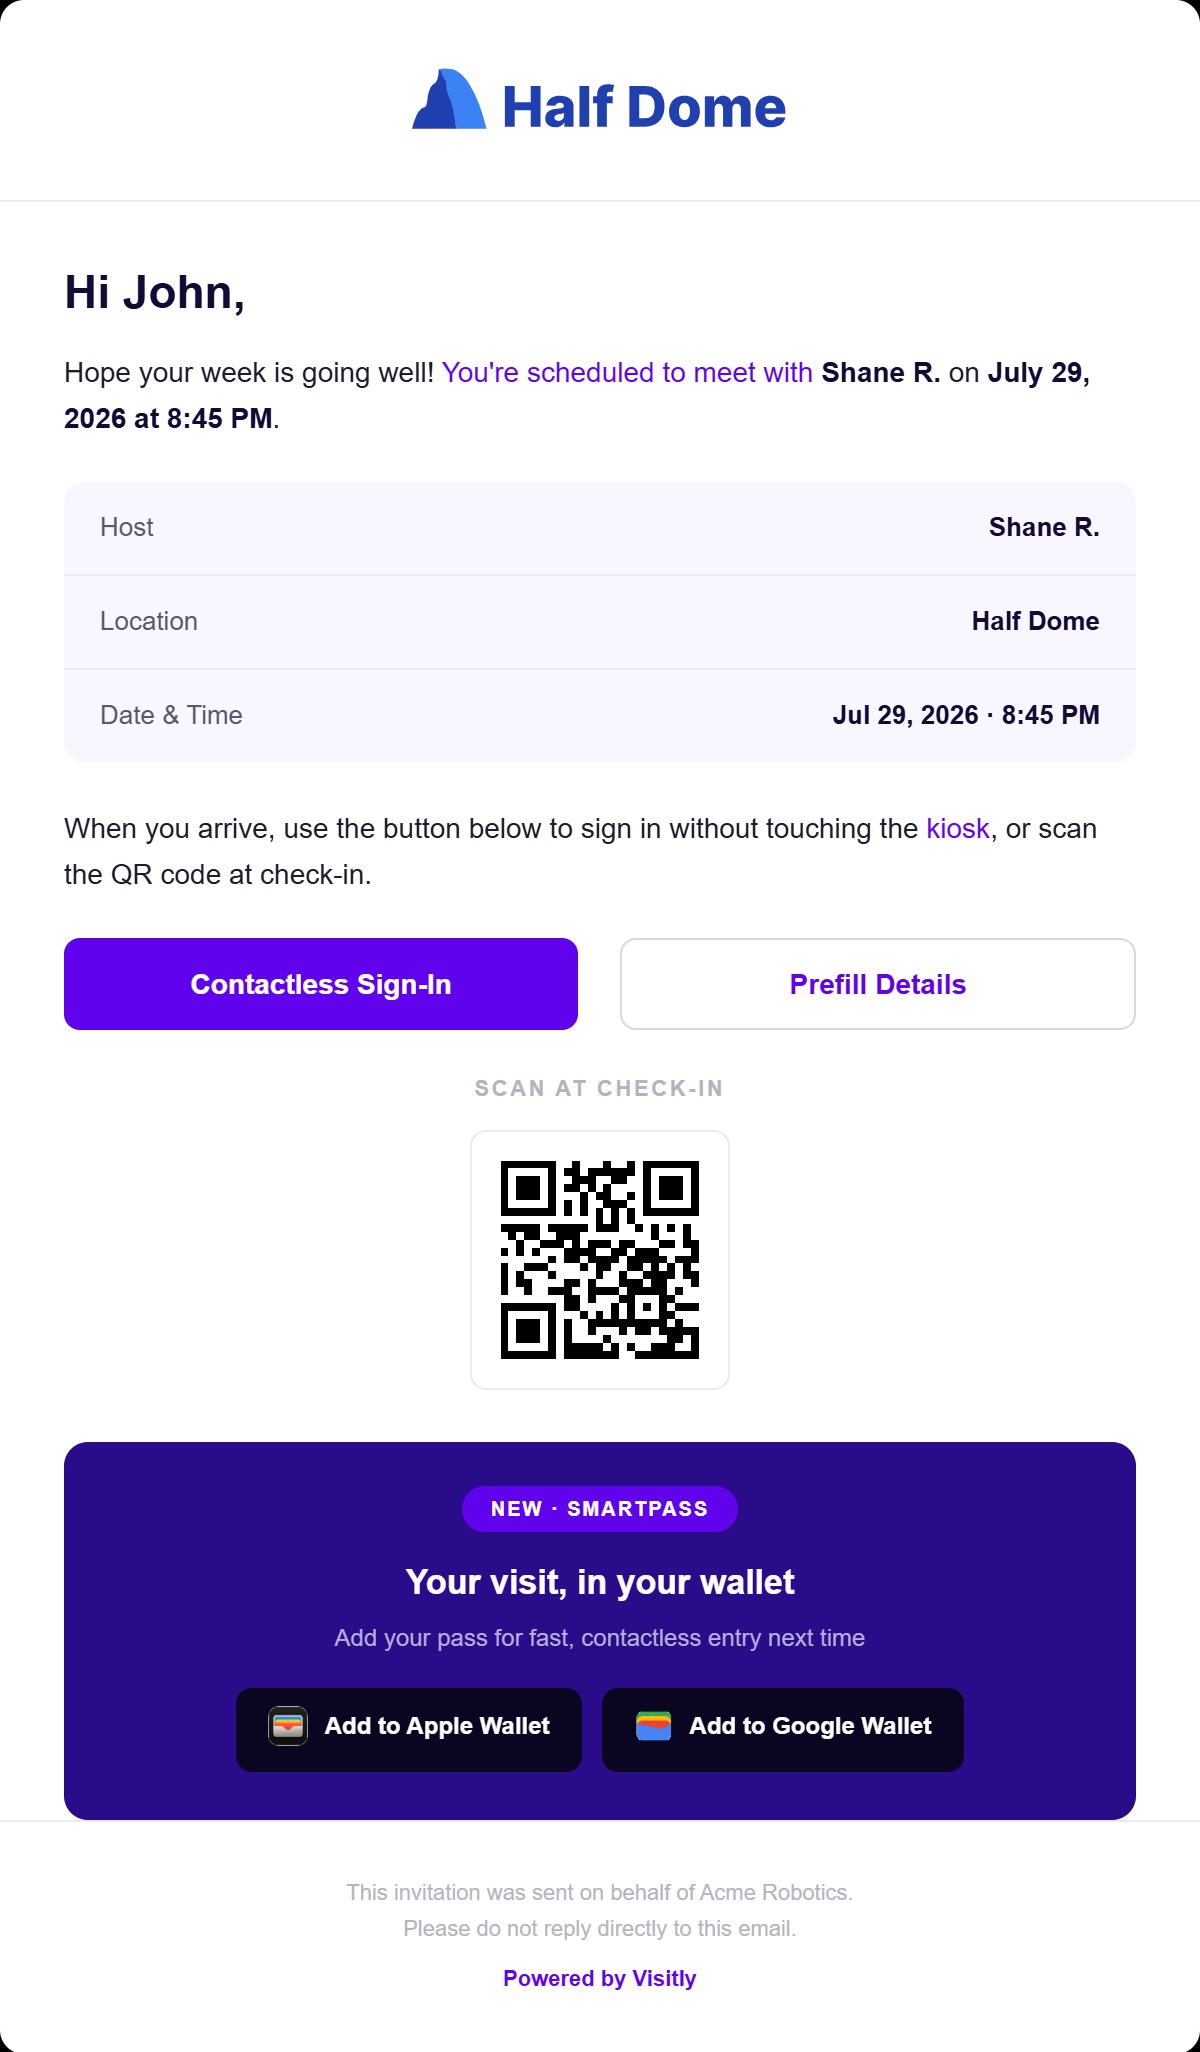
Note: Visitors receives an email when they are issued a SmartPass.
Adding the pass to a wallet
Visitors add their pass directly from their invite or sign-in email, which includes "Add to Apple Wallet" and "Add to Google Wallet" buttons. Once added, the pass displays the visitor's name, visit details, a QR code, and your organization's branding.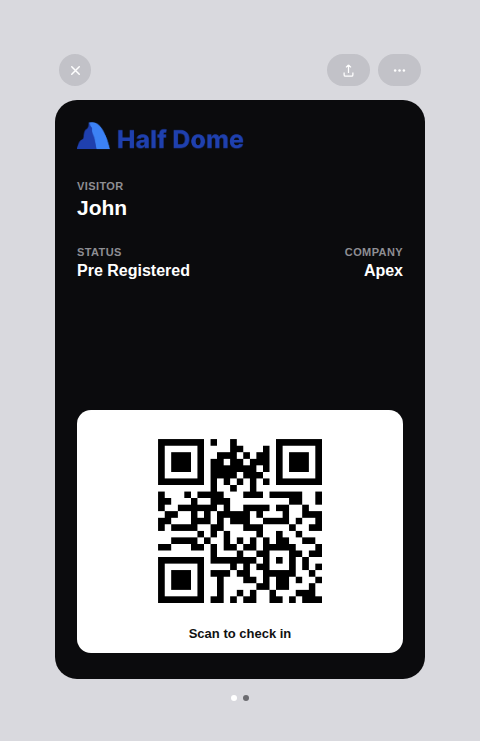
At check-in
- The visitor taps the action button on their pass while they're at the location.
- Visitly confirms their GPS location and opens the check-in screen.
- Once check-in is complete, the pass automatically updates to "On Site."
At check-out
- The visitor taps "Check Out" on their pass while they're still at the location.
- Visitly confirms their GPS location and records the checkout.
- The pass automatically updates to reflect that the visitor has left.
Troubleshooting
Smart Pass settings don't appear in my account.
Your organization's plan doesn't yet include the Smart Pass or Visitor Directory. Contact support@visitly.io to confirm your plan and request access.A visitor didn't receive their pass or wallet buttons in their email.
Confirm the visitor's email address is correctly entered in their visit record. Also confirm your organization hasn't reached its Smart Pass limit and that your subscription is active — both will block new passes from being issued.A visitor can't check in or out using their pass.
Confirm the visitor is physically within the geofence radius you configured for the location. If they're outside the radius, their pass will show an "outside the location" message and block the action.A location isn't selectable when I try to issue a pass.
Confirm Smart Pass is enabled for that location and that its contactless check-in using geofence is turned on. A location without an active geofence can't be used for Smart Pass, even if Smart Pass itself is enabled.I revoked a visitor's pass but need to issue them a new one.
Revoking a pass doesn't prevent future passes. Return to the visitor's record in the Visitor Directory and issue a new Smart Pass — it will be created as a fresh, active pass.
Was this article helpful?
That’s Great!
Thank you for your feedback
Sorry! We couldn't be helpful
Thank you for your feedback
Feedback sent
We appreciate your effort and will try to fix the article