Admin role required: Global Admin

Feature availability varies by plan. Check What's in each plan on our pricing page to see if it's included in yours, or talk to our sales team about upgrading.
Overview
The SharePoint integration automatically archives signed visitor documents to your organization's Microsoft SharePoint site. Once connected, Visitly saves a copy of every signed visitor document into a folder you choose, making visit records searchable and accessible directly inside SharePoint. This guide walks you through connecting Visitly to SharePoint and choosing where your visitor documents will be stored.
How It Works
- When a visitor completes and signs a document at check-in, Visitly automatically archives a copy to your selected SharePoint folder.
- Visitly organizes documents in per-site and per-visit folders, so you can find records without searching through raw file names.
- Visit summaries remain searchable inside SharePoint, giving your team a second, independent record of visitor activity.
- The integration uses least-privilege, app-only access — Visitly can only read and write within the SharePoint site content you authorize. It cannot access personal files or your organization's broader directory.
Before You Begin
Complete all prerequisites before starting setup. Missing any of these will prevent the integration from working.
Visitly requirements:
- Active Visitly account with SharePoint access. To get access to SharePoint, contact Visitly support team at support@visitly.io
Microsoft requirements:
- A Microsoft 365 tenant with SharePoint enabled
- A Microsoft tenant admin account, since admin consent is required to authorize the Visitly SharePoint app
- The destination SharePoint site, document library, and (optionally) folder already created
Setup Guide
Step 1: Start the integration
- Log in to the Visitly admin dashboard.
- Go to Integration Hub.
- Select Documents Storage from the category list.
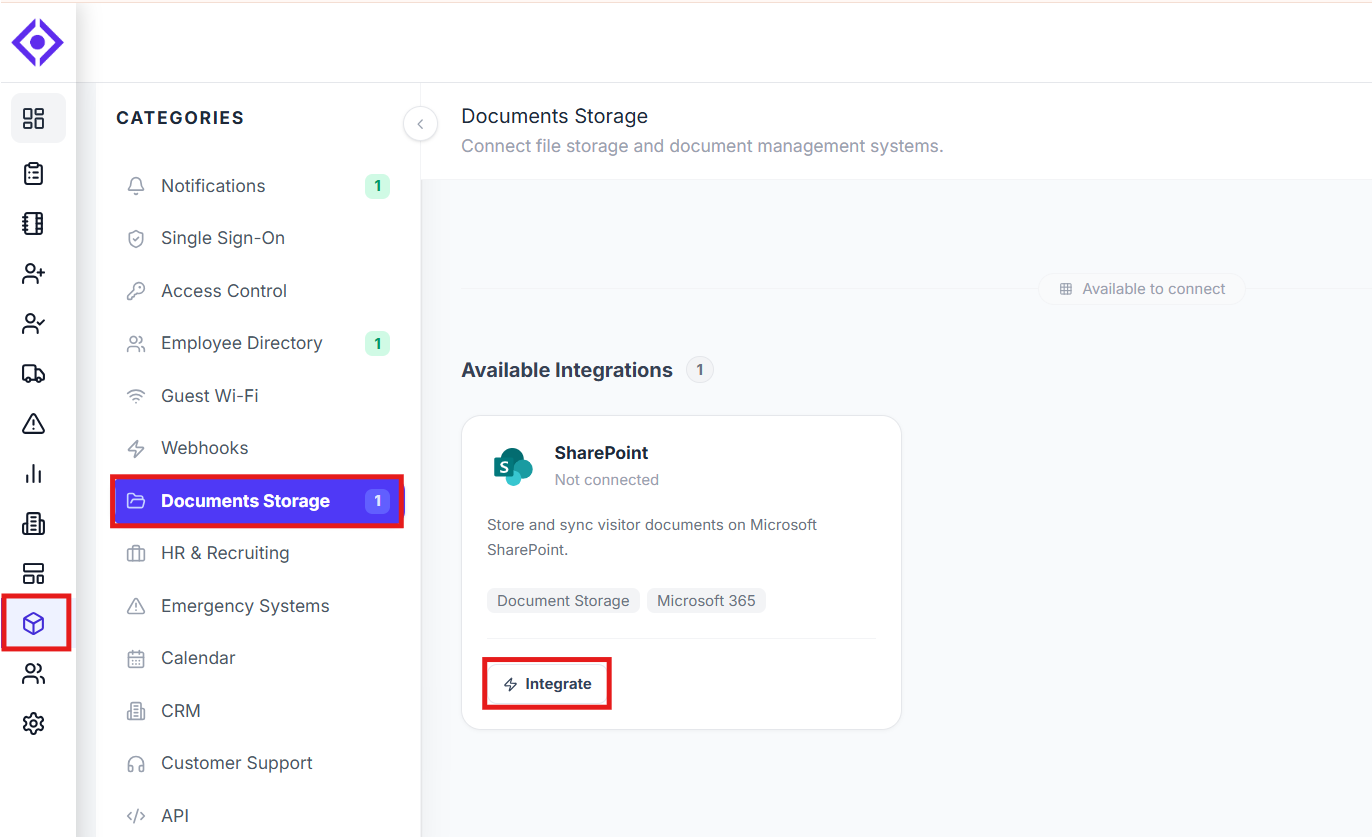
- Navigate to SharePoint → Integrate → Connect Microsoft.
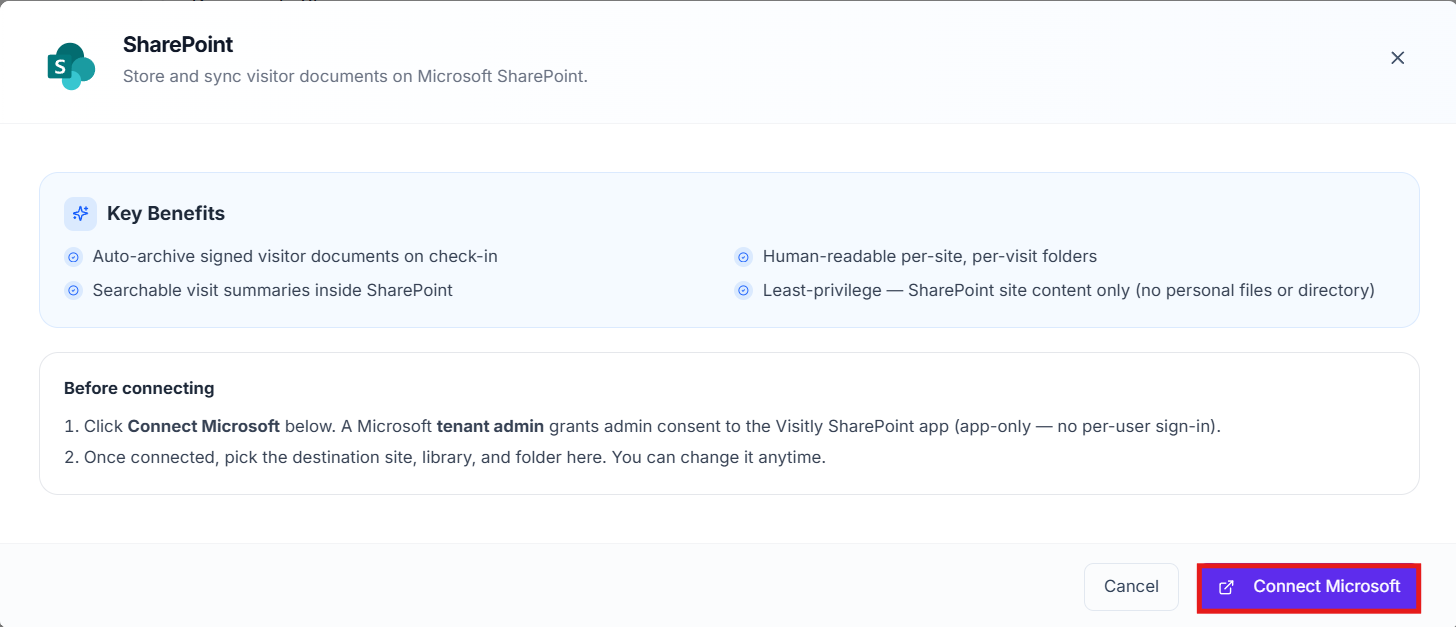
Visitly redirects you to the Microsoft sign-in page to begin authorization.
Step 2: Authorize with Microsoft
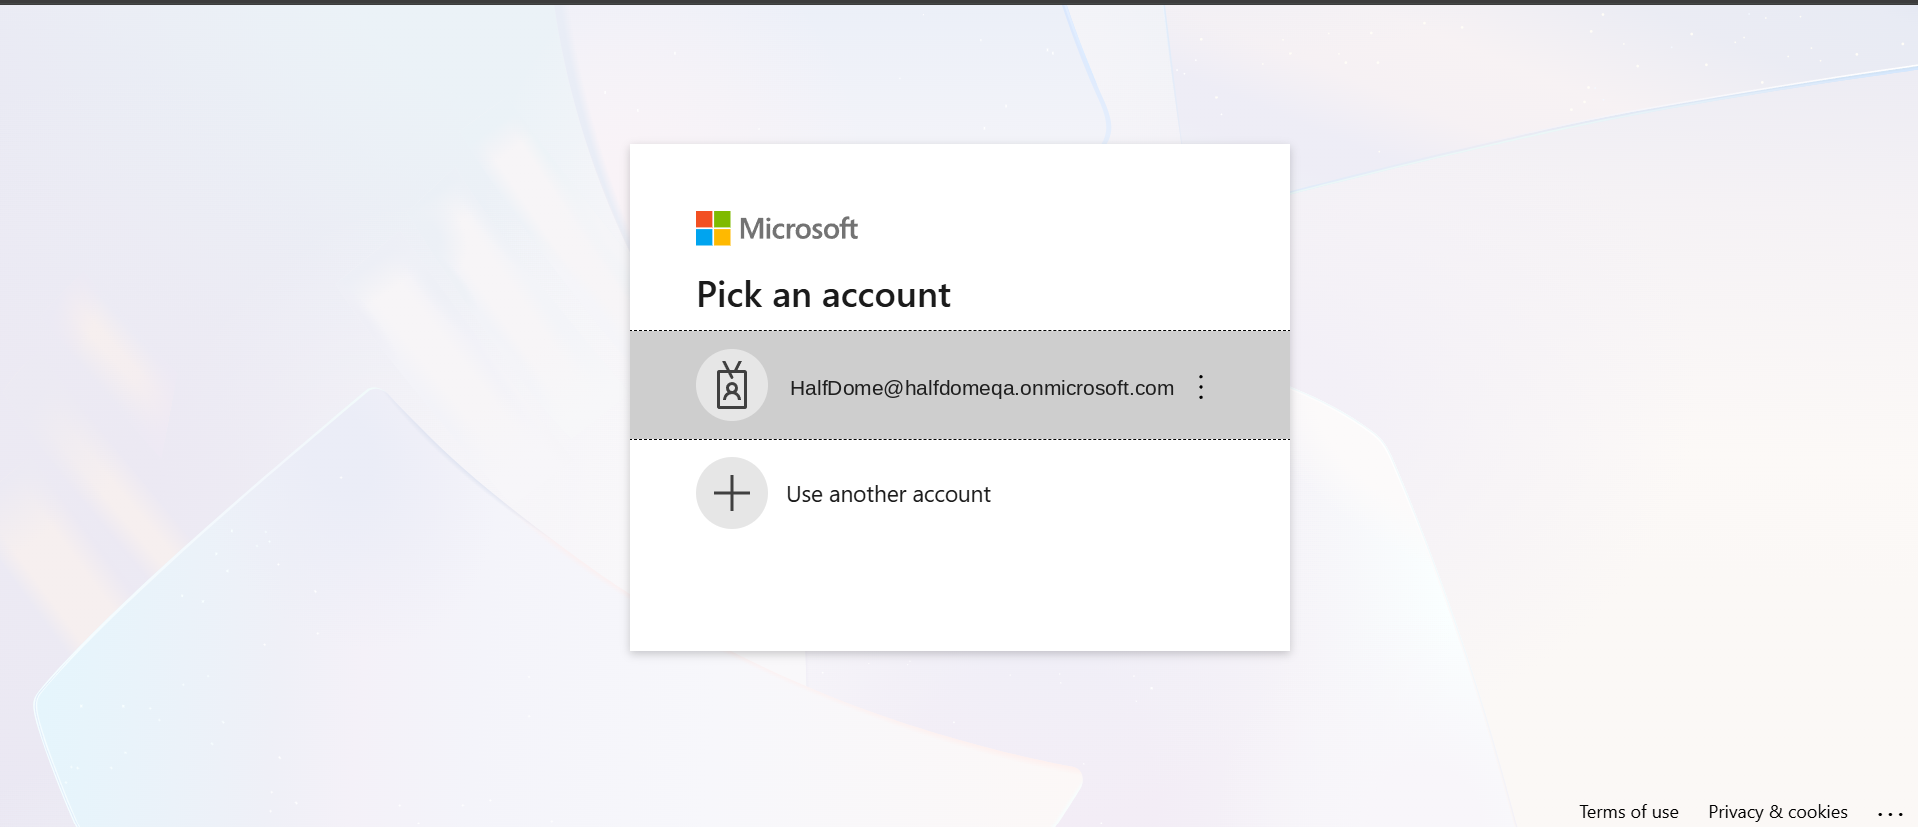
- On the Pick an account screen, select the Microsoft account for your organization's tenant. If you need to authorize a different account, select Use another account.
- On the Permissions requested screen, review the access Visitly is requesting: Read and write items in all site collections, and Sign in and read user profile.
- Select Accept to grant admin consent.
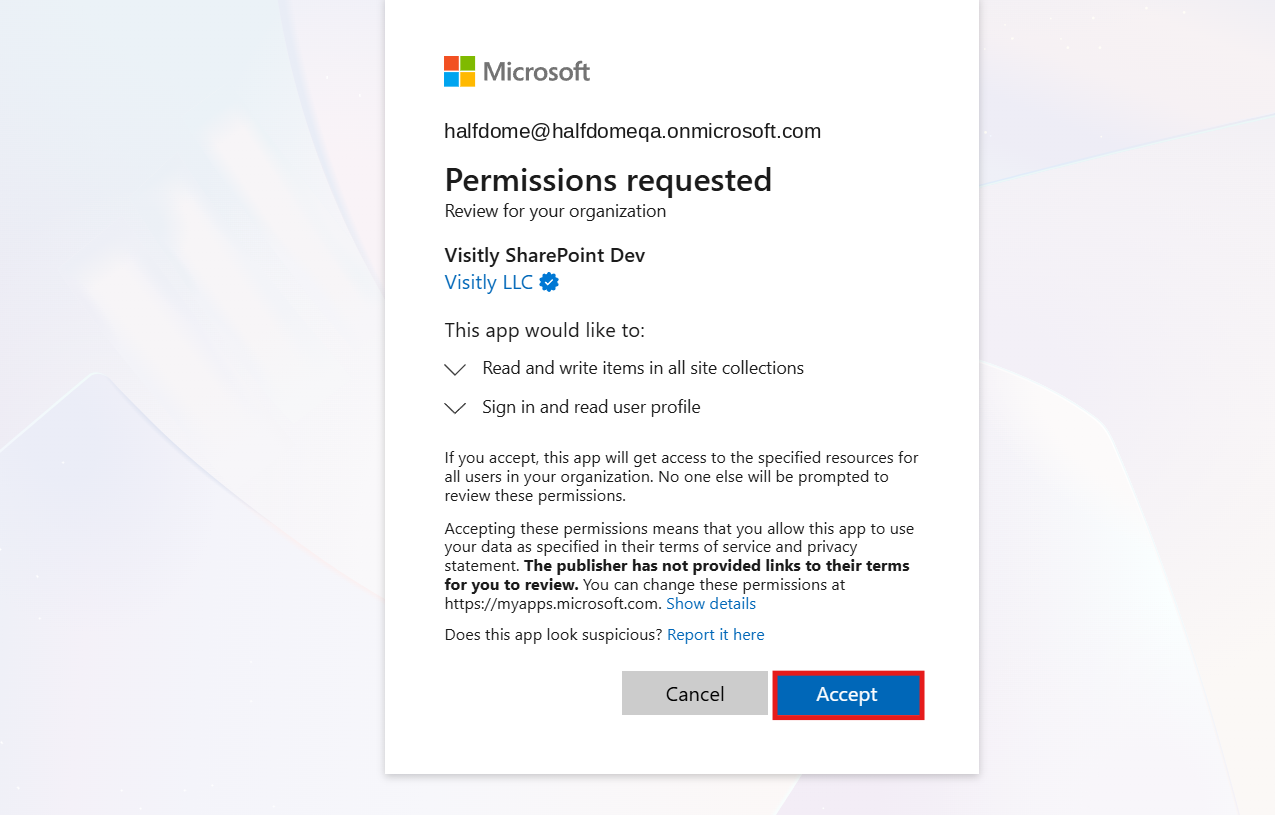
Your Microsoft account is now authorized, and Visitly returns you to the Integration Hub to choose your destination.
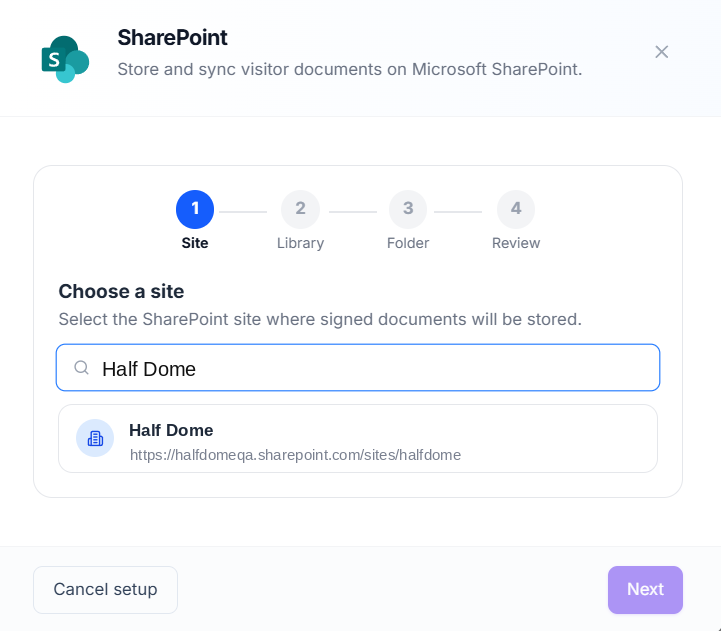
Step 3: Choose a site
- In the Choose a site screen, use the search field to find the SharePoint site where signed documents should be stored.
- Select the correct site from the list of matching results.
- Select Next.
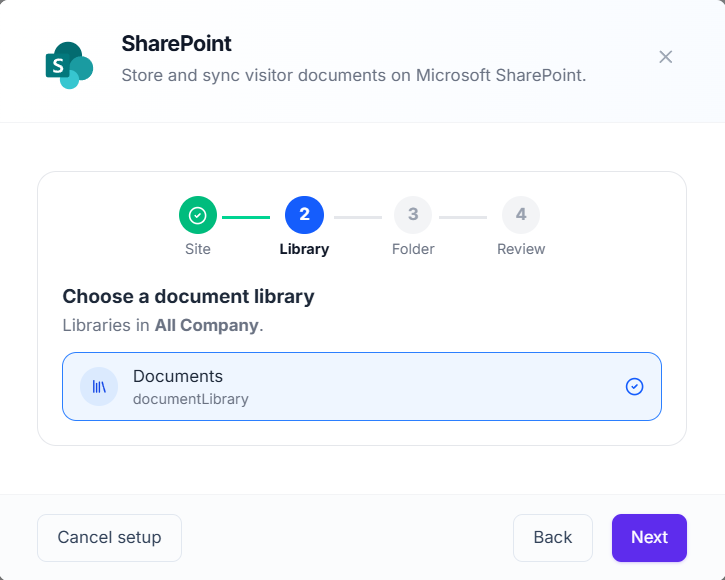
Step 4: Choose a document library
- In the Choose a document library screen, review the libraries available within your selected site.
- Select the document library where Visitly should store signed visitor documents.
- Select Next.
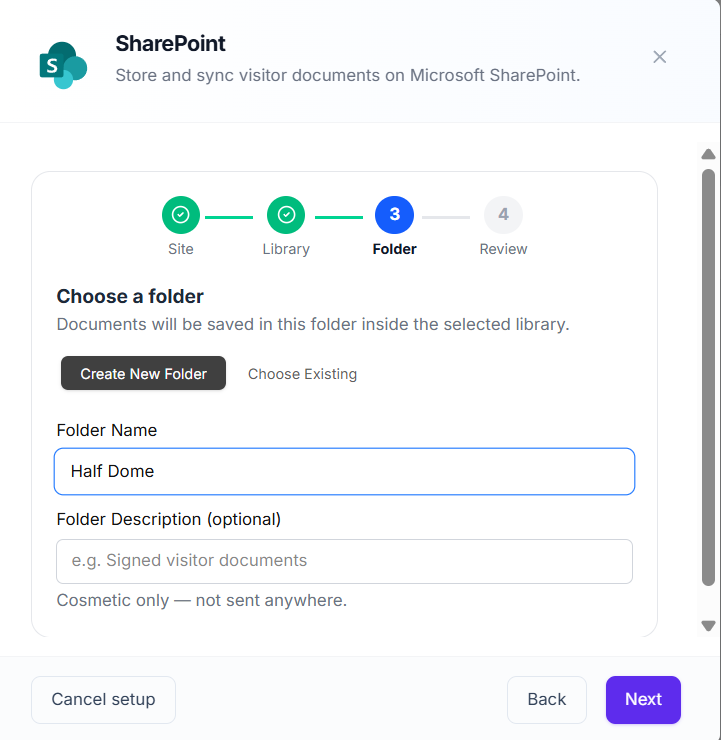
Step 5: Choose a folder
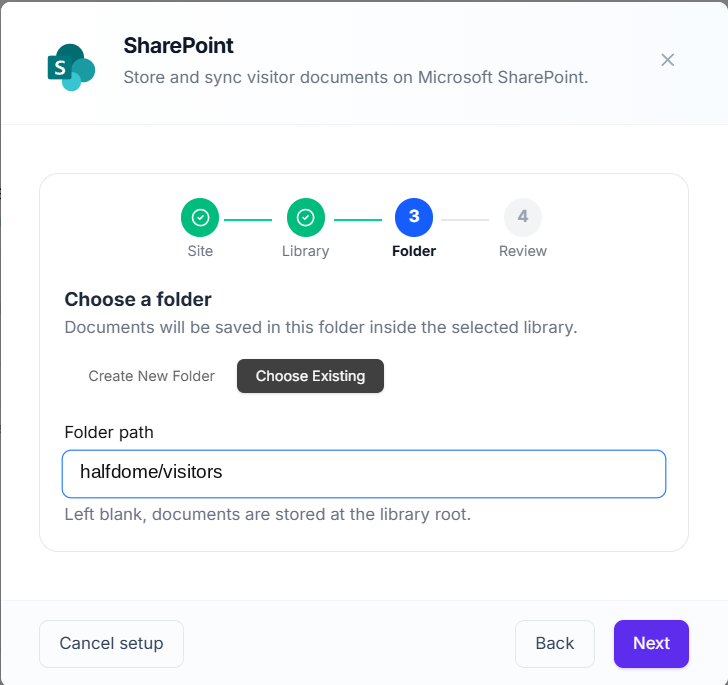
- Select Create New Folder to have Visitly create a new folder in the library, or select Choose Existing to store documents in a folder that already exists.
- If creating a new folder, enter a Folder Name and an optional Folder Description. The description is cosmetic only and is not sent to SharePoint.
- If choosing an existing folder, enter the Folder path. Leaving this field blank stores documents at the library root (for example: Visitly/visitors).
- Select Next.
Step 6: Review and connect
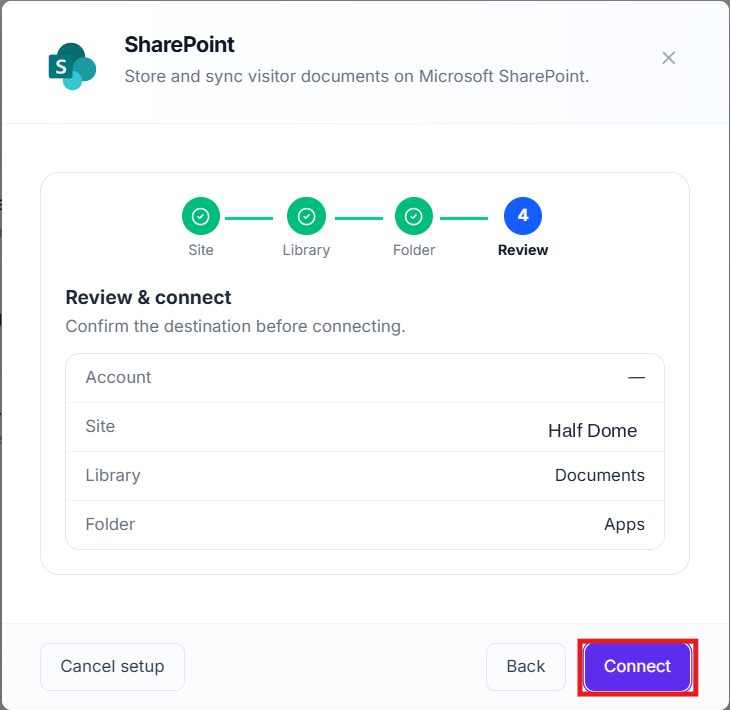
- On the Review & connect screen, confirm the Account, Site, Library, and Folder shown match your intended destination.
- Select Connect to finish setup.
Visitly displays a "SharePoint Connected!" confirmation showing your connected account, site, library, and folder.
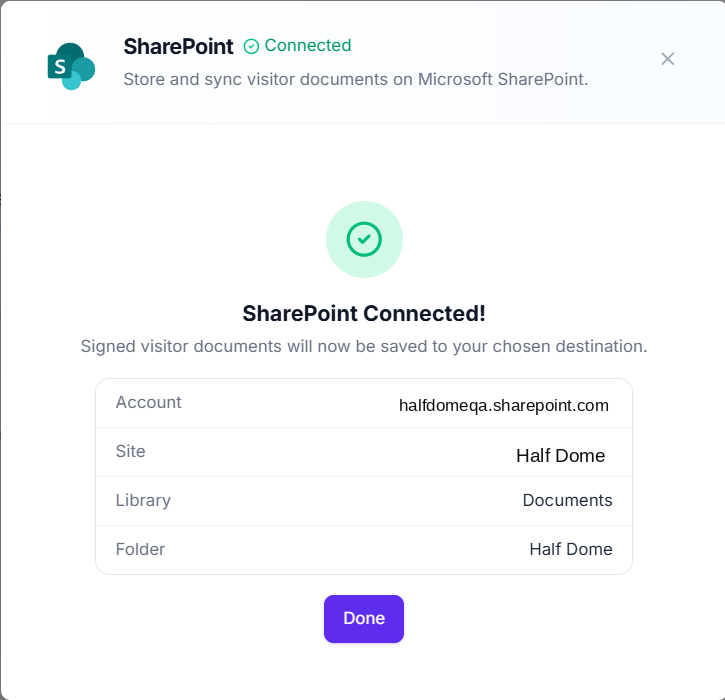
Select Done to close the setup panel.
Your Visitly account is now connected to SharePoint.
Using the Integration
At check-in:
- Visitly automatically archives the visitor's signed document to your configured SharePoint folder as soon as they complete check-in.
- Visitly names each archived file and folder in a readable format, organized by site and visit.
Ongoing:
- Your team can search visit summaries directly inside SharePoint without needing to log in to Visitly.
You can change the connected site, library, or folder at any time from Integration Hub → Documents Storage → Manage.
Example: Create a Visit and Confirm a Document Syncs to SharePoint
Use this walkthrough to confirm your SharePoint connection is working, using an NDA or safety document as an example.
- Create a visit with a visitor type that requires a signed document (e.g., NDA or Safety Acknowledgment).
- Complete check-in and have the visitor sign the document.
- Mark the visit as Checked In.
- Open your configured SharePoint site, library, and folder.
- Confirm the new file appears, named for the visit.
- Open it to confirm it matches the signed document.
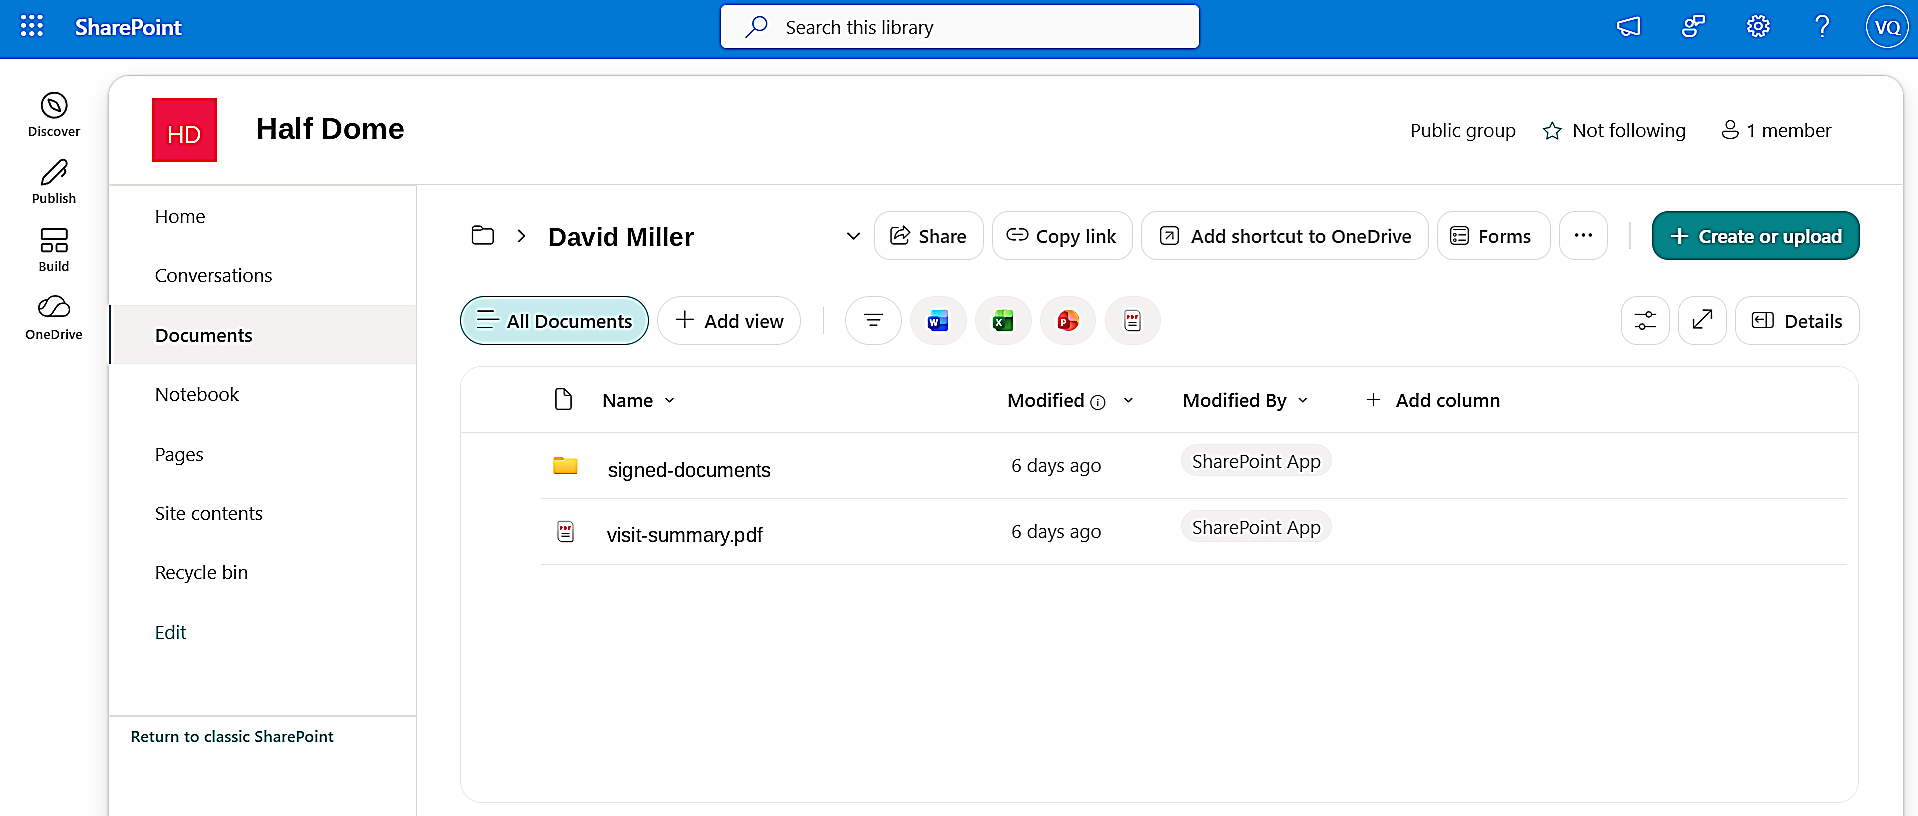
If the file appears within a few minutes, the integration is working. If not, see Troubleshooting below.
Troubleshooting
The Connect Microsoft button doesn't redirect to a Microsoft sign-in page.
Confirm pop-ups are not blocked in your browser and that you're logged in to Visitly with an account that has Integration Hub access. Refresh the page and try again.
Admin consent fails or the Accept button is unavailable.
Confirm you're signed in with a Microsoft tenant admin account. Standard user accounts cannot grant the organization-wide permissions this integration requires.
No sites appear in the Choose a site step.
Confirm SharePoint is enabled for your Microsoft 365 tenant and that at least one site exists. If sites still don't appear, select Refresh or disconnect and reconnect the integration.
Signed documents aren't appearing in the selected SharePoint folder.
Confirm the integration status shows Connected under Documents Storage. Check that the folder path entered in Step 5 still exists in SharePoint — if the folder was renamed or deleted after setup, reconnect the integration and choose a valid destination.
I need to change the destination folder after setup.
Go to Integration Hub → Documents Storage, select Manage on the SharePoint card, and step back through the Site, Library, and Folder selections.
Need help? Contact the Visitly support team at support@visitly.io
Was this article helpful?
That’s Great!
Thank you for your feedback
Sorry! We couldn't be helpful
Thank you for your feedback
Feedback sent
We appreciate your effort and will try to fix the article